Showing posts with label Knitting. Show all posts

Thursday, November 22, 2007

Wait for it...wait for it...

To folks coming over from Mason-Dixon Knitting--Welcome! Thanks for stopping by! To catch up on the back story on this sassy project, go HERE and HERE and HERE.

Please join me in a moment of silence. The daisy dukes...oh, the DUKES!...they're actually done. It's been a long and season-spanning journey. There were highs and lows, debates over pockets and waistbands, fears of binding off too soon and lily-white thighs. Progress was slow but inevitable and the siren call of knitted glory pushed me ever onward. My friends near and far, I give unto you The Daisy Dukes:

In the beginning, I kept careful notes on construction and method, diligently recorded stitch counts, and photographed the stages. In the end, though, I just started winging it. Willy nilly! Freestyle! Booty or bust! For interested knitting parties out there, the design was based on the Sweetheart Short, a free pattern over at Knitpicks.com, though I used their pattern more for method and construction than actual stitch counts. I did a swatch and worked out my gauge, sizing the dukes to fit yours truly. When I figured out how many stitches I needed to fit around my waist, I divided them in two and worked the front (with pockets) and back separately.

The pockets, oh, the pockets. Without a doubt, these pockets are my single proudest achievement as a knitter, mostly because it involved channeling my inner-nerd and figuring out slope. I debated whether to knit the pockets by hand or cut them out of an o
ld pair of jeans. I really really wanted that look of the pockets hanging out below the hemline, but the idea of knitting all that in sock yarn was a bit...daunting. In the end, I decided that cut-outs from real jeans would add a little je ne sais quoi touch of authenticity and also to reduce bulkiness in the final short. Plus I was already about on pace with the Big Dig in terms of project completion, so it was time to cut a few corners. Just like the Big Dig (oh! OUCH! BURN!).

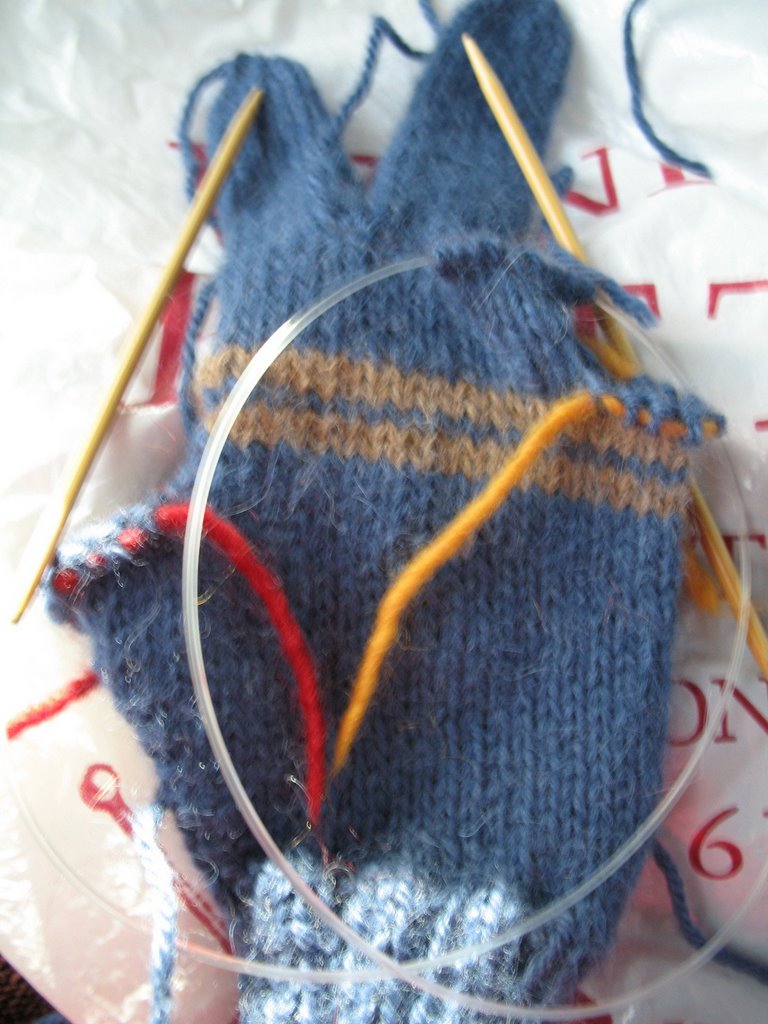
I traced the contour of the pocket onto graph paper and compared it to my gauge-swatch to figure out number of stitches and where to increase. At this point, I realized that these dukes will be tough to duplicate because there's not a standard pocket size on jeans (or shape, for that matter). To any potential Daisy Dukers out there: It's totally worth
it to figure out how to shape those pockets. The rush when you finally get it is unbelievable. My personal Moment of Enlightenment occurred in the Logan International Airport in Boston. I believe I might have stood up with tears in my eyes and pumped my fist in the air a few times. I might have also tried to get my fellow travelers to high-five me, but since I was babbling about "Slope! And see! The pockets! The gauge! See! I used graph paper!" they kind of edged away quietly with excuses of connecting flights. Worth. It.There are some good shots of the pockets-in-progress in an earlier post HERE.

After the pocket shaping was done and I connected the front and the back, the rest of the body was worked in the round. When I got to the legs, I divided the stitches again and worked each leg separately. I did work in a few Raspy-esque rips and tears, but they didn't end up being big enough to be very noticeable. For those interested, I worked the 'rips' by increasing one and then dropping that increased stitch when I was binding off along the hem. The dropped stitch unravels and leaves a nice little rip. I considered bleaching the rips to make them more visible, but in the end I really liked the clean look of the hem.

For the waist band, I picked up stitches along the edge and increased stitches over the space where the pockets would go. I did about an inch and half of ribbing and bound off.

And last but not least, I stitched in those Pockets of Glory using a basic back stitch. All of the detailing--the faux fly and the faux back pockets--were also done in back stitch similar to the Blu pattern over on Knitty.

I feel a profound sense of satisfaction at having finished these--and finished them in time to wear at my Halloween party, none the less! I'm not sure how many occasions I will have in the future to sport these ladies, but you know? It just makes me happy to know that they exist.

Notes for Daisy Dukes: Take 2 (a.k.a Daisy Dukes: Oops I Did It Again) and/or the intrepid knitter:

*Worth it to figure out the gauge.

*Start the raspy rips and tears further up the legs
*Knit just a few more rows on the legs. I knit about an inch and I think I could have gone an inch and a half and still had the bottoms of the pockets showing. Yes, they are Daisy Dukes, but...let's just say there was a bit more of my badonkadonk showing that was strictly necessary.

Wednesday, October 17, 2007

Wednesday Roundup


Currently reading:
Animal, Vegetable, Miracle: A Year of Food Life
by Barbara Kingsolver


Yeah, so...um...I didn't get very far with Seven Storey Mountain. Yeah...oops. That's because I was completely swept away by Barbara Kingsolver's latest book, Animal, Vegetable, Miracle. I have been an avid Kingsolver reader for several years, but was so annoyed by the preachy environmentalism masquerading as fiction in her book Prodigal Summer that I haven't ready anything she's written since. When Animal, Vegetable, Miracle first came out, I rolled my eyes and walked right on by.

And then picked it up off of a friend's coffee table, read the first page, sat down on the couch, read a little more, and couldn't put it down. I think what turned me off about Prodigal Summer was the underhanded way that (I felt) Kingsolver pushed her environmental agenda onto the reader. It felt passive aggressive, overly defensive, and forced. But in Animal, Vegetable, Miracle, Kingsolver can be direct and honest with the reader about her views, and the resulting book feels like conversation between the reader and Kingsolver. A conversation that perhaps takes place in her cozy kitchen while canning tomatoes or flipping through poultry catalogs.

Anyways, it's a good read, especially at this time of year when the summer bounty is winding down and hot tea starts to sound like a mighty fine idea.

Speaking of which...

Currently drinking:

Nutcracker Sweet Tea from Celestial Seasonings

Earlier in the summer, my good friend Dave arrived in my cube all a-flutter and grinning from ear to ear. He held out a box wrapped in Christmas paper: "Open it! Open it!" By this point, he was hopping from foot to foot and giggling a little, so I tore off the paper in about two seconds and revealed....an entire box full of Nutcracker Sweet Tea. That's right, Dave had heard my cry for a dependable supply of Favorite Tea Ever, and went straight to the source: Celestial Seasonings Mecca and got me six whole boxes of Nutcracker Sweet Tea. All for me! To ration or splurge as I please! Oh, Dave, did I ever tell you that you're my hero? Yes, and also the wind beneath my wings.

At the time, I had one lonely box of tea that I'd been slowly rationing out. Then it got hot here in Boston and hot = iced coffee, and for whatever reason, it's only been this last week that I cracked the first box of Favorite Tea Ever. And it's so timely since just this week, fall arrived. Just like that. Sweater time!

Currently Knitting:

Not a sweater, alas. No, it's that time of year when I still believe I can really truly finish all my knitting projects in time for Christmas. Yes, like any true Red Sox fan, I still believe.

And yes, pictures of the Daisy Dukes to come. Sorry it's taken me so long. Sorry sorry sorry! They're done, actually, but just haven't gotten photographed. To come. To come. The best is yet to come.

Currently eating:

Calzones!

I need to do a separate post about this asap as this is my new favorite thing ever. It's essentially my recipe for pizza dough (HERE) split into eight pieces and folded into calzone-shape. I spread out the dough into a palm-sized round on a piece of parchment paper, put a few spoonfulls of filling, fold it over into a half-moon and pinch it shut. Leave the parchment paper around it (the paper comes off in the oven) and cut a few steam vents in the size. I bake these on a baking sheet in the oven because the filling tends to ooze out and get all over my oven (which is always perfectly clean. Of course.). That's it! They're about 3.5-4 Weight Watcher points each, depending on the filling and they freeze like a dream. I made a double batch this past weekend--sixteen calzones! I had a whole production-line going there. These are perfect for how crazy my life is these days--I leave a bunch in the freezer at work for lunches and throw one in my bag to scarf down between lecture and lab on class nights. Yum!

What else?....mmm...that's about it. That's about all I have had time for! Well, that and watching America's Next Top Model. (Go, Bianca! So fierce!)

Later, gators!

Monday, July 23, 2007

Who wears short shorts?

Warning! Potentially blinding shots of pale white legs ahead!
Ok, so here's the first leg in all it's glory. More of a hem, really. (aHEM! Oh, I just made myself laugh out loud. I heart puns.) You can kinda make out the drop stitch 'rip' in the picture above. This one is a smallish one, but the other rips were...er...difficult to photograph by one's self, shall we say. All in all, I'm pretty pleased! They're snug, suitably faux-denim, and...well..short.

Did I say short? I'm pretty sure there should be another name for this. They're purty darn short. See Evidence A:

Yeehaw, y'all! The ironic thing is that I STOPPED knitting because I was afraid it was getting too long! It was hard to try them on while the actual knitting was happening--needles and cords and balls of yarn and whatnot goofing up my measurements. So I had to guesstimate based on other pairs of shorts.

I have to admit that when wiggled into them and looked in the mirror to check out that first leg, my hands started twitching for a bathrobe. Or a towel. Or pair of full-length jeans. SOMETHING! They're painfully immodest for a lil' Midwestern gal like myself. I'm really having to force myself not to undo the bind-off and add on a few more rows.

Right? I should leave it, right? I mean they are Daisy Dukes. Right? Oh dear...cluck cluck cluck.

Sunday, July 15, 2007

Harry Potter: Knit the Movie

I went to see the new Harry Potter move, "Order of the Phoenix," this Friday, and I have to admit that I don't remember much of it because I was so distracted by all the fabulous knit goods. I mean, who can follow the intricate machinations of Dumbledore's Grand Master Plan when there's patterns to be analyzed and yarn to be coveted?

Umbridge's wardrobe mistress must be Knitting Kinfolk. Scene after scene had me gasping with delight. Umbridge purty much stole the show, knit-wise, but don't miss Trelawny's stellar h
andbag:
There really are no words for this one. Except "yum":She had a whole train wreck of amazing sweaters, as well, but I didn't want to overwhelm you.

Stripes also made a grand showing:
It's hard to make out the detailed lacing on Luna's scrumptious lavender capelet, but it's well worth a closeup:And here's our crew, bedraggled yet triumphant, in all their knit glory:
Ron's sweater is particularly priceless. I don't know if Luna's pants are knit, but they should be. Or rather, they could be.

Anyhow, knitting distractions aside, the movie was really excellent. Similar Starbucks coffee, I've found that bringing up Harry Potter in conversation opens to the door to intense debate. People have some darn strong opinions about the inherent value of Harry Potter and its affect on the youth of today (and the rest of us)!
I happen to fall on the "thumbs up" side of the "Harry Potter: Yeah or nay?" fence. I always feel a need to justify why I like it to people, but really it just comes down to this: Folks, it's really not that big of a deal. I don't see the need to get all uppity about it--either for or against, really. (And if you feel that burning urge to take on a big franchise or two that's arguably ruining the youth of today, I suggest turning your attention Walt Disney or McDonald's.)

I'm very much looking forward to the last book coming out next week--both for the sheer delight and also so that I can finally put an end to the sense of incompleteness that's been like a hangnail in my psyche since I read the first book six years ago. Plus my gals and I are taking a trip to Cape Cod at the end of the month, and I think it will be perfect to read while lounging on the beach and showing off my Daisy Dukes.

Friday, June 08, 2007

Sick Days and Daisy Dukes

I got bowled over by a summer cold yesterday, completely out of the blue. No sniffly warning signs, no dry-cough indicator. Just woke up yesterday morning and proceeded straight to the moaning stage. Where normally I would soldier through and keep on trucking through my regularly scheduled life with no regard to what my body was trying tell me, I thought I'd try something different this time around and actually take a break. So I came home early yesterday and ended up staying home again today. The past 48 hours have been a tough regimen of naps, tea, movies ("Shortbus" was not what I expected--wowzas), and more naps.

Having said all this, I'm now at the antsy "everything in my apartment bores me, but sitting upright for more than a few minutes feels like dying" stage. And then I remembered, Oh yeah. I have a blog! So far this post has taken me about an hour to
write because I keep putting my head down on my desk and taking a little catnap. That sounds more sad than it really is. I think. Actually, I feel a lot better!

Here, help me with my knitting:

I started working on the daisy dukes a while ago, loosely based on the Sweetheart Shorts pattern over at Knitpicks (I keep typing that as sweatheart shorts, but that's...not at all what I'm going for). I decided to use some navy blue cotton yarn because I couldn't find any denim at any of the yarn stores within public transit distance. I also accidentally threw away the label, so I can't tell you exactly which yarn or dyelot I'm using. I know, I know. A
knitter's biggest faux-pas. Alls I can say is that it's been a rough few months, and well, it's just yer basic navy blue cotton dishtowel yarn, so I think we'll be ok.

I also decided to use the pockets from an actual pair of jeans instead of knitting my own. The tricky part was figuring out how to knit the front so that the pockets from the jeans would line up. I spent the entire time while I was waiting for a standby flight to Minnesota last April inexpertly plotting the slope of the pocket and matching it to my gauge. I felt veeeery smart when I was done, let me tell you!
The knit pocket actually lines up perfectly with the jean-pocket, but I moved the knit piece askew a little so you can see what an awesome job I did with that pocket shaping.

So--I will knit the front and the back in two separate pieces and then join them together at the bottom of the pocket. I already had to rip out and restart once because I am knitting the front and back pieces separately on straight needles, but my gauge was taken from knitting in the round. I know, I know--another big knitting faux pas to so brashly assume my gauge would be the same (unless you're a knitter, I know you don't care a lick about gauge, but trust me, it can be a real brat). Anywho, easily remedied by going down a needle size for knitting the front and back and then switching to the larger needles when I joined the pieces for working in the round.

And then I realized my second mistake. The sweetheart shorts pattern has you start increasing for shapeliness around the hip and bottom region after about an inch and a half. I figured (again, oh-so-brashly) that my pockets would be about an inch and a half and I'd start shaping as soon as I joined the pieces. Well, this would have actually been fine. If I'd remembered. Instead, I was so excited at working in the round that I whipped off several rows and now I'm at about two and a half inches. So here's my Dilemma Emma, do I rip the three rows and go back to do the shaping correctly? Or do I
soldier through and keep on trucking through my regularly scheduled knitting?

No, don't say it. I know what you're going to say. I know what I have to do. I have to. My conscience will never let me live with subpar knitting. Even for a pair of daisy dukes. I will have to rip it, and rip knowing full well that I may very well drop all those cast-ons at the bottom of the pocket and just have to start completely over. It's ok. I'm still going to be sick another few days. I still have plenty of daytime TV to catch up on. *sigh*

Oh, but here's the exciting part that I need to figure out soon: I want to intentionally knit little tears in the bottom hem of the shorts--like Kay's Raspy sweater HERE. I can probably figure it out myself, but it would probably be a good idea to track down a copy of Denim People to get the full story.

And on that note, I feel another nap coming on. Or some tea. But not together. Bad combo.

Emma's Feel Better Tisane/Tea/Whatever-Cuz-It-Makes-Me-Feel-Better Drink:

Cuppa hot water
A coupla scoops of honey
A teaspoon-ish of fresh grated ginger
Half a squeezed lemon

Ahhh....

Tuesday, March 27, 2007

Swiss Chard and Better-Late-Than-Never Scarves: A Kitchen-Sink Post

Hi, folks!

Spring time has me all a flutter over here in Northeastern parts. I've been jealously devouring all the posts from the Northwest bloggers, what with th
eir pictures of flowering trees and their getting-gardens-ready-for-planting. Oh, and the fact that they already have spring produce at their farmers markets. But then just today, I saw the first crocuses blooming around a still-nekkid tree over on Tremont Street. Oh, did my heart twinge with joy. I. Can't. Wait.

Some of you may remember my garden from last year. It w
as a bit of a disappointment for my first back-porch garden, so I thought I'd scale back a bit this year and start with a fresh perspective on the whole she-bang. First off, I'm scrapping the veggies for the time being. It's just not feasible in my little container garden and I feel really happy about buying produce from my farmer's market, so we'll leave that until I have an actual garden. Or a job that allows me to devote more time to caring for veggies.

I bought a whole mess of flower seeds that I'm pla
nning on scattering willy-nilly in several of my containers. We'll see what pops up with those. Theoretically, I should have already started seedlings or at least (I think) scattered the seeds last fall, but...well...meh? I'll be happy with whatever little flowers decide to poke their faces up at me.

And then (here's my Smartest Move Yet!), I ordered actual seedlings of several diffe
rent culinary herbs that will magically, miraculously, oh-so-perfectly arrive at my doorstep just when they should be planted in the garden. So wonderful. So perfect. And even so affordable! I think I'm getting six different herbs for about $17. I can't WAIT for fresh herbs again. The more I've gotten into cooking this past fall, the more I've been learning and discovering new ways to use herbs. I didn't feel like I really took advantage of the herbs I grew last summer because I honestly didn't know how to use them--unless a recipe called for a specific herb, I didn't think to try adding anything different. This summer? A whole new kinda Emma, just you wait!

Ok, a few updates:1) I have finally finished Stephen's scarf. I custom knit some Urban Mitts (a.k.a. the Aid-and-Abet Smoker's Gloves) for Stephen last fall (link HERE) and apparently at some point agreed to throw in a hat and scarf with the leftover yarn. I don't actually recall this conversation, but Stephen was quite insistent that it did, indeed, occur. I have my doubts, but nonetheless, I did have leftover yarn and so...why not?! Well, other projects struck my fancy and with this and that, I didn't get around to finishing this scarf until a few weeks ago, just as the weather started to turn. I call it "Stephen's About-Time Scarf" and used the My So-Called Scarf pattern from Sheep in the City (link HERE). I love love love with a cherry on top and a few extra dollops of creme fraiche this pattern. It was fun to knit--never boring--and I felt very accomplished to have mastered the stitch (it's not actually that hard, but it looks that hard--the best of both worlds). The resulting fabric is kind of squishy or spongy, kind of like the waffle-weave on thermal shirts and absolutely perfect for a cozy scarf. I also have dreams of a cardigan in this stitch, but I'm afraid that will have to remain in Knitted Dream Land for a few more months. I knit this scarf length-wise because I was worried about running out of yarn (which I did. I even used all my little tail-scraps to finish binding off the last row! But look how symmetrical I got the stripes to be!). Oh, and a hat? Did I agree to a hat? I don't remember a hat...*Note to anyone out there thinking of commissioning some great knit good from me--I'm more than happy to do it, but don't expect anything in a timely manner. True art takes time, don't ya know. But wine and a steady supply of Top Chef DVDs will also help get the job done. Just sayin'.

2) The next book in the Keys To The Kingdom series by Garth Nix is out and in stores! It's called Lady Friday and picks up the story of our intrepid young hero, Arthur, just as he has taken the fourth key. Unlike the other books in the series which wrapped up the individual book with minimal cliffhangers, the recent book (Sir Thursday) ended practically mid-sentence. I believe I may have gasped when I turned the page and saw that the book just...just...ended! So it is with much delight that I anticipate reading this fifth book. Stay tuned, fellow lovers of young adult fantasy!

3)
And last but not least, I leave you with the recipe and mouth watering pictures for my new favorite comfort food: Polenta with Parmesan and Olive Oil Fried Eggs and Garlicky Swiss Chard. Mmm, mmm...good. If only I had a few black truffles to shave on top, this dish would take no prisoners. All the flavors combine so perfectly--especially the creamy polenta, the runny yoke, and the crispy edges. I'm a huge fan of wilted greens, their bitter flavor and slight chew make a great contrast to the egg and polenta. I would like to point out that this simple dish combines every flavor profile: sweet, salty, bitter, sour, and umami.

This dish comes courtesy of the New York Times and their article "A Morning Meal Begs to Stay Up Late," published 2/7/07. (Click HERE for the article--though it may be content protected) I have made a few adaptations from the original recipe.

Polenta with Parmesan and Olive Oil Fried Eggs

Yield--four servings

*Note: This recipe for polenta makes the best polenta I've ever made--very creamy and smooth. It makes several cups, so I usually pour the leftovers into a bread loaf pan, cover with saran wrap, and let set. You can then cut off blocks of polenta as needed from the 'loaf.'

4 1/2 cups broth or water (I use half chicken broth and half water--all chicken broth makes the polenta taste a bit 'tinned,' in my opinion)
1 1/2 cups polenta (not quick-cooking), course corn meal, or corn grits. (I use Goya brand corn meal)
3/4 teaspoon salt
1 1-oz chunk of Parmesan cheese

2 Tablespoons olive oil
8 large eggs (or 1-2 eggs per person)
course sea salt for garnish

1. In a large pot, bring broth/water to a simmer (not boil). Gently shake in the corn meal a bit at a time and add salt. Simmer, stirring as frequently as your arm muscles can stand, until it thickens to taste--between 10 and 20 minutes. Cover pot to keep warm.

*If making the chard as well, start the chard wilting now.

2. Using a vegetable peeler, shave the cheese into slivers. Alternately, grate it on the largest hole of a box grater.

3. In a large skillet, heat 1 tablespoon of olive oil until very hot. Fry 4 eggs at a time until edges are crispy and the yokes are still runny. Repeat with remaining oil and eggs.

4. Pile polenta into 4 bowls and top with first the cheese and then the fried eggs. Garnish with sea salt.

Garlicky Swiss Chard
(if serving with polenta and fried eggs, cut the chard before starting any cooking and then start wilting the chard after the polenta has finished cooking.)

2 bunches of Swiss chard, stems removed (You could really use any leafy green, here. I think I might have actually used collard greens by mistake, and it was still delish.)
1 tablespoon olive oil
2 garlic cloves, minced
Large pinch of crushed red pepp
er flakes
Juice from one half squeeze lemon
Salt to taste.

1. Stack chard leaves on top of one another (you can make several piles), and slice them into 1/4-inch strips

2. Heat oil in a very large skilled. Add garlic and red pepper flakes, and saute for about 30 seconds, until the garlic is fragrant. Stir in the chard, turning to coat with oil. Cover pan and let cook for about 2 minutes until chard is wilted. Uncover, stir, and cook for 2 minutes longer.

Serve alongside the polenta with fried egg, and squeeze a bit of lemon juice over the top just before serving.

Weight Watchers Points: One egg, a half cup of polenta, a few shavings of Parmesan, and as much chard as you want will equal about 5 points.

Sunday, February 25, 2007

Yarn: Daisy Dukes--Oh, it is BROUGHT!

Well, y'all, the much-anticipated and widely discussed Boston Heat Wave of '07 (Forty degree highs! Meteorologists in a tizzy!) met with an abrupt and untimely finale yesterday when we awoke to a crispy layer of new snow over the still-unmelted varnish of ice on the sidewalks. But it left me with hope. Hope for a New Spring. I have historically been a big proponent of winter and all that is wonderful in the season, but for some reason this year I can't wait for spring. I can't wait for the farmer's market and to plant my seeds. I can't wait to wear all my impractical strappy summer shoes and my favorite skirts. I can't wait to go for runs outside without constantly being on the lookout for patches of ice. Yes, I know we've had a mild winter this year and got off easy with only one big storm (so far), but somehow, that has made me even more antsy. I'm ready to let this winter fade into memory and embrace the sun again.

And with the warm weather on the horizon, it is once again time to begin watching for that elusive and migratory beast: Campusious Hottius (a.k.a. Campus Hotties). Yes, the Engineer will soon be deluged with young hotties walking around campus pursuing such valid trades as sun bathing and too-short-skirt-wearing.
This is what I'm up against:

I am not at all intimidated by these hotties (*cough,cough*...ahem), but I do find them infinitely fascinating. Since he spends most of his days on campus, the Engineer is constantly coming home with stories of Young Hottie sightings, stories that are usually accompanied by much shaking of the head and exclamations of, "NO! You're kidding!" on my part.

Ok, I'm not exactly intimidated by them, and to any young hottie wishing to snag the Engineer, I say "You best bring it!" But still...they do know how to make a gal feel, well, decidedly uncool. It's like these young'uns are constantly saying, "Yeah, I know ugg boots are UGGly and these shorts are too tight and this skirt shows my undies, but I'm so hip that I don't care. What are you, like, twenty-five? You're too old to understand." The aura of coolness oozes from their pores and you feel it in the specific passion of their disregard.

So this year I've decided to take a pro-active approach. It's time to make uncool cool again. It's time to Bring Back the Fashion. Yes, it's time for dai
sy dukes. And not just any daisy dukes, but knitted daisy dukes:

Daisy dukes, y'all! I missed this fashion train wreck back when it was actually "popular," but I feel the time is ripe for a come-back: Knittin' Style! We're talking soft blue denim yarn. We're talking belt loops made of i-cord. Fringe of elegantly unraveled bits of yarn. Oh, how to knit those interior pockets hanging so deliciously below the hem-line? My fingers do tingleth with joy...

I think I will base my pattern on the Sweetheart Shorts from KnitPicks (click HERE), though I'll have to modify it a bit to work in the pockets. Plus I think the waist line will need to be several inches shorter--we need to make sure those belly buttons get their time to shine.

And I know you're all sitting there wondering if I'll actually model my dukes in public once finished. Alls I can say is, all you
Campusious Hottius out there? You best bring it!

Saturday, February 17, 2007

Craft: Yarn! All I really need is Yarn! Yarn! Yarn!

Ok, first and foremost, an update on the Engineer Sweater. It's so almost done, I can taste the finished-blocked-ness of it. I am about a third of the way done with the second sleeve--the final piece of this puzzle. I made the Engineer stand still for me while I pinned the pieces onto him and checked that it was all going to come together ok. He was antsy to get back to his analyses of drag coefficients and centers of gravity, but oh no, sir. I made him stand for a full thirty seconds while a gazed adoringly at how perfectly everything fit and made little cooing sounds while stroking that symmetrical sleeve.

I am impressed, slightly amazed
, and very relieved that it looks like it will fit. In what we'll just call "A Knitter's First-Sweater Mistake," I didn't think to double-check that my gauge was accurate until, oh, I'd knit the entire front piece and half the back. When I did, I realized that my gauge had mysteriously gone from perfect (at the time I knit my swatch) to much much less perfect (at the time when I gazed in horror at my ruler, counting and re-counting my stitches-per-inch). Just imagine--your perfect pattern-matching gauge is 10 stitches per inch, but your reality-sucks gauge is actually closer to 13 stitches per inch. It might not seem like a lot, but those little 3 extra stitches add up and...well, your sweater is going to be too small. It's a terrible, terrible thing to realize, my friends. Lucky for me, the Engineer tends toward the scrawny side and the smallest size in this pattern would probably have ended up being a bit large on him anyway. I did some measurements and enlisted some nearly-forgotten math skills and decided it would *probably* be ok. What's a gal to do but knit onwards?

Now, my energy for this project has been flagging and
I have to admit that tried (unsuccessfully) to persuade the Engineer that one-sleeved sweaters are sure to be all the rage this spring season. He wasn't buying it and is demanding the second sleeve. Fine. This sweater will be finished before the swan boats return to the duck pond at Boston Garden! You're all my witnesses.

Side projects are a necessary and healthy part of any long term project. I give you, the Nose Warmer. I'm knitting two of these handsome warmers for a friend of mine and his son. They knit up quickly and are a good refresher course on short-row shaping--the 'nose' is very similar to turning the heel on a sock. I just need to give these noses some whiskers and attach the head-ties, and they're ready to go warm some noses. For interested parties, the pattern is over at Knitty--click HERE.

A few weeks ago, I placed a big order for yarn from KnitPicks so I could price out the cost for making hats and scarves for Angelina over at Dustpan Ally. I am so excited to have discovered KnitPicks. I've wanted to sell my handknits ever since my family started politely insisting they had enough hats, scarves, gloves, uteruses, penguins, and other knit items to last them quite some time. (Luckily, I've made new friends since who are more than happy to volunteer for handknits. Whew!) But the biggest obstacle to selling handknits is that it's rilly not cost-effective. Yarn is expensive! To recoup both the cost of the yarn and a bit more for my labor, I'd be needing to sell, say, a basic hat for at least $30 to the retailer, and the retailer would then need to mark it up again to make their money. So we're looking at a $50 or $60 handknit ski hat. Loony bins. Who would buy that?

Enter Knitpicks. Their yarn is affordable, very good quality, and available in a lot of different colors, fibers, and weights. It's pretty uniform, so if you're looking for the subtle beauty of hand-dyed or the unique texture of hand-spun, you're not going to find it here. But the yarn is dependable and good. My hope is that I can have a good base of these low-cost goods and eventually have clientele who would want and be able to afford handknits with more luxury yarns. I also hope that if all goes well with selling hats and scarves at Dustpan Ally, craft fairs, and the like, I can also start knitting larger, uniquely designed patterns like sweaters and bags.

For this initial, reality-based trial, I ordered a bunch of skeins of Wool of the Andes--a 100% Peruvian wool. For kicks, I also ordered a few skeins of Andean Silk--a blend of alpaca, silk, and merino wool. It was a bit more expensive, but I was worried that the Wool of the Andes might be too scratchy when knit and wanted to test out a different blend. (Update: I think Wool of the Andes will work just fine. A bit rough, but not at all "grandma sweater" scratchy. No offense, grandmothers out there. But still, you know what I mean.) I chose several colors that I will love to knit with (it's important to love what you're knitting) and that also will blend well together if I want to do any patterns: black, moss green, burgundy, dark blue, and cloud blue. I'm also going to play around with felted flowers, so I got a few skeins in pink, yellow, and orange.

With the scarves, I want to try different stitch patterns and play around with mixing stripes of different colors. One idea to make it a bit more interesting is to weave a strip or two of ribbon down the length of the scarf to add detail and texture. The hats could also have some felted embellishments sewn along the length. I'd like the stocking caps to resemble flapper hats. The felted flowers would be added as removable brooches over the ear, and I'd like to weave ribbon through the brims on a few of the hats by knitting a button-hole eyelets about one inch from the bottom of the hat. I have a couple other ideas for making these otherwise ordinary handknits unique and exciting, but I'm going to wait to talk about them until they're more solid in my head. I'm also planning on selling these under the name "My Three Loves" so am brainstorming ways to combine these loves of mine into a nice little package. Cuz otherwise it would just be kinda confusing and would be better to just sell them under my name. Any thoughts?

And last but not least, just when I thought my week couldn't get any better, I get this lovely package from Angelina.
Months ago, I started coveting her canned goods after a particularly scrumptious post she wrote on canning pears in vanilla syrup. I begged and pleaded and made a nuisance of myself, but Angelina eventually took pity on me and agreed to an exchange of goods: A jar of gorgeous pears in exchange for a comfy scarf done in the style of my laptop cozy. Angelina, the yarn is gorgeous. I stroked it for a full fifteen minutes and daydreamed about what a beautiful scarf it will make. You'll all be happy to know that I've perfected my bubble-making technique since the laptop cozy, and think I've got it down to a science. A full-on felting like I did for the cozy might make this yarn too stiff for a scarf, so I'm going to experiment with some light felting to try and get a fabric that is still supple and scarf-able. Oh, boy I can't wait!

Also can't wait to break into these pears. They have held a place of honor on my counter since their arrival and it makes my mouth water just looking at them.
I have considered and discarded half a dozen different recipes, still looking for just the right one. My most recent thought and the one I think I will ultimately do is a pear tartlet for the Engineer and I. We're celebrating a faux-Valentine's day dinner sometime in the near future (a.k.a. an excuse to go to the fancy grocery store and buy fancy foods!), and I think a pear tartlet would go quite nicely. Or I could just eat them straight from the jar with a spoon while standing at the counter in my pyjamas. That sounds good too.

By the way, if you haven't already discovered it, please do stop by Angelina's store, Dustpan Ally, and check out all the wonderful things she's got going on over there. The actual, real-life store is in McMinnville, Oregon, but if you don't happen to be in the neighborhood, you can also order off the web at http://www.dustpanalley.com/. Angelina is an amazing and creative woman, and I could buy everything in her store in a heartbeat.

Saturday, February 03, 2007

Knitting News: Nuns Flee Knitting Debt!

This shouldn't be so funny...but it is:

Nuns Flee Debt
Volos, Greece
An entire convent of Greek Orthodox nuns has fled to another convent to avoid paying close to $1 million in debt from their failed knitting business. The 55 nuns splurged on purchases of industrial knitting machines and by attending foreign fashion shows to get ideas for patterns. The wool clothes they made were popular in Greece, but the business went under when a bank called in the loan. The nuns are now holed up in a convent in Volos, as the Holy Synod negotiates with the bank on their behalf. (Quoted from The Week magazine)
Here's the link to an entire news article on this breaking news: http://news.bbc.co.uk/2/hi/europe/6311443.stm

Tuesday, December 05, 2006

A Knitting Check-in: Meathead Hats and Engineering Sweaters

Knitting Distraction Numero Uno: The Meathead Hat

While paddling around the Blog-o-pond a few weeks ago, I came across a mention that Portland (Oregon, y'all) fiber artist Larissa Brown was in the process of compiling a knitting book and was looking for volunteers to test-knit some of the patterns. Well, I'm always up for a good old fashioned ho-down so I signed myself on up! Yee-haw!

Right now she's testing her signature piece: the meathead hat.
This was a pattern she developed for an art show called Conference in fall of 2005. For this piece, she gathered 100 volunteer knitters from around the world and had them each knit the same hat in the same yarn. She affixed a numbered cattle tag to each hat and pinned them to the art gallery wall in rows. You can read a brief synopsis of the show and see some of the photos on Knitty.com: click HERE. The original invite to test the pattern and some more background on the project is also HERE.

The pattern is very cute and quite simple--one of those great novice
knitter patterns that is a snap to make and still looks wicked impressive. The truly novel thing about this pattern is the suggestion to add some sort of embellishment over the ear. In my opinion, knitters tend to follow the pattern that's before them and they don't always realize that they can jazz it up any ol' way they please. I like that this pattern is basic and yet it also encourages you to add your own bit of creativity and personality. It's fun to see what people have come up with--you can check out the pool of pictures HERE. My favorite so far is the meat cleaver!

I'm sworn to secrecy on the pattern itself, but I will tell
you that I knit mine with a double strand of Lamb's Pride Bulky "Chocolate Souffle." The leaves are knitted with some scraps of Lamb's Pride Worsted using the pattern for Aspen Leaves from Knitted Embellishments by Nicky Epstein. This was a fun little side project and a nice break from the marathon Engineer Sweater (see below). I've gotten plenty of "Wa...huh?" looks as I've walked around Boston, but s'cool, yo. I can dig it. I'll be very curious to glimpse the other patterns that Larissa has in store. For those interested, she will be having additional volunteer knit-alongs to test out her other projects, and she will post on her blog when the knit-alongs are open. Her blog is http://larissmix.typepad.com/stitch_marker/.

Knitting Distraction Numero Dos: The Engineer's Sweater

Hello, my name is Emma, and I am a knitter who has never knitted a sweater. And I'll tell you why: yarn is not cheap. It's fine for the small projects--your scarves and your fingerless gloves and wombs or what have you--but for the larger ones? Fuggedaboudit. I mean, if I'm going to end up paying $100 or more on the yarn alone to knit myself a sweater, I'm sorry but I'll just go BUY a sweater that I like for that much. I'm a crazy obsessed knitter, no doubt there, but I've got my limits. And then along came KnitPicks.

While knitting the Aid-and-Abet Glove Pattern, I came across an online-only store called KnitPicks and fell in love. At first, I was skeptical--I mean $2.49 for a skein of merino wool? C'mon, where's the catch? (For non-knitters who are still with us at this point in the post, $2.49 is UNHEARD of cheap for merino wool.) I thought surely the yarn must be crap. The colors--deceptively gorgeous on the website--just had to be a fluke. But I asked around my knitting group at work and found one woman who absolutely swore that KnitPicks sold some of the best yarn she'd ever gotten. She said I couldn't go wrong. But if this were true, why aren't all the knitters stashing up at KnitPicks? Is it a secret because knitters who buy there are afraid it will become too popular and the prices will go up? Or is that the yarn just isn't very good? Still hesitant, I ordered several swatches so that I could see the actual colors and feel some bits of the wool.

The colors were indeed a bit off from the pictures on the website, but that's to be expected since digital colors are notoriously unfaithful depending on your computer. (If you order from KnitPicks, I definitely recommend ordering swatches first--especially if you're doing a big project.) The swatch yarn felt a bit scratchy, but otherwise of good quality (hard to tell how something's going to knit up when all you have is a 2 inch piece of string). I had ordered a couple of skeins of sock yarn along with the swatches and was very impressed by them--the yarn felt soft and the colors were very rich and deep-hued. I was starting to feel better about the cheap yarn and was ready to take a leap of faith. With some mild trepidation, I approached the Engineer on the subject of sweaters.

You know, i
t took four years of trust-building, proof-gathering, convincing, cajoling, and outright bribery, but the unarguable affordability of the yarn has finally tilted the scales. The Engineer has finally buckled under the pressure and is granting me the singular pleasure of knitting him a sweater for his Christmas present. (You might be asking yourself if taking a leap of faith on both the yarn and the project at the same time was really a wise idea, but I don't like to do anything in halves. There's a proverb about this somewhere, I'm sure.)

We looked at several different patterns and he decided that he liked the Leo pattern from Knitty the best. (A link to the pattern is HERE.) He left it to me to pick the yarn (but I double checked the color with him before ordering all 16 skeins, oh goodness, yes). I decided to go with a deep blue color in the Merino wool. Downside of the merino is that you have to hand wash it, but the upside is that it's very soft and a bit cheaper. FYI, this is not the type of present that I would want to surprise him with or try to keep secret from him--I want him to be happy with the sweater and actually WEAR it, so I knew I wanted him to be weighing in on the pattern, the color, the fit, and all those other crucial details. Since we live together, I also knew there was no way I could knit this in secrecy or have any hope of finishing it before the second coming if I tried to only knit when he wasn't around.

This project isn't so much a distraction as it is the focus of all motor activity any time I sit down on the couch. And since I discovered that the Boston Public Library kindly purchased all the seasons of Star Trek: The Next Generation, Star Trek: Deep Space Nine, and Star Trek: Voyager, I've been spending a lot of time on my couch reliving middle school fantasy worlds and knitting my fingers into knots.

The yarn is knitting up beautifully. I had a moment of panic when all those skeins showed up. Even with the swatch, the color wasn't quite what I'd expected. But now that I've finished the back and half of the front, I'm really liking the color. Neither of these pictures really does the color justice--it's kind of a summer sky right after sunset kind of blue. A bit turquoise, but deeper. The fabric of the sweater is really soft. It's put-your-cheek-against-it-and-coo soft. And the whole time I'm thinking, "I only paid $2.49 a skein!"

A few pattern notes: the sweater is actually NOT fitted--it just looks that way in the picture because I had to drape it over the back of the sofa to get the whole thing in the shot (who knew the Engineer had such a huge back?!). Don't worry--it's properly manly and straight. The red threads on the left-hand side (you can see them if you click on the top picture) are not a part of the pattern. They're little pieces of scrap yarn to count the rows since I inevitably get distracted and forget to write down how many rows I've done. I just thread a little piece of contrasting yarn through a stitch every five rows, and then I'll take them out when the sweater is done. They aren't actually holding any stitches in place.

With KnitPicks, my whole knitting world has opened up. All those patterns I coveted but dismissed because of lack of funds are now back up for grabs. I'm particularly excited by the sock yarn, the fingering weight yarn (for nice lacy sweaters) and the Wool of the Andes yarn (for felting). I've got big plans for 2007, my friends, BIIIIIG plans...

The KnitPicks website is: http://www.knitpicks.com. Have at it, fellow knitters. All my blessings.

Friday, November 10, 2006

Knitting: Laptop Cozy, Take...4?!?!

All right, y'all, I don't think there's anything else I can do to tweak, fiddle, or otherwise alter my little laptop cozy. I think it's actually finished. For reals this time. I ran it through the washer again, sans chickpeas, to try and felt the little baubles. It was a mixed success. Here are the before and after shots:

Here's the before (click on the picture to enlarge):
And here's the after:
The biggest problem was inconsistency in how the different sized baubles felted. The larger ones near the bottom of the bag (like the one in the foreground of the 'after' picture) didn't really felt very much but just kinda...spread out. There are a few other large baubles on the bag that spread out so much that they don't really poof anymore and really just blend in with the background. The baubles in the middle felted the best. They are just a little felty and still have just the right amount of poof:

The smallest baubles near the top of the bag felted well, but were so small that they tended to sink into the fabric of the bag and all but disappear. Meh. So now I know. If you want to felt the bag but not the baubles, go with medium sized baubles with 2-5 chickpeas. If you want baubles with a more felted look, do medium sized baubles with 4-8 chickpeas and then felt the bag a second time.

The bag itself did end up felting more. The fabric will eventually reach a point where it's as felted as it will get and not shrink further. Apparently I was not at that point with my bag. The final bag is a big smaller than I'd hoped for, but still completely serviceable. Again, so now I know. If you want to felt a second time, be sure to stop the felting the bag a little sooner on the first round, take out the chick peas, and then felt again until you're satisfied with the size.

Ok, so now I need some handles on my bag to complete my crafty-metro-girl-on-the-go! ensemble
I was initially nervous about cutting the handles because it's, you know, permanent and all that, but I took a deep breath and did it.

First I laid a piece of clear packing tape across the bag approximately where I was going to cut it. My bag just so happened to be exactly 12 inches across and a 4 inch handle sounded good to me, so I measured 4 inches on either side and two inches from the top, marking this on the tape:
I almost had to close my eyes while I cut through the felt. I was so paranoid that it hadn't felted enough and the whole thing would just start to unravel. (If it's felted properly, the fibers will be so twisted that you can literally cut it like fabric.) :

Voila! Cut felt! You can see here that the felted fabric is really quite thick--that's a good quarter of an inch thick and quite sturdy. Whew.
Now for some action pix! Here's the crafty-metro-girl-on-the-go! ready to swing by the farmer's market or pop by the public library for some good weekend reads:But this is a laptop cozy after all, so does my laptop really fit inside?! I was nervous since the bag felted so much more the second time. While it was drying, I kept stretching it out, trying to get it to keep as large a shape as possible:Ok, it fits sideways, but will it go all the way in?!
Ah, just barely. My laptop fits inside, but I can't pick it up by the handles. But you know what? That's actually just fine because the only time I'm transporting my laptop, I'd actually prefer to carry it in my backpack. This laptop cozy will be an extra protective sleeve inside my bag.

So final verdict? Complete satisfaction, plus inspiration to knit more bags and continue experimenting with the bauble idea. I've been thinking about enhancing the baubles during the initial knitting stage by doing some short row shaping. Not only would this make the bauble more pronounced and less susceptible to flattening out during the second round of felting, but it would enable me to knit the baubles in different colors from the background. Oh, man, I love knitting.

For the evolution on the laptop cozy:
Part I: Click HERE
Part II: Click HERE
Part III: Click HERE

Monday, October 23, 2006

Crafts: Aid-and-Abet Smoker's Gloves

For those of you just joining us, a few weeks ago, a co-worker and friend of mine finagled his way into getting me to make him a pair of customized, extra-warm smoker's gloves. And by "finagle," I mean he offered to buy the yarn and a pair of needles and I was sold. We've all got our weaknesses, ya know?

And the truth is, whether you're a smoker or not, these gloves are mighty handy. It gets gosh durn cold here in Boston. And who suffers most? That's right: our fingers. Even if you or the recipient of your knitted goodies aren't smokers, these mittens are still perfect for grabbing billfolds out of bags, snagging hot pretzels from street vendors, and all your other wintry shenanigans. I'm thinking of knitting myself a pair--once I'm done with all the other projects I've got up in the air, of course. (Of COURSE! Who needs another project? Not me! Hee hee...hee. Oh dear.)

When all was done and knit, my pattern was really nothing like the original Cigar pattern off of which I had been basing my gloves. So I will give a nod to Mr. Cigar and claim this cousin as my own, thanks very much. For all interested parties, here is the Aid-and-Abet Smoker's Gloves pattern and other sundry details. (Apologies in advance if there are formatting errors in this pattern--MS Word and I have been having...issues with each other. If you're interested in knitting this pattern, e-mail me at mythreeloves (at) gmail (dot) com and I'll send it to you in an attachment.)

Oh, and P.S. if you're not really interested in the pattern details, but wanna see some groovy pictures of the gloves, scroll on down to the bottom!

Size
S [M, L]

Finished Measurements:
Width: 3.5 [3.75, 4] inches
Length: 9 [9.5, 10]

Materials:

* 100% light worsted wool; 330 yd/297 m/150g (Shown in Plymouth Indiecita Alpaca (3 skeins)

* 1 US #4 circular needle (or 4 double pointed #4)

* Waste yarn

*Tapestry needle

Gauge:

25 sts/32 rows = 4 inches in stockinette

Pattern Notes:

The only tricky thing with these gloves is keeping the left one and the right one straight while you’re knitting. The right glove will have fingerless index and middle fingers (switch hands if knitting for a left-handed person), and each respective glove will have a row of purled stitches across the back of the hand—this is where you’ll pick up stitches to begin the mitten flaps on each hand. If you confuse the gloves, you’ll end up with a purled row across the palm instead of the back of the hand.

Directions for Gloves (make 2):

Using either the Magic Loop circular knitting method or 4 double pointed needles, CO 36 [40, 44] and divide stitches evenly between needles. Join and begin working in the round.

First Round: [K2, p2] to end.

Repeat round until work measures 2.5 [3, 3.5] inches (about 20 rows [24 rows, 28 rows])

Thumb Gusset

Next round: K all sts.

Increase round: K1, m1, k to end of round, m1.

Repeat these 2 rounds 5 times more. (48 [52, 56] sts)

Next 4 rounds: K 3 rounds. Work one increase round.

Repeat these 4 rounds 1 [2, 3] times more. (52 [58, 64] sts)

Next round: K to last 6 [7, 8] sts, place next 13 [15, 17] sts on waste yarn. (You will pick up these stitches later to make the thumb.)

Next Round: CO 1 st, rejoin round and k all sts. (40 [44, 48] sts)

K 4 more rounds.

Next round:

Right Hand: K 20 [22, 24] sts, p 20 [22, 24] sts (You will pick up these purled stitches later to begin the mitten flap.)

Left Hand: P 20 [22, 24] sts, k 20 [22, 24] sts

Next round: K 3 [4, 5] more rounds.

Next round: K16 [17, 18] sts, place next 8 [10, 11] sts on waste yarn (you’ll pick these up later for the pinky finger), CO 2 sts, rejoin round and k remaining 16 [17, 19] sts.

Next round: K 5 [6, 7] more rounds.

Index Finger

K6 place next 22 [24, 26] sts on waste yarn, CO 3, rejoin round and k to end of round. (15 [15, 16] sts)

Right Hand: K 8 [9, 10] rounds (or until stitching reaches the bottom of the first knuckle). BO very loosely.

Left Hand: K 25 [28, 30] rounds (or until stitching just reaches the tip of the finger or slightly beyond).

Next round: [K1, K2tog] until end of round

Next round: K2tog until end of round. Break yarn leaving a generous tail, draw the tail through the remaining sts, and pull tight.

Middle Finger

Working sts clockwise (so knit stitches face outwards), pick up and k 3 sts in CO sts from Index Finger, pick up and k 5 [5, 6] sts from waste yarn on one side of hand (next to Index Finger), CO 3, pick up and k 5 [6, 6] sts from waste yarn on other side of hand (next to Index Finger). Join to work in the round. (16 [17, 18] sts)

Right Hand: K 9 [10, 11] rounds (or until stitching reaches the bottom of the first knuckle). BO very loosely.

Left Hand: K 30 [33, 35] rounds (or until stitching just reaches the tip of the finger or slightly beyond).

Next round: [K1, K2tog] until end of round

Next round: K2tog until end of round. Break yarn leaving a generous tail, draw the tail through the remaining sts, and pull tight.

Ring Finger

Pick up and k 3 sts in CO sts from Middle Finger, pick up and k remaining 10 [11, 12] sts on waste yarn next to Middle Finger, and join to work in the round. (13 [14, 15] sts)

K 25 [28, 30] rounds (or until stitching just reaches the tip of the finger or slightly beyond).

Next round: [K1, K2tog] until end of round

Next round: K2tog until end of round. Break yarn leaving a generous tail, draw the tail through the remaining sts, and pull tight.

Creepy-looking half-finished glove. I've just picked up the stitches being held for the ring finger. The red and yellow strings are pieces of waste yarn holding the stitches.

Close up of picked-up stitches on the ring finger. The top three stitches were picked up from the cast-on stitches in the middle finger and the bottom stitches were being held on waste yarn. I'm about to knit the first round.

Pinky Finger

Pick up and k 4 sts in the CO next to the held sts for the Pinky Finger, pick up and k 8 [10, 11] sts being held on the waste yarn. (12 [16, 17] sts)

K 18 [20, 22] rounds (or until stitching just reaches the tip of the finger or slightly beyond).

Next round: [K1, K2tog] until end of round

Next round: K2tog until end of round. Break yarn leaving a generous tail, draw the tail through the remaining sts, and pull tight.

Thumb

Pick up and k 3 sts in the CO next to Thumb Gusset, k 13 [15, 17] sts being held on waste yarn. (16 [18, 20] sts)

K 18 [20, 22] rounds (or until stitching just reaches the tip of the finger or slightly beyond).

Next round: [K1, K2tog] until end of round

Next round: K2tog until end of round. Break yarn leaving a generous tail, draw the tail through the remaining sts, and pull tight.

Mitten Flap

Note: Work clockwise so that the knit stitches face outwards. On the right hand, begin picking up purled stitches and begin each following round on the pinky finger side. On the left hand, begin picking up purled stitches and begin each following round on the thumb side.

First row: Pick up and k 20 [22, 24] sts from the purled row across the back of the hand.

CO 21 [23, 25] stitches (these CO sts will be the front of the mitt), and join with the picked-up sts to work in the round. (41 [45, 49] sts)

Next round: K 20 [22, 24] (across back of hand), [k1, p1] next 21 [22, 24] sts to end of round.

Next round: Repeat this round once.

Next round: K all sts a total of 34 [38, 42] more rounds (or until the tip of the mitten is about 4 rows below the tip of the middle finger.)

Half-finished mitten flap on left hand

Half-finished mitten flap showing the join on the back of the hand.

Decrease row: K4, k2tog, and repeat to end of row.

Repeat this decrease round 3 more times.

Decrease row: K3, k2tog, and repeat to end of row

Repeat this decrease round 1 more time.

Finishing: Divide remaining sts between two needles and graft sts together using the kitchener stitch.

(Alternatively, [k2, k2tog] for one more round and then pull taiont>l through the remaining stitches to close.)

Weave in all loose ends.

Finished left-hand glove

Finished left-hand glove with mitten flap, back side.
Finished left-hand glove with mitten flap, palm-side.
Finished right-hand glove