Showing posts with label Felting. Show all posts

Friday, November 10, 2006

Knitting: Laptop Cozy, Take...4?!?!

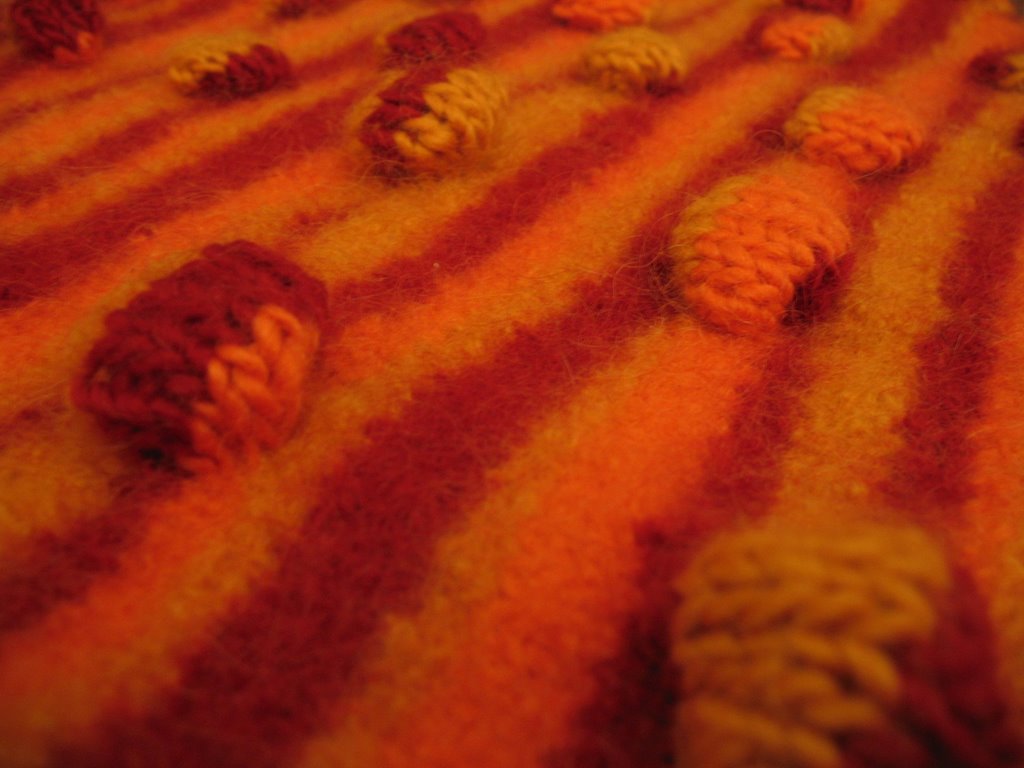
All right, y'all, I don't think there's anything else I can do to tweak, fiddle, or otherwise alter my little laptop cozy. I think it's actually finished. For reals this time. I ran it through the washer again, sans chickpeas, to try and felt the little baubles. It was a mixed success. Here are the before and after shots:

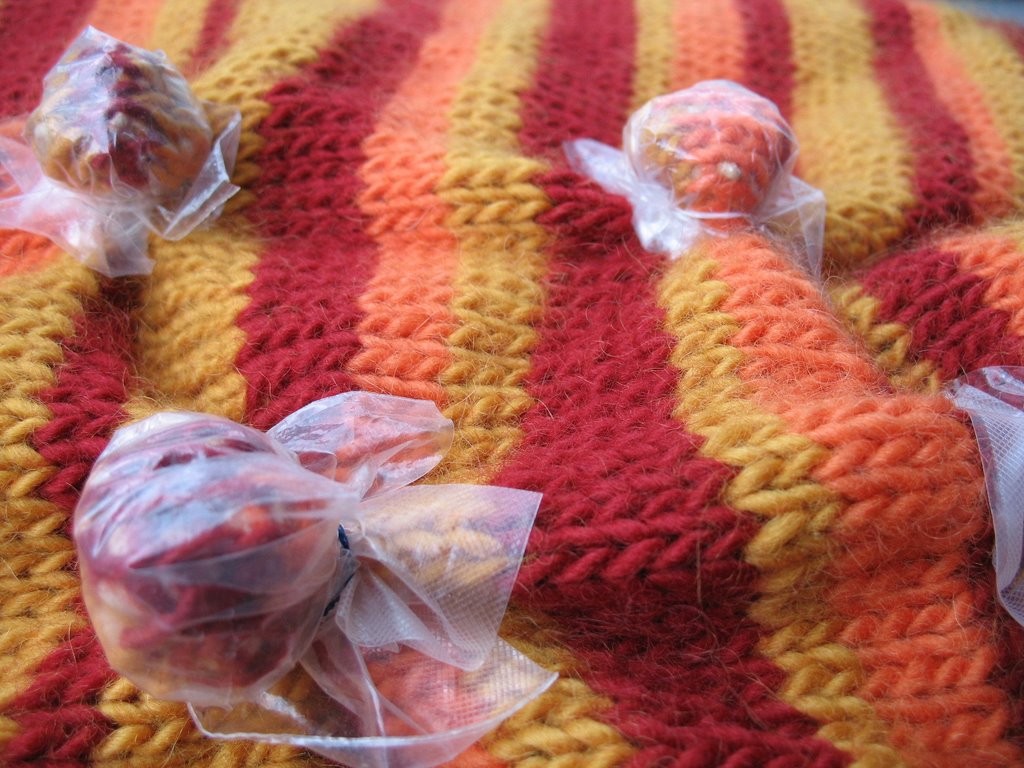
Here's the before (click on the picture to enlarge):
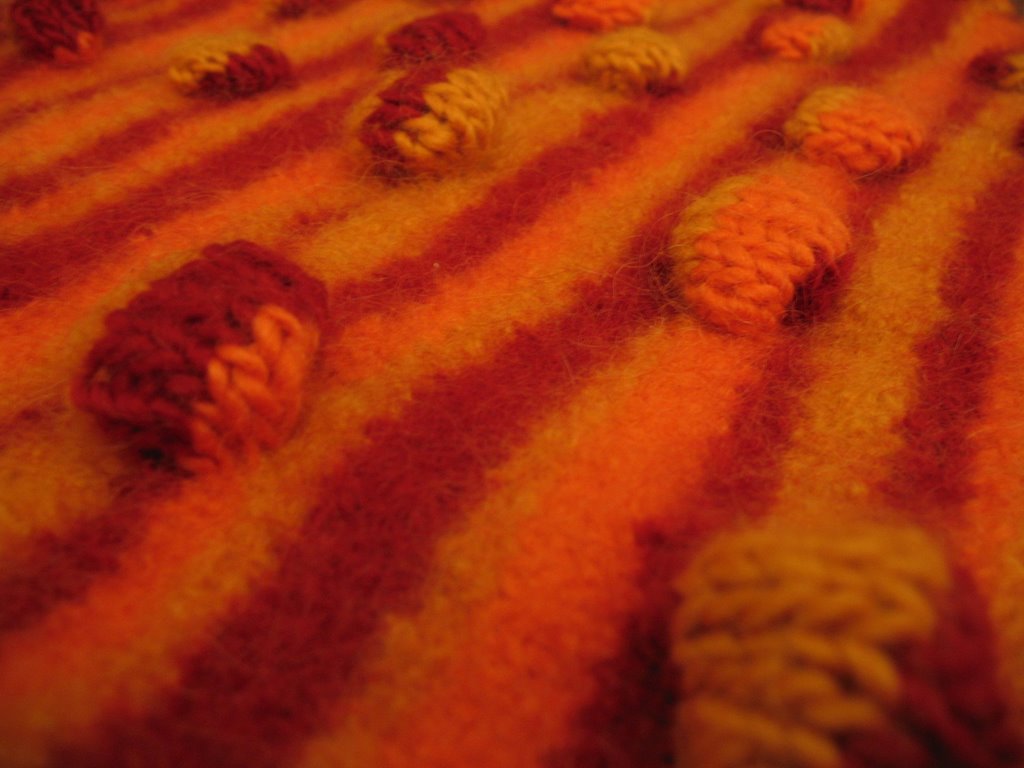
And here's the after:
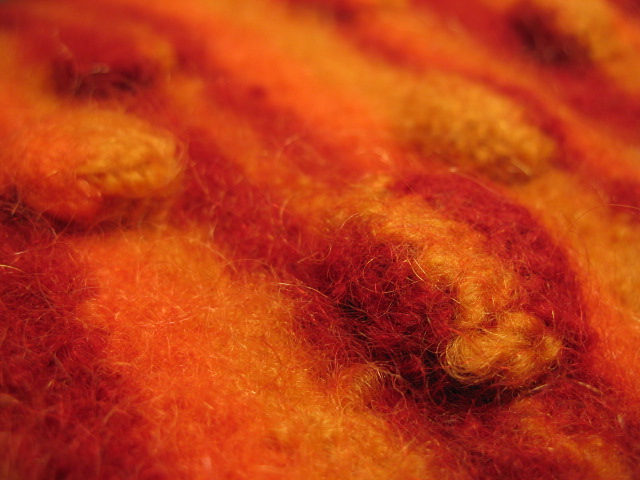
The biggest problem was inconsistency in how the different sized baubles felted. The larger ones near the bottom of the bag (like the one in the foreground of the 'after' picture) didn't really felt very much but just kinda...spread out. There are a few other large baubles on the bag that spread out so much that they don't really poof anymore and really just blend in with the background. The baubles in the middle felted the best. They are just a little felty and still have just the right amount of poof:

The smallest baubles near the top of the bag felted well, but were so small that they tended to sink into the fabric of the bag and all but disappear. Meh. So now I know. If you want to felt the bag but not the baubles, go with medium sized baubles with 2-5 chickpeas. If you want baubles with a more felted look, do medium sized baubles with 4-8 chickpeas and then felt the bag a second time.

The bag itself did end up felting more. The fabric will eventually reach a point where it's as felted as it will get and not shrink further. Apparently I was not at that point with my bag. The final bag is a big smaller than I'd hoped for, but still completely serviceable. Again, so now I know. If you want to felt a second time, be sure to stop the felting the bag a little sooner on the first round, take out the chick peas, and then felt again until you're satisfied with the size.

Ok, so now I need some handles on my bag to complete my crafty-metro-girl-on-the-go! ensemble
I was initially nervous about cutting the handles because it's, you know, permanent and all that, but I took a deep breath and did it.

First I laid a piece of clear packing tape across the bag approximately where I was going to cut it. My bag just so happened to be exactly 12 inches across and a 4 inch handle sounded good to me, so I measured 4 inches on either side and two inches from the top, marking this on the tape:
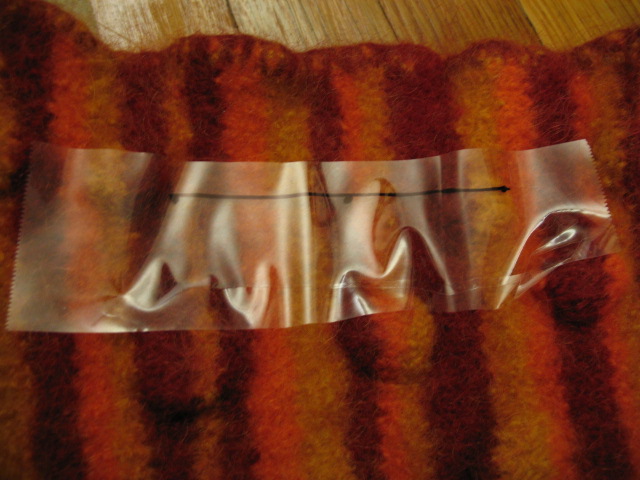
I almost had to close my eyes while I cut through the felt. I was so paranoid that it hadn't felted enough and the whole thing would just start to unravel. (If it's felted properly, the fibers will be so twisted that you can literally cut it like fabric.) :
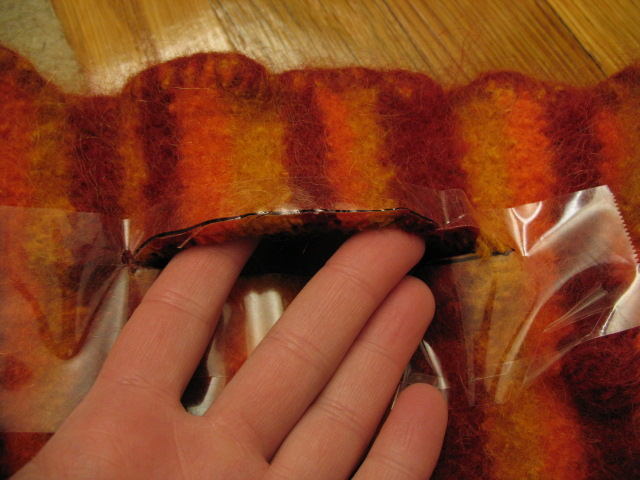
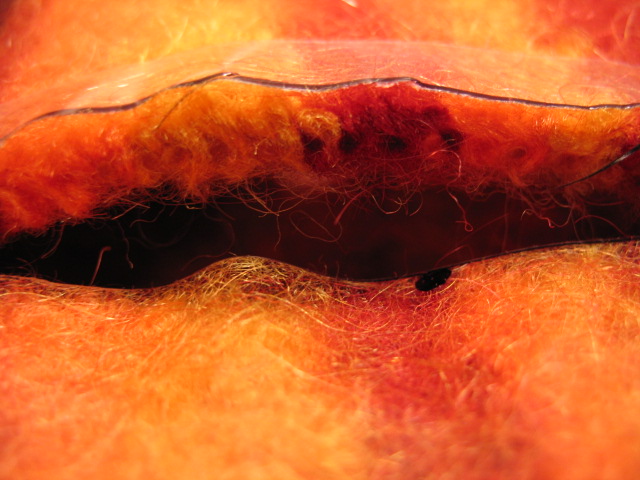
Voila! Cut felt! You can see here that the felted fabric is really quite thick--that's a good quarter of an inch thick and quite sturdy. Whew.
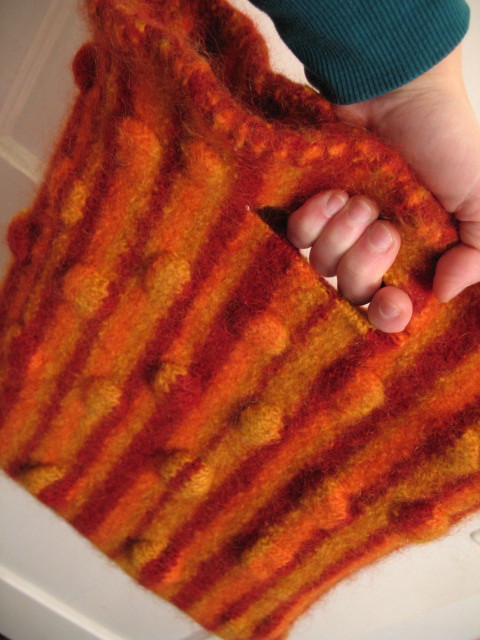
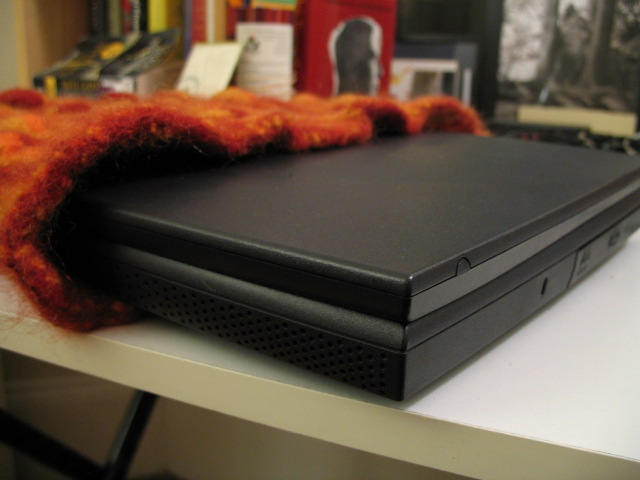
Now for some action pix! Here's the crafty-metro-girl-on-the-go! ready to swing by the farmer's market or pop by the public library for some good weekend reads:But this is a laptop cozy after all, so does my laptop really fit inside?! I was nervous since the bag felted so much more the second time. While it was drying, I kept stretching it out, trying to get it to keep as large a shape as possible:Ok, it fits sideways, but will it go all the way in?!
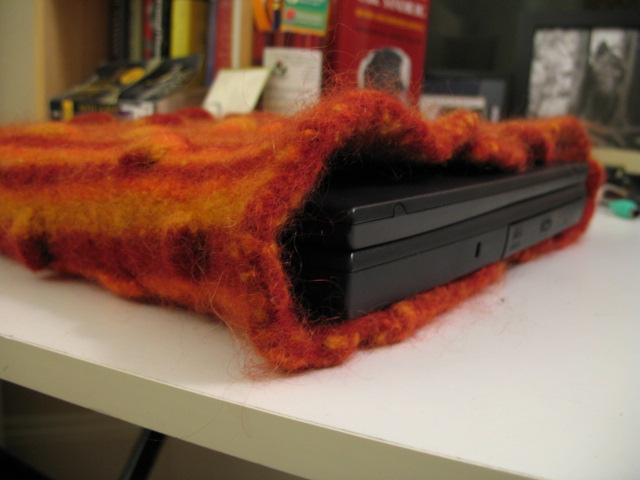
Ah, just barely. My laptop fits inside, but I can't pick it up by the handles. But you know what? That's actually just fine because the only time I'm transporting my laptop, I'd actually prefer to carry it in my backpack. This laptop cozy will be an extra protective sleeve inside my bag.

So final verdict? Complete satisfaction, plus inspiration to knit more bags and continue experimenting with the bauble idea. I've been thinking about enhancing the baubles during the initial knitting stage by doing some short row shaping. Not only would this make the bauble more pronounced and less susceptible to flattening out during the second round of felting, but it would enable me to knit the baubles in different colors from the background. Oh, man, I love knitting.

For the evolution on the laptop cozy:
Part I: Click HERE
Part II: Click HERE
Part III: Click HERE
Saturday, September 30, 2006

Crafts: Laptop Cozy...The Big Day

[Catch up on the drama of Parts I and II of this Laptop Cozy series HERE--Part I and HERE--Part II.]

It's been a long, hard road, my friends. The cozy is complete. Ends are all woven in. Garbanzo beans are all tucked into little pouches and lovingly wrapped in cut-up zip lock bags. It's been through the washer and the ringer to boot. Results are in...

But FIRST, for a bit of delayed gratification, a little lesson on felting! True, honest-to-goodness felting is a bit different than the kind of felting I'm talking about. Felting, like Fedora hat felting, is very similar to making hand-made paper. Basically, it is done by taking carded, unspun wool (also called roving), getting it wet, and placing it in layers into some sort of mold. As the wet wool is agitated, the little fibers will tangle with each other, creating a solid, tight mass. Let it dry and you have a solid piece of fabric that can be molded into something like a hat or used in kindergarden dioramas of cave-man dwellings.

When we talk about felting with knitting, it's essentially the same process, but using spun and knitted fiber. Instead of going at it free form, we knit a very big, loose item, get it wet, and agitate it to get the fibers to tangle together. The piece will 'shrink' and become a thicker, more solid piece of fabric--exactly what happens when you accidentally throw your favorite winter sweater in the wash. (Interestingly enough, it's the washing process, NOT the drying process that causes your favorite sweater to felt and shrink.) Yarns made of any kind of animal fibers (like wool) and that have not been pre-treated to be machine washable ("superwash") can be felted. Yarns made of plant fibers like cotton, flax, or bamboo don't felt very well, though I've heard of felting experiments combining a thread of plant fiber and a thread of animal fiber. If you're planning a felting project, it's really really key to knit and felt a sample swatch. Every yarn felts a little differently and swatching is crucial to determine the gauge for your original, pre-felted piece. In general, a piece of knitting will felt (shrink) more vertically (top to bottom) than horizontally (left to right).

To felt an item, first knit something rilly rilly big on relatively large needles. The looser you knit, the more the piece will felt because there will be more room to agitate those fibers. If the knitting is tight, there will be less agitation and less felting. Put the finished piece in a zippered bag (like a pillow case)--this will prevent your washing machine from getting clogged with little rats of loose fiber. Throw this in your washing machine along with a couple of pairs of old jeans (NOT TOWELS) and about a tablespoon of detergent (any kind). Put your washing machine on the lowest load setting and the hottest water setting. Let 'er rip! Check your piece every five minutes to see how the felting is coming along. You can keep repeating the first part of the wash cycle as many times as you need to. When it's the size you want, take it out of the washing machine, let the washing machine run until the cold water part of the cycle, and dunk your piece back in to get out the last traces of detergent. Many places advocate removing your piece before the spin cycle as sometimes spinning it can leave wrinkles in the fiber, but I've never had this problem. In general, I feel the risk is worth it to get out as much excess water as possible. All that's left to do is block your piece and let it dry. There's a good article about felting on Knitty.com: http://knitty.com/ISSUEwinter03/FEATfelthis.html
.

Ok, blah blah blah, give us the good stuff! My friends, wait no longer. (P.S. Click on any of the pictures to see them larger--some of the detail is amazing, but hard to see in the smaller size.)

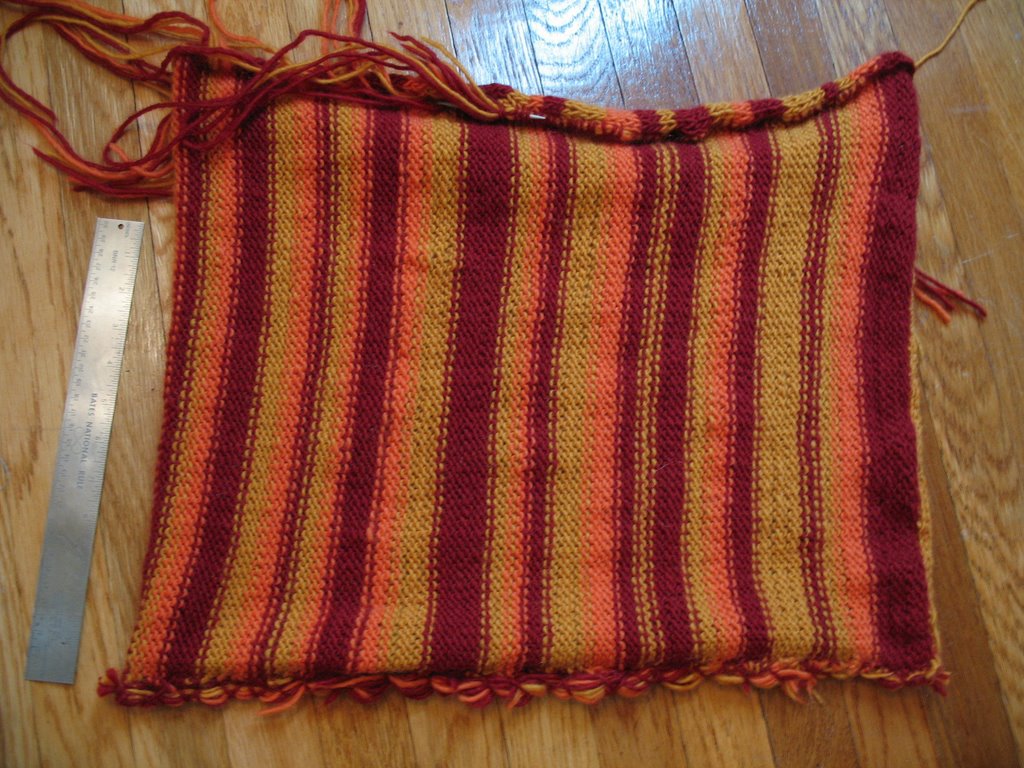
This is the finished, pre-felted laptop cozy. My idea was to have a fewer number of large nubs at the bottom and gradually move to more, smaller nubs at the top. The large nubs have about ten garbanzo beans stuffed in them and the smallest nubs have three. I ended up using cut squares of old zip lock bags instead of simple plastic wrap because I was worried the plastic wrap might actually melt in the hot water and figured the zip lock bags would be more durable. I used cheapo rubber hair bands to secure the nubs. Pre-felted size was about 18.5x22 inches.

And it felted beautifully. The fabric is really seamless and tight with barely a trace of the original stitches. You can already see in the pictures above that the fabric in the nubs didn't felt at all. Boy was I nervous to take them off, though!

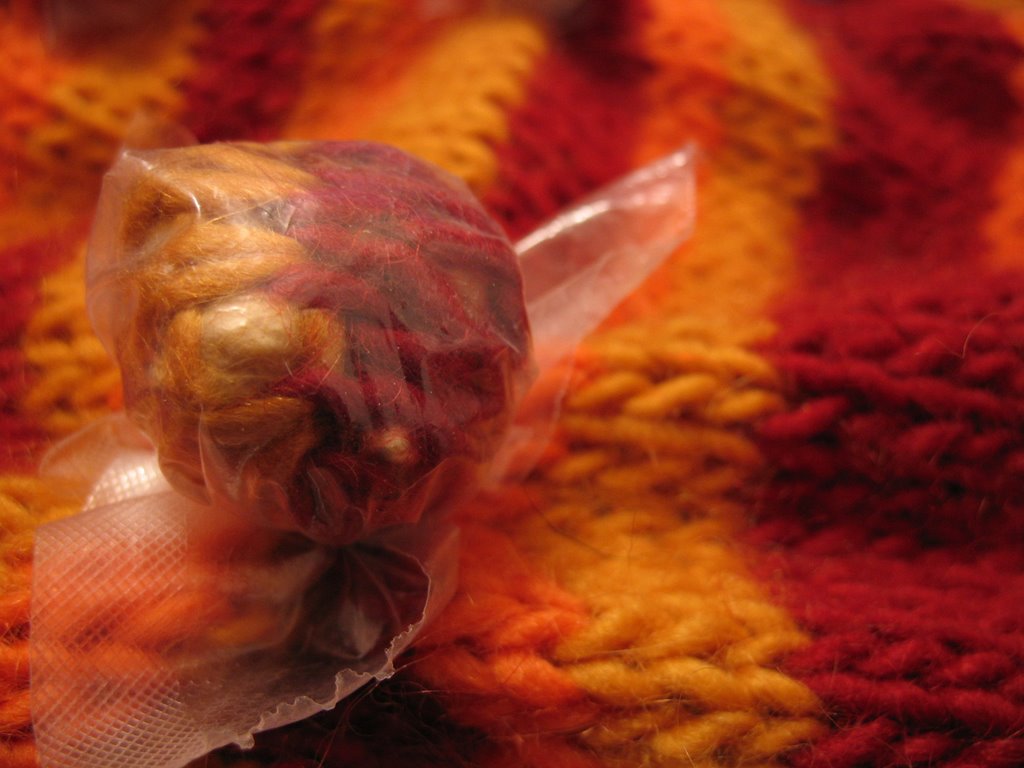
And, ta-DA! There are the nubs! Don't they look like little cheese balls you want to pick up and pop in your mouth? Below is the full piece being blocked, and then progressively closer details of the nubs. The final piece measures about 11x14 inches.
When dry, those little nubby baubles pop right up. Of course now that it's all done with, I'm already wishing I'd done more nubs and in a different arrangement, but then again, because the pattern overestimated the amount of yarn needed, I do have enough left over for another entire bag...

And here's another thing--maybe y'all can help me decide:
When I first took the plastic wrap off, I thought the nubs were cool, but wasn't sure I really liked the un-felted nub look for this particular piece. But now that I've been looking at it for a few days, I'm torn. I'm thinking about throwing the bag into the washer to felt again, this time withOUT any covering on the nubs. My idea is that I would felt it just enough so that the nubs softened and felted a bit, but were still obviously, well, nubs. I'm also kinda tempted to do it just as an experiment to see what it looks like (since we've already determined I'll soon be doing another bag, obviously). What do you think, oh ye sage crafters and opinion-holders?

Sunday, September 24, 2006

Crafts: Laptop Cozy Update

The hour is nigh upon us. The laptop cozy hovers on the brink of completedness. I debated waiting to post anything until it was actually 100% and truly finished, but where's the fun in that? Plus, I think I might need a bit of hand holding through the potential disaster I have created.

So, the laptop cozy is probably one of the simplest patterns in existence. It's so easy that I have absolutely no plagiarism hang-ups about sharing it with you (though the original pattern can be found in Alterknits by Leigh Radford): cast on 65 (80, 80) [for small (medium, large)] and work in stockinette stitch until the piece measures 44 (50.5, 57.5) inches from the beginning. Bind off and fold the piece in half. The folded edge becomes one side of the bag. Sew the bottom and the other side shut using your favorite fancy sewing method. Weave in loose ends. Felt. Use scissors to cut handles. Presto chango, laptop cozy!

I made the small size bag, which calls for two skeins each in three colors of Lamb's Pride Worsted if you want stripes, or six skeins in a single color.
First off, I didn't use anywhere NEAR this much yarn. In fact, I only used three skeins and still had some left over. I was a bit disgruntled about this because, as you may recall from my earlier post, I actually had three skeins already, but since the pattern called for six, I made a public display of myself by picking up the extra skeins from my local yarn store while out on a run. Anywho, at least the experience still makes for a good "yarn" (oh! oh! Ouch!).

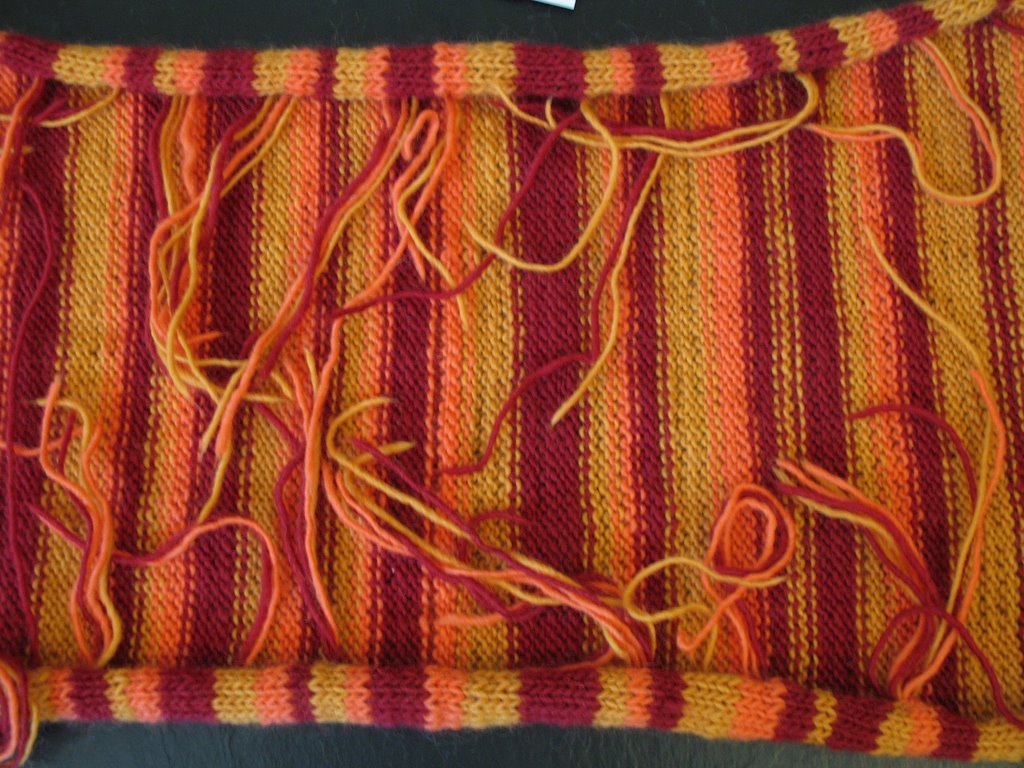
I liked the striping pattern in the book, so decided to follow it instead of making up my own. The striped ranged in width from two rows to seven rows. Since the final piece was going to measure 44 inches, this translates into a lot of striping, my friends. It didn't occur to me until, oh, about 3/4 of the way through that this also translates into a lot of loose ends. That I would have to weave in. Later. Dear Lord. I smacked myself on the head and said, "This is what INTARSIA is for!" Intarsia is where you essentially have two balls of each color, one for each side of the piece. You end up not having any loose ends to weave in. (see more thorough explanations here and here.) Since intarsia is usually used when you're knitting some sort of complicated pattern like argyle or letters, it didn't occur to me to use it here (although now I'm wondering if this is why the pattern calls for six skeins when only three get used? Still seems a bit excessive, even so). Alas, my intarsia-revelation was too late to be of real use for me, but please learn from my experience. The idea of weaving those ends in was so effing annoying that this project was almost relegated to the "I can't deal with you until at least several months from now" pile.
Look at all those ends! Bleck!

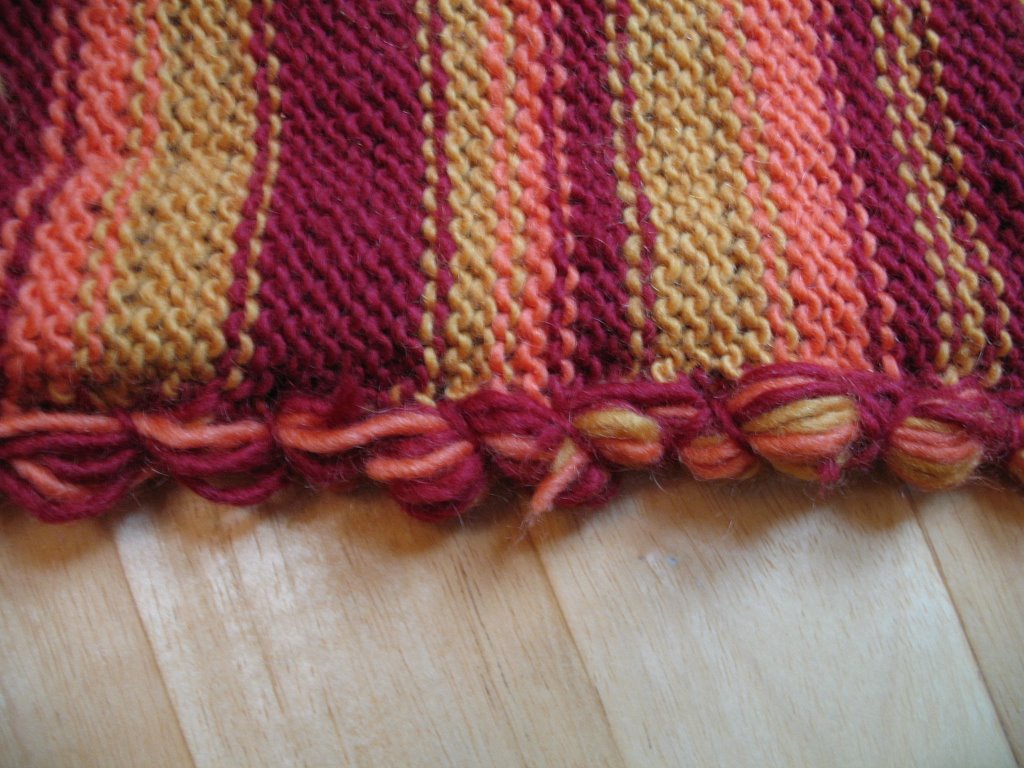
In the end, rather than actually weaving in all the ends, I decided to do a whip stitch along the bottom edge and a mattress stitch across the top (cu
z it's prettier and this is the part that will be seen), and gather in the ends as I go. I'm not sure how well this will felt, but it seemed preferable to weaving them all in. Fingers crossed.

Bottom ends woven in with a whip stitch
Top ends woven in--I think this is called a mattress stitch

Ok, at this point a sane person would be all hunky dory and ready for a good afternoon of old fashioned felting. But I kept looking at the finished, un-felted bag and thinking, "You know? I think I could do something more here." That's when I remembered a scarf that my mom once described seeing at an art fair she went to. It was a basic felted scarf, but there were all sorts of little...well...bubbles all over it. The way Mom described it, I pictured a clean piece of felted knit fabric, but with the kind of nubs you'd get if you were doing short-row shaping--like the heel of a sock. Mom said it was one of the most incredible (and expensive--$350 for a scarf!?!) things she'd ever seen, and she asked the artist how she'd done it. The artist said she took a piece of knitting that she was going to felt and tied bundles of garbanzo beans into the fabric, covered it with plastic wrap, and then proceeded with the felting. This way, the regular fabric felts, but everything covered by the plastic doesn't.

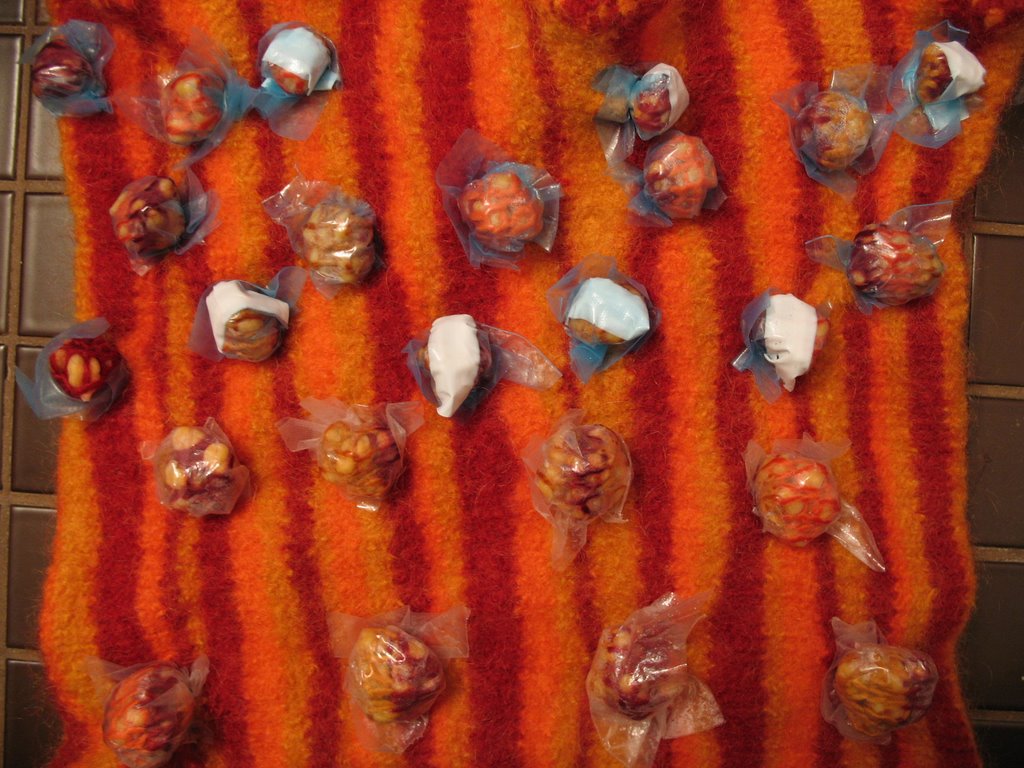
I've been eager to try this technique out for myself ever since Mom described it to me, but never had quite the right project. Until now! Yessiree, we're gonna get cre-AH-tive over here in Boston! Below is a picture of what the nubs look like so far. I gathered a bit of the fabric, popped in a few garbanzo beans, and secured a piece of plastic wrap over the whole nub with hair bands. I'm going to finish tying them up during the Patriots game tonight (cuz what's football for if not guaranteed, uninterrupted knitting time?), and then felt them tomorrow. Wheeee!

Thursday, July 13, 2006

Knitting: The Laptop Cozy

I've been very aware of the fact that I've been ignoring my third love, knitting. Poor little third love. A few weeks ago, I decided my laptop also needed a little love, so I decided to knit it a laptop cozy so it would have some flair all its own. There's a lovely pattern in Alterknits by Leigh Radford that I decided to try out. (Oooh, and Alterknits is on sale at Powells.com. Get 'em while they're hot!).

The Laptop Cozy is really very simple--it's basically a really long rectangle knit in a simple stockinette stitch and you can stripe or not as you please. Then you sew up the sides, felt it, cut some holes for handles, and voila! Laptop Cozy!

I'm partial to stripes myself and it just so happens that I had some Lamb's Pride Worsted yarn left in my stash from some socks that...um...were going to be Christmas presents, but...um...didn't quite make it beyond the Threshold of Good Intention. I lacked two skeins in a matching color, so on my Saturday morning jog a few weeks ago, I ran to my local yarn store, A Good Yarn (off Harvard Street in Brookline) to pick some up. The well-mannered ladies presiding over the shop that morning didn't quite know what to make of this sweaty, wild-eyed knitter who stumbled into their midst. "I won't touch!" I promised, and they nodded sagely.

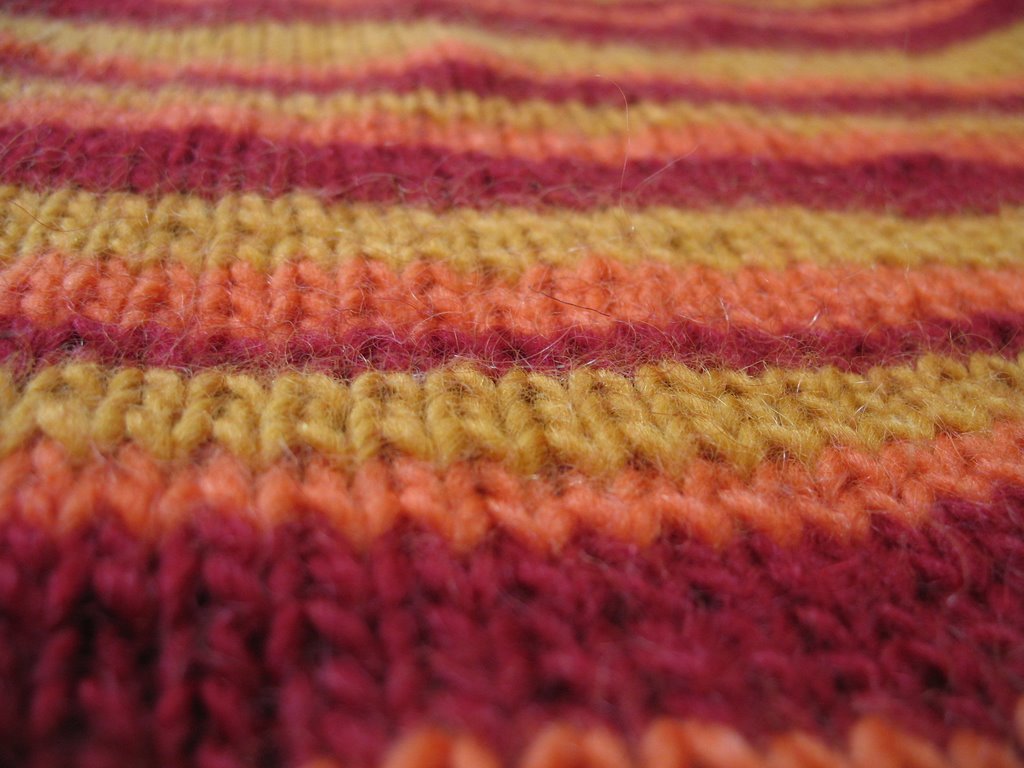
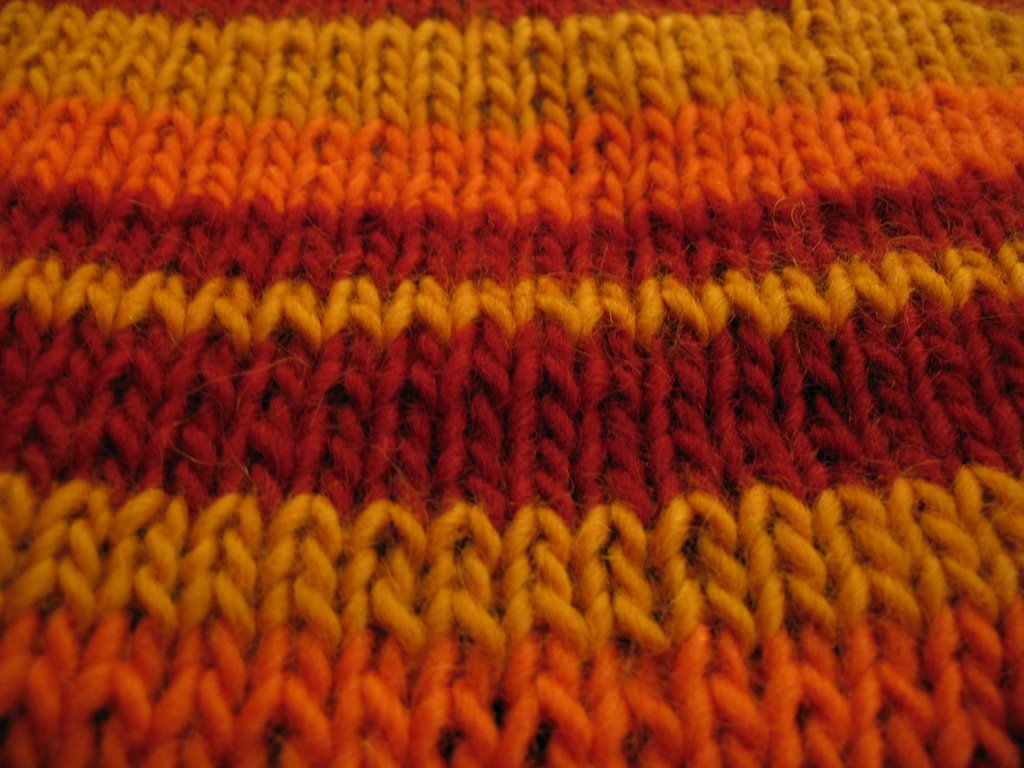
Home, showered, and settled with some coffee, I began the Laptop Cozy. It's about half done now, so nothing too exciting to see. But I just happened to have recently purchased a fancy camera, so of course I'll post a few pictures so you can see the excellent striping action. By the way, the gold is the yarn I bought on my jog. I'm still learning how to do the macro-shots, so the colors are a bit dull, but you get the idea.

Look! A SUPER macro shot! Oh, the fine textures and textiles.