Showing posts with label Crafts. Show all posts

Wednesday, December 12, 2007

Home-made Holiday Gift-o-Rama

Updated 12/12/07

Hi, folks!


The Engineer and I have declared this to be the Christmas of No Stress, and to this end we have forsworn the following:

1) The Finding of the Perfect Present
2) The Spending of the More Money Than Makes Us Comfortable ("Cringe-making" is our barometer for this)
3) The Buying of a Present for Everyone and Their Little Dog Too
(and a personal one for yours truly)
4) The Spending of Too Much Time (a.k.a. FOREVER) Crafting Presents

To follow through with this commitment, I have decided that I'm going to make the majority of my presents myself, be it with crafts or edibles, and I'm going to give everyone essentially the same thing.

In this era of DIY and craftiness, you'd think it would be easy to find simple-yet-awesome, budget-friendly craft projects, but I've actually been finding it rather difficult. A lot of projects can end up being rather spendy once you add up all the various bits and pieces (some people's definition of 'budget-friendly' being different from my own) Or they take forever to assemble. Or they aren't mass-production-friendly. But it can be done! [Finger jabbed triumphantly skyward]

So, for your holiday crafting enjoyment and entertainment, below is a smattering of projects I've found that appear to be Cool, Cheap, and Stress-Free. Click on the name of the project to link to the original website. Some of them don't have instructions, but seem logical to assemble. If you have questions, feel free to comment or e-mail and I'll cypher it out with you:

*I'll keep adding to this list as I find new things over the next few weeks. Check back in!

Crafts:

Felt wine racks (or HERE)
Rice face masks
Bacon Magnets made with felt
Neck-Warmer--a sexy and simple one-skein knitting project

Eats:

Caramels
-->Salted, dipped in chocolate, w/ espresso powder, bourbon, rum...
(P.S. I'm actually trying another recipe this weekend that I got from one of my chefs at school and that looks easier than this one. If it works out, I'll post about it next week.)
Marshmallows
Coffee Liqueur
Crunchy Snacks

Mixes:
*I'm packaging my mixes in Bell canning jars, which I found at a local hardware store for $8 for 12 jars. You can certainly go shmancier--the Container Store has a plethora of interesting vessels.

Cocoa
Beer Bread (or HERE)

Enjoy!

Thursday, November 22, 2007

Wait for it...wait for it...

To folks coming over from Mason-Dixon Knitting--Welcome! Thanks for stopping by! To catch up on the back story on this sassy project, go HERE and HERE and HERE.

Please join me in a moment of silence. The daisy dukes...oh, the DUKES!...they're actually done. It's been a long and season-spanning journey. There were highs and lows, debates over pockets and waistbands, fears of binding off too soon and lily-white thighs. Progress was slow but inevitable and the siren call of knitted glory pushed me ever onward. My friends near and far, I give unto you The Daisy Dukes:

In the beginning, I kept careful notes on construction and method, diligently recorded stitch counts, and photographed the stages. In the end, though, I just started winging it. Willy nilly! Freestyle! Booty or bust! For interested knitting parties out there, the design was based on the Sweetheart Short, a free pattern over at Knitpicks.com, though I used their pattern more for method and construction than actual stitch counts. I did a swatch and worked out my gauge, sizing the dukes to fit yours truly. When I figured out how many stitches I needed to fit around my waist, I divided them in two and worked the front (with pockets) and back separately.

The pockets, oh, the pockets. Without a doubt, these pockets are my single proudest achievement as a knitter, mostly because it involved channeling my inner-nerd and figuring out slope. I debated whether to knit the pockets by hand or cut them out of an o
ld pair of jeans. I really really wanted that look of the pockets hanging out below the hemline, but the idea of knitting all that in sock yarn was a bit...daunting. In the end, I decided that cut-outs from real jeans would add a little je ne sais quoi touch of authenticity and also to reduce bulkiness in the final short. Plus I was already about on pace with the Big Dig in terms of project completion, so it was time to cut a few corners. Just like the Big Dig (oh! OUCH! BURN!).

I traced the contour of the pocket onto graph paper and compared it to my gauge-swatch to figure out number of stitches and where to increase. At this point, I realized that these dukes will be tough to duplicate because there's not a standard pocket size on jeans (or shape, for that matter). To any potential Daisy Dukers out there: It's totally worth
it to figure out how to shape those pockets. The rush when you finally get it is unbelievable. My personal Moment of Enlightenment occurred in the Logan International Airport in Boston. I believe I might have stood up with tears in my eyes and pumped my fist in the air a few times. I might have also tried to get my fellow travelers to high-five me, but since I was babbling about "Slope! And see! The pockets! The gauge! See! I used graph paper!" they kind of edged away quietly with excuses of connecting flights. Worth. It.There are some good shots of the pockets-in-progress in an earlier post HERE.

After the pocket shaping was done and I connected the front and the back, the rest of the body was worked in the round. When I got to the legs, I divided the stitches again and worked each leg separately. I did work in a few Raspy-esque rips and tears, but they didn't end up being big enough to be very noticeable. For those interested, I worked the 'rips' by increasing one and then dropping that increased stitch when I was binding off along the hem. The dropped stitch unravels and leaves a nice little rip. I considered bleaching the rips to make them more visible, but in the end I really liked the clean look of the hem.

For the waist band, I picked up stitches along the edge and increased stitches over the space where the pockets would go. I did about an inch and half of ribbing and bound off.

And last but not least, I stitched in those Pockets of Glory using a basic back stitch. All of the detailing--the faux fly and the faux back pockets--were also done in back stitch similar to the Blu pattern over on Knitty.

I feel a profound sense of satisfaction at having finished these--and finished them in time to wear at my Halloween party, none the less! I'm not sure how many occasions I will have in the future to sport these ladies, but you know? It just makes me happy to know that they exist.

Notes for Daisy Dukes: Take 2 (a.k.a Daisy Dukes: Oops I Did It Again) and/or the intrepid knitter:

*Worth it to figure out the gauge.

*Start the raspy rips and tears further up the legs
*Knit just a few more rows on the legs. I knit about an inch and I think I could have gone an inch and a half and still had the bottoms of the pockets showing. Yes, they are Daisy Dukes, but...let's just say there was a bit more of my badonkadonk showing that was strictly necessary.

Monday, July 23, 2007

Who wears short shorts?

Warning! Potentially blinding shots of pale white legs ahead!
Ok, so here's the first leg in all it's glory. More of a hem, really. (aHEM! Oh, I just made myself laugh out loud. I heart puns.) You can kinda make out the drop stitch 'rip' in the picture above. This one is a smallish one, but the other rips were...er...difficult to photograph by one's self, shall we say. All in all, I'm pretty pleased! They're snug, suitably faux-denim, and...well..short.

Did I say short? I'm pretty sure there should be another name for this. They're purty darn short. See Evidence A:

Yeehaw, y'all! The ironic thing is that I STOPPED knitting because I was afraid it was getting too long! It was hard to try them on while the actual knitting was happening--needles and cords and balls of yarn and whatnot goofing up my measurements. So I had to guesstimate based on other pairs of shorts.

I have to admit that when wiggled into them and looked in the mirror to check out that first leg, my hands started twitching for a bathrobe. Or a towel. Or pair of full-length jeans. SOMETHING! They're painfully immodest for a lil' Midwestern gal like myself. I'm really having to force myself not to undo the bind-off and add on a few more rows.

Right? I should leave it, right? I mean they are Daisy Dukes. Right? Oh dear...cluck cluck cluck.

Friday, June 08, 2007

Sick Days and Daisy Dukes

I got bowled over by a summer cold yesterday, completely out of the blue. No sniffly warning signs, no dry-cough indicator. Just woke up yesterday morning and proceeded straight to the moaning stage. Where normally I would soldier through and keep on trucking through my regularly scheduled life with no regard to what my body was trying tell me, I thought I'd try something different this time around and actually take a break. So I came home early yesterday and ended up staying home again today. The past 48 hours have been a tough regimen of naps, tea, movies ("Shortbus" was not what I expected--wowzas), and more naps.

Having said all this, I'm now at the antsy "everything in my apartment bores me, but sitting upright for more than a few minutes feels like dying" stage. And then I remembered, Oh yeah. I have a blog! So far this post has taken me about an hour to
write because I keep putting my head down on my desk and taking a little catnap. That sounds more sad than it really is. I think. Actually, I feel a lot better!

Here, help me with my knitting:

I started working on the daisy dukes a while ago, loosely based on the Sweetheart Shorts pattern over at Knitpicks (I keep typing that as sweatheart shorts, but that's...not at all what I'm going for). I decided to use some navy blue cotton yarn because I couldn't find any denim at any of the yarn stores within public transit distance. I also accidentally threw away the label, so I can't tell you exactly which yarn or dyelot I'm using. I know, I know. A
knitter's biggest faux-pas. Alls I can say is that it's been a rough few months, and well, it's just yer basic navy blue cotton dishtowel yarn, so I think we'll be ok.

I also decided to use the pockets from an actual pair of jeans instead of knitting my own. The tricky part was figuring out how to knit the front so that the pockets from the jeans would line up. I spent the entire time while I was waiting for a standby flight to Minnesota last April inexpertly plotting the slope of the pocket and matching it to my gauge. I felt veeeery smart when I was done, let me tell you!
The knit pocket actually lines up perfectly with the jean-pocket, but I moved the knit piece askew a little so you can see what an awesome job I did with that pocket shaping.

So--I will knit the front and the back in two separate pieces and then join them together at the bottom of the pocket. I already had to rip out and restart once because I am knitting the front and back pieces separately on straight needles, but my gauge was taken from knitting in the round. I know, I know--another big knitting faux pas to so brashly assume my gauge would be the same (unless you're a knitter, I know you don't care a lick about gauge, but trust me, it can be a real brat). Anywho, easily remedied by going down a needle size for knitting the front and back and then switching to the larger needles when I joined the pieces for working in the round.

And then I realized my second mistake. The sweetheart shorts pattern has you start increasing for shapeliness around the hip and bottom region after about an inch and a half. I figured (again, oh-so-brashly) that my pockets would be about an inch and a half and I'd start shaping as soon as I joined the pieces. Well, this would have actually been fine. If I'd remembered. Instead, I was so excited at working in the round that I whipped off several rows and now I'm at about two and a half inches. So here's my Dilemma Emma, do I rip the three rows and go back to do the shaping correctly? Or do I
soldier through and keep on trucking through my regularly scheduled knitting?

No, don't say it. I know what you're going to say. I know what I have to do. I have to. My conscience will never let me live with subpar knitting. Even for a pair of daisy dukes. I will have to rip it, and rip knowing full well that I may very well drop all those cast-ons at the bottom of the pocket and just have to start completely over. It's ok. I'm still going to be sick another few days. I still have plenty of daytime TV to catch up on. *sigh*

Oh, but here's the exciting part that I need to figure out soon: I want to intentionally knit little tears in the bottom hem of the shorts--like Kay's Raspy sweater HERE. I can probably figure it out myself, but it would probably be a good idea to track down a copy of Denim People to get the full story.

And on that note, I feel another nap coming on. Or some tea. But not together. Bad combo.

Emma's Feel Better Tisane/Tea/Whatever-Cuz-It-Makes-Me-Feel-Better Drink:

Cuppa hot water
A coupla scoops of honey
A teaspoon-ish of fresh grated ginger
Half a squeezed lemon

Ahhh....

Friday, March 09, 2007

A Craft Room of One's Own...

For as long as I can remember, I've dreamed of having a room of my own. Even when I was still living with my parents and technically had my own room, I still nurtured a fantasy dream room in my heart. Back then, the primary features of My Room were a loft with a big cushiony bed and various hidden doors, secret compartments, tunnels leading to other various sub-rooms, and all sorts of very mysterious and intricate designs. Since then, my tastes have evolved and become (somewhat) more practical, though the loft idea does still drift in and out of the picture depending on my mood.

These days, the room I lust after is part craft room, part lounge, part sanctuary. A room that's neither too big or small, but it's just the right size to fit all my things into and close the door. Somewhere I can leave projects out and make a mess without feeling the need to clean it up right away and organize everything just the way I want to. Along one wall would be big square-shaped shelves stacked nearly to the ceiling. These shelves would hold bins of yarn (organized by color, fiber, and texture, of course), my favorite books, and all my various Special Trinkets, of which I have collected many. My desk would be in front of the windows, which would be curtained in beautiful fabric sheer enough to let in sunlight, but opaque enough to provide privacy. It would be a big, long desk with my laptop at one end and the rest completely clear for whatever project I happen to be working on.

Against another wall would be a comfy love-seat couch with fold-out bed. Big stuffed pillows. A side table. Lots and lots of warm, glowy lamps because I'm very particular about my lighting and loathe overhead lights. Bright, patterned sheets of colored paper or simple tapestries of hemmed fabric would decorate the wall behind the couch. Everywhere the colors would be cinnamony-orange, burgundy, and steel blue. Accents of moss green here and there at the edges. All the furniture would be mostly blonde wood with some stainless steel for that bit of edge. A handknit blanket over the back of the sofa, and a cozy, broken-in sweater over the back of the chair. A warm, squishy rug on the floor.
The light is always autumn and somehow it's always warm enough for bare feet, but cool enough to settle down with a sweater or scarf around my shoulders.

Oh, it all sounds almost too cozy and lovely to be true. I dream of this room and dream of sitting at the desk, lying on the carpet, napping on the sofa, running my finger along the spines of the books on the shelf. It's funny that I've never really thought in terms of a whole house or an apartment--it's always just been this one room. But a house would be too large for little me; a room fits me just fine.

What's your fantasy hide-away?!

Sunday, February 25, 2007

Yarn: Daisy Dukes--Oh, it is BROUGHT!

Well, y'all, the much-anticipated and widely discussed Boston Heat Wave of '07 (Forty degree highs! Meteorologists in a tizzy!) met with an abrupt and untimely finale yesterday when we awoke to a crispy layer of new snow over the still-unmelted varnish of ice on the sidewalks. But it left me with hope. Hope for a New Spring. I have historically been a big proponent of winter and all that is wonderful in the season, but for some reason this year I can't wait for spring. I can't wait for the farmer's market and to plant my seeds. I can't wait to wear all my impractical strappy summer shoes and my favorite skirts. I can't wait to go for runs outside without constantly being on the lookout for patches of ice. Yes, I know we've had a mild winter this year and got off easy with only one big storm (so far), but somehow, that has made me even more antsy. I'm ready to let this winter fade into memory and embrace the sun again.

And with the warm weather on the horizon, it is once again time to begin watching for that elusive and migratory beast: Campusious Hottius (a.k.a. Campus Hotties). Yes, the Engineer will soon be deluged with young hotties walking around campus pursuing such valid trades as sun bathing and too-short-skirt-wearing.
This is what I'm up against:

I am not at all intimidated by these hotties (*cough,cough*...ahem), but I do find them infinitely fascinating. Since he spends most of his days on campus, the Engineer is constantly coming home with stories of Young Hottie sightings, stories that are usually accompanied by much shaking of the head and exclamations of, "NO! You're kidding!" on my part.

Ok, I'm not exactly intimidated by them, and to any young hottie wishing to snag the Engineer, I say "You best bring it!" But still...they do know how to make a gal feel, well, decidedly uncool. It's like these young'uns are constantly saying, "Yeah, I know ugg boots are UGGly and these shorts are too tight and this skirt shows my undies, but I'm so hip that I don't care. What are you, like, twenty-five? You're too old to understand." The aura of coolness oozes from their pores and you feel it in the specific passion of their disregard.

So this year I've decided to take a pro-active approach. It's time to make uncool cool again. It's time to Bring Back the Fashion. Yes, it's time for dai
sy dukes. And not just any daisy dukes, but knitted daisy dukes:

Daisy dukes, y'all! I missed this fashion train wreck back when it was actually "popular," but I feel the time is ripe for a come-back: Knittin' Style! We're talking soft blue denim yarn. We're talking belt loops made of i-cord. Fringe of elegantly unraveled bits of yarn. Oh, how to knit those interior pockets hanging so deliciously below the hem-line? My fingers do tingleth with joy...

I think I will base my pattern on the Sweetheart Shorts from KnitPicks (click HERE), though I'll have to modify it a bit to work in the pockets. Plus I think the waist line will need to be several inches shorter--we need to make sure those belly buttons get their time to shine.

And I know you're all sitting there wondering if I'll actually model my dukes in public once finished. Alls I can say is, all you
Campusious Hottius out there? You best bring it!

Saturday, February 17, 2007

Craft: Yarn! All I really need is Yarn! Yarn! Yarn!

Ok, first and foremost, an update on the Engineer Sweater. It's so almost done, I can taste the finished-blocked-ness of it. I am about a third of the way done with the second sleeve--the final piece of this puzzle. I made the Engineer stand still for me while I pinned the pieces onto him and checked that it was all going to come together ok. He was antsy to get back to his analyses of drag coefficients and centers of gravity, but oh no, sir. I made him stand for a full thirty seconds while a gazed adoringly at how perfectly everything fit and made little cooing sounds while stroking that symmetrical sleeve.

I am impressed, slightly amazed
, and very relieved that it looks like it will fit. In what we'll just call "A Knitter's First-Sweater Mistake," I didn't think to double-check that my gauge was accurate until, oh, I'd knit the entire front piece and half the back. When I did, I realized that my gauge had mysteriously gone from perfect (at the time I knit my swatch) to much much less perfect (at the time when I gazed in horror at my ruler, counting and re-counting my stitches-per-inch). Just imagine--your perfect pattern-matching gauge is 10 stitches per inch, but your reality-sucks gauge is actually closer to 13 stitches per inch. It might not seem like a lot, but those little 3 extra stitches add up and...well, your sweater is going to be too small. It's a terrible, terrible thing to realize, my friends. Lucky for me, the Engineer tends toward the scrawny side and the smallest size in this pattern would probably have ended up being a bit large on him anyway. I did some measurements and enlisted some nearly-forgotten math skills and decided it would *probably* be ok. What's a gal to do but knit onwards?

Now, my energy for this project has been flagging and
I have to admit that tried (unsuccessfully) to persuade the Engineer that one-sleeved sweaters are sure to be all the rage this spring season. He wasn't buying it and is demanding the second sleeve. Fine. This sweater will be finished before the swan boats return to the duck pond at Boston Garden! You're all my witnesses.

Side projects are a necessary and healthy part of any long term project. I give you, the Nose Warmer. I'm knitting two of these handsome warmers for a friend of mine and his son. They knit up quickly and are a good refresher course on short-row shaping--the 'nose' is very similar to turning the heel on a sock. I just need to give these noses some whiskers and attach the head-ties, and they're ready to go warm some noses. For interested parties, the pattern is over at Knitty--click HERE.

A few weeks ago, I placed a big order for yarn from KnitPicks so I could price out the cost for making hats and scarves for Angelina over at Dustpan Ally. I am so excited to have discovered KnitPicks. I've wanted to sell my handknits ever since my family started politely insisting they had enough hats, scarves, gloves, uteruses, penguins, and other knit items to last them quite some time. (Luckily, I've made new friends since who are more than happy to volunteer for handknits. Whew!) But the biggest obstacle to selling handknits is that it's rilly not cost-effective. Yarn is expensive! To recoup both the cost of the yarn and a bit more for my labor, I'd be needing to sell, say, a basic hat for at least $30 to the retailer, and the retailer would then need to mark it up again to make their money. So we're looking at a $50 or $60 handknit ski hat. Loony bins. Who would buy that?

Enter Knitpicks. Their yarn is affordable, very good quality, and available in a lot of different colors, fibers, and weights. It's pretty uniform, so if you're looking for the subtle beauty of hand-dyed or the unique texture of hand-spun, you're not going to find it here. But the yarn is dependable and good. My hope is that I can have a good base of these low-cost goods and eventually have clientele who would want and be able to afford handknits with more luxury yarns. I also hope that if all goes well with selling hats and scarves at Dustpan Ally, craft fairs, and the like, I can also start knitting larger, uniquely designed patterns like sweaters and bags.

For this initial, reality-based trial, I ordered a bunch of skeins of Wool of the Andes--a 100% Peruvian wool. For kicks, I also ordered a few skeins of Andean Silk--a blend of alpaca, silk, and merino wool. It was a bit more expensive, but I was worried that the Wool of the Andes might be too scratchy when knit and wanted to test out a different blend. (Update: I think Wool of the Andes will work just fine. A bit rough, but not at all "grandma sweater" scratchy. No offense, grandmothers out there. But still, you know what I mean.) I chose several colors that I will love to knit with (it's important to love what you're knitting) and that also will blend well together if I want to do any patterns: black, moss green, burgundy, dark blue, and cloud blue. I'm also going to play around with felted flowers, so I got a few skeins in pink, yellow, and orange.

With the scarves, I want to try different stitch patterns and play around with mixing stripes of different colors. One idea to make it a bit more interesting is to weave a strip or two of ribbon down the length of the scarf to add detail and texture. The hats could also have some felted embellishments sewn along the length. I'd like the stocking caps to resemble flapper hats. The felted flowers would be added as removable brooches over the ear, and I'd like to weave ribbon through the brims on a few of the hats by knitting a button-hole eyelets about one inch from the bottom of the hat. I have a couple other ideas for making these otherwise ordinary handknits unique and exciting, but I'm going to wait to talk about them until they're more solid in my head. I'm also planning on selling these under the name "My Three Loves" so am brainstorming ways to combine these loves of mine into a nice little package. Cuz otherwise it would just be kinda confusing and would be better to just sell them under my name. Any thoughts?

And last but not least, just when I thought my week couldn't get any better, I get this lovely package from Angelina.
Months ago, I started coveting her canned goods after a particularly scrumptious post she wrote on canning pears in vanilla syrup. I begged and pleaded and made a nuisance of myself, but Angelina eventually took pity on me and agreed to an exchange of goods: A jar of gorgeous pears in exchange for a comfy scarf done in the style of my laptop cozy. Angelina, the yarn is gorgeous. I stroked it for a full fifteen minutes and daydreamed about what a beautiful scarf it will make. You'll all be happy to know that I've perfected my bubble-making technique since the laptop cozy, and think I've got it down to a science. A full-on felting like I did for the cozy might make this yarn too stiff for a scarf, so I'm going to experiment with some light felting to try and get a fabric that is still supple and scarf-able. Oh, boy I can't wait!

Also can't wait to break into these pears. They have held a place of honor on my counter since their arrival and it makes my mouth water just looking at them.
I have considered and discarded half a dozen different recipes, still looking for just the right one. My most recent thought and the one I think I will ultimately do is a pear tartlet for the Engineer and I. We're celebrating a faux-Valentine's day dinner sometime in the near future (a.k.a. an excuse to go to the fancy grocery store and buy fancy foods!), and I think a pear tartlet would go quite nicely. Or I could just eat them straight from the jar with a spoon while standing at the counter in my pyjamas. That sounds good too.

By the way, if you haven't already discovered it, please do stop by Angelina's store, Dustpan Ally, and check out all the wonderful things she's got going on over there. The actual, real-life store is in McMinnville, Oregon, but if you don't happen to be in the neighborhood, you can also order off the web at http://www.dustpanalley.com/. Angelina is an amazing and creative woman, and I could buy everything in her store in a heartbeat.

Friday, November 10, 2006

Knitting: Laptop Cozy, Take...4?!?!

All right, y'all, I don't think there's anything else I can do to tweak, fiddle, or otherwise alter my little laptop cozy. I think it's actually finished. For reals this time. I ran it through the washer again, sans chickpeas, to try and felt the little baubles. It was a mixed success. Here are the before and after shots:

Here's the before (click on the picture to enlarge):
And here's the after:
The biggest problem was inconsistency in how the different sized baubles felted. The larger ones near the bottom of the bag (like the one in the foreground of the 'after' picture) didn't really felt very much but just kinda...spread out. There are a few other large baubles on the bag that spread out so much that they don't really poof anymore and really just blend in with the background. The baubles in the middle felted the best. They are just a little felty and still have just the right amount of poof:

The smallest baubles near the top of the bag felted well, but were so small that they tended to sink into the fabric of the bag and all but disappear. Meh. So now I know. If you want to felt the bag but not the baubles, go with medium sized baubles with 2-5 chickpeas. If you want baubles with a more felted look, do medium sized baubles with 4-8 chickpeas and then felt the bag a second time.

The bag itself did end up felting more. The fabric will eventually reach a point where it's as felted as it will get and not shrink further. Apparently I was not at that point with my bag. The final bag is a big smaller than I'd hoped for, but still completely serviceable. Again, so now I know. If you want to felt a second time, be sure to stop the felting the bag a little sooner on the first round, take out the chick peas, and then felt again until you're satisfied with the size.

Ok, so now I need some handles on my bag to complete my crafty-metro-girl-on-the-go! ensemble
I was initially nervous about cutting the handles because it's, you know, permanent and all that, but I took a deep breath and did it.

First I laid a piece of clear packing tape across the bag approximately where I was going to cut it. My bag just so happened to be exactly 12 inches across and a 4 inch handle sounded good to me, so I measured 4 inches on either side and two inches from the top, marking this on the tape:
I almost had to close my eyes while I cut through the felt. I was so paranoid that it hadn't felted enough and the whole thing would just start to unravel. (If it's felted properly, the fibers will be so twisted that you can literally cut it like fabric.) :

Voila! Cut felt! You can see here that the felted fabric is really quite thick--that's a good quarter of an inch thick and quite sturdy. Whew.
Now for some action pix! Here's the crafty-metro-girl-on-the-go! ready to swing by the farmer's market or pop by the public library for some good weekend reads:But this is a laptop cozy after all, so does my laptop really fit inside?! I was nervous since the bag felted so much more the second time. While it was drying, I kept stretching it out, trying to get it to keep as large a shape as possible:Ok, it fits sideways, but will it go all the way in?!
Ah, just barely. My laptop fits inside, but I can't pick it up by the handles. But you know what? That's actually just fine because the only time I'm transporting my laptop, I'd actually prefer to carry it in my backpack. This laptop cozy will be an extra protective sleeve inside my bag.

So final verdict? Complete satisfaction, plus inspiration to knit more bags and continue experimenting with the bauble idea. I've been thinking about enhancing the baubles during the initial knitting stage by doing some short row shaping. Not only would this make the bauble more pronounced and less susceptible to flattening out during the second round of felting, but it would enable me to knit the baubles in different colors from the background. Oh, man, I love knitting.

For the evolution on the laptop cozy:
Part I: Click HERE
Part II: Click HERE
Part III: Click HERE

Monday, October 23, 2006

Crafts: Aid-and-Abet Smoker's Gloves

For those of you just joining us, a few weeks ago, a co-worker and friend of mine finagled his way into getting me to make him a pair of customized, extra-warm smoker's gloves. And by "finagle," I mean he offered to buy the yarn and a pair of needles and I was sold. We've all got our weaknesses, ya know?

And the truth is, whether you're a smoker or not, these gloves are mighty handy. It gets gosh durn cold here in Boston. And who suffers most? That's right: our fingers. Even if you or the recipient of your knitted goodies aren't smokers, these mittens are still perfect for grabbing billfolds out of bags, snagging hot pretzels from street vendors, and all your other wintry shenanigans. I'm thinking of knitting myself a pair--once I'm done with all the other projects I've got up in the air, of course. (Of COURSE! Who needs another project? Not me! Hee hee...hee. Oh dear.)

When all was done and knit, my pattern was really nothing like the original Cigar pattern off of which I had been basing my gloves. So I will give a nod to Mr. Cigar and claim this cousin as my own, thanks very much. For all interested parties, here is the Aid-and-Abet Smoker's Gloves pattern and other sundry details. (Apologies in advance if there are formatting errors in this pattern--MS Word and I have been having...issues with each other. If you're interested in knitting this pattern, e-mail me at mythreeloves (at) gmail (dot) com and I'll send it to you in an attachment.)

Oh, and P.S. if you're not really interested in the pattern details, but wanna see some groovy pictures of the gloves, scroll on down to the bottom!

Size
S [M, L]

Finished Measurements:
Width: 3.5 [3.75, 4] inches
Length: 9 [9.5, 10]

Materials:

* 100% light worsted wool; 330 yd/297 m/150g (Shown in Plymouth Indiecita Alpaca (3 skeins)

* 1 US #4 circular needle (or 4 double pointed #4)

* Waste yarn

*Tapestry needle

Gauge:

25 sts/32 rows = 4 inches in stockinette

Pattern Notes:

The only tricky thing with these gloves is keeping the left one and the right one straight while you’re knitting. The right glove will have fingerless index and middle fingers (switch hands if knitting for a left-handed person), and each respective glove will have a row of purled stitches across the back of the hand—this is where you’ll pick up stitches to begin the mitten flaps on each hand. If you confuse the gloves, you’ll end up with a purled row across the palm instead of the back of the hand.

Directions for Gloves (make 2):

Using either the Magic Loop circular knitting method or 4 double pointed needles, CO 36 [40, 44] and divide stitches evenly between needles. Join and begin working in the round.

First Round: [K2, p2] to end.

Repeat round until work measures 2.5 [3, 3.5] inches (about 20 rows [24 rows, 28 rows])

Thumb Gusset

Next round: K all sts.

Increase round: K1, m1, k to end of round, m1.

Repeat these 2 rounds 5 times more. (48 [52, 56] sts)

Next 4 rounds: K 3 rounds. Work one increase round.

Repeat these 4 rounds 1 [2, 3] times more. (52 [58, 64] sts)

Next round: K to last 6 [7, 8] sts, place next 13 [15, 17] sts on waste yarn. (You will pick up these stitches later to make the thumb.)

Next Round: CO 1 st, rejoin round and k all sts. (40 [44, 48] sts)

K 4 more rounds.

Next round:

Right Hand: K 20 [22, 24] sts, p 20 [22, 24] sts (You will pick up these purled stitches later to begin the mitten flap.)

Left Hand: P 20 [22, 24] sts, k 20 [22, 24] sts

Next round: K 3 [4, 5] more rounds.

Next round: K16 [17, 18] sts, place next 8 [10, 11] sts on waste yarn (you’ll pick these up later for the pinky finger), CO 2 sts, rejoin round and k remaining 16 [17, 19] sts.

Next round: K 5 [6, 7] more rounds.

Index Finger

K6 place next 22 [24, 26] sts on waste yarn, CO 3, rejoin round and k to end of round. (15 [15, 16] sts)

Right Hand: K 8 [9, 10] rounds (or until stitching reaches the bottom of the first knuckle). BO very loosely.

Left Hand: K 25 [28, 30] rounds (or until stitching just reaches the tip of the finger or slightly beyond).

Next round: [K1, K2tog] until end of round

Next round: K2tog until end of round. Break yarn leaving a generous tail, draw the tail through the remaining sts, and pull tight.

Middle Finger

Working sts clockwise (so knit stitches face outwards), pick up and k 3 sts in CO sts from Index Finger, pick up and k 5 [5, 6] sts from waste yarn on one side of hand (next to Index Finger), CO 3, pick up and k 5 [6, 6] sts from waste yarn on other side of hand (next to Index Finger). Join to work in the round. (16 [17, 18] sts)

Right Hand: K 9 [10, 11] rounds (or until stitching reaches the bottom of the first knuckle). BO very loosely.

Left Hand: K 30 [33, 35] rounds (or until stitching just reaches the tip of the finger or slightly beyond).

Next round: [K1, K2tog] until end of round

Next round: K2tog until end of round. Break yarn leaving a generous tail, draw the tail through the remaining sts, and pull tight.

Ring Finger

Pick up and k 3 sts in CO sts from Middle Finger, pick up and k remaining 10 [11, 12] sts on waste yarn next to Middle Finger, and join to work in the round. (13 [14, 15] sts)

K 25 [28, 30] rounds (or until stitching just reaches the tip of the finger or slightly beyond).

Next round: [K1, K2tog] until end of round

Next round: K2tog until end of round. Break yarn leaving a generous tail, draw the tail through the remaining sts, and pull tight.

Creepy-looking half-finished glove. I've just picked up the stitches being held for the ring finger. The red and yellow strings are pieces of waste yarn holding the stitches.

Close up of picked-up stitches on the ring finger. The top three stitches were picked up from the cast-on stitches in the middle finger and the bottom stitches were being held on waste yarn. I'm about to knit the first round.

Pinky Finger

Pick up and k 4 sts in the CO next to the held sts for the Pinky Finger, pick up and k 8 [10, 11] sts being held on the waste yarn. (12 [16, 17] sts)

K 18 [20, 22] rounds (or until stitching just reaches the tip of the finger or slightly beyond).

Next round: [K1, K2tog] until end of round

Next round: K2tog until end of round. Break yarn leaving a generous tail, draw the tail through the remaining sts, and pull tight.

Thumb

Pick up and k 3 sts in the CO next to Thumb Gusset, k 13 [15, 17] sts being held on waste yarn. (16 [18, 20] sts)

K 18 [20, 22] rounds (or until stitching just reaches the tip of the finger or slightly beyond).

Next round: [K1, K2tog] until end of round

Next round: K2tog until end of round. Break yarn leaving a generous tail, draw the tail through the remaining sts, and pull tight.

Mitten Flap

Note: Work clockwise so that the knit stitches face outwards. On the right hand, begin picking up purled stitches and begin each following round on the pinky finger side. On the left hand, begin picking up purled stitches and begin each following round on the thumb side.

First row: Pick up and k 20 [22, 24] sts from the purled row across the back of the hand.

CO 21 [23, 25] stitches (these CO sts will be the front of the mitt), and join with the picked-up sts to work in the round. (41 [45, 49] sts)

Next round: K 20 [22, 24] (across back of hand), [k1, p1] next 21 [22, 24] sts to end of round.

Next round: Repeat this round once.

Next round: K all sts a total of 34 [38, 42] more rounds (or until the tip of the mitten is about 4 rows below the tip of the middle finger.)

Half-finished mitten flap on left hand

Half-finished mitten flap showing the join on the back of the hand.

Decrease row: K4, k2tog, and repeat to end of row.

Repeat this decrease round 3 more times.

Decrease row: K3, k2tog, and repeat to end of row

Repeat this decrease round 1 more time.

Finishing: Divide remaining sts between two needles and graft sts together using the kitchener stitch.

(Alternatively, [k2, k2tog] for one more round and then pull taiont>l through the remaining stitches to close.)

Weave in all loose ends.

Finished left-hand glove

Finished left-hand glove with mitten flap, back side.
Finished left-hand glove with mitten flap, palm-side.
Finished right-hand glove

Wednesday, October 04, 2006

Crafts: Smoker Mittens by Request

A month or so ago while at the weekly knitting gathering we have at work, I was knitting away at the laptop cozy when one of my non-knitting co-workers strolled up to us and said, "Ok, so my hands get really cold during the winter when I'm smoking outside, so I'm going to go ahead and need one of you to knit me some gloves with those little flappy mitten things. Ok? Great. Thanks." I gave it some thought and said, "Sure!" I'm not a fan of smoking, but I AM a fan of someone buying me yarn to knit with, and this is what S. promised to do. Everybody wins.

So I found a few mitten and glove patterns, we had a
Very Serious board meeting to go over the options, we haggled, we dealed, we combined features and came up with the Ultimate Smoker's Mitten Glove Thingy. This is essentially based on the Cigar pattern from Knitty.com (click HERE for the pattern), but to minimize the freezing of digits not being used in the act of smoking, the only exposed fingers are the index and middle fingers of the right hand. Both thumbs and all the fingers on the left hand will be covered. Then to even further increase the warmth, I'm going to cover both gloves with a mitten flap. In S.'s words, "This is a smoker's dream come true."

Off we go to Windsor Button to pick out some yarn. After much hemming and hawing on S's part and much calculating of gauges and converting of meters and feet on my part, we finally decided on Plymouth Indiecita Alpaca Knitting Worsted Weight w
ool, which is 100% Peruvian Alpaca. We were both immediately drawn to the softness and warmth potential of this yarn. S. picked out a lovely dusky blue color with a sandy beige for the stripes--the two principle colors of his wardrobe, apparently. The only real disadvantage to this yarn is that it is not superwash, so I reluctantly informed S. that he would have to handwash these gloves or they would felt into doll's gloves. He shrugged and said, "Then I just won't wash them." Problem solved.

Back at the office, we made traces of his hands and I set to work. I had to futz with the needle sizes a bit to get the right gauge, but ultimately settled on a Size 4 (the Cigar pattern calls for a Size 5). I absolutely love knitting with this yarn--it's like knitting with spun cloud. I also decided to knit these using a long circular needle and the "Magic Loop" method rather than double-pointed needles. For an explanation of the Magic Loop, go HERE. So far, I'm about halfway done with the first (right) hand. I decided to do a purled ridge along the back of the hand where I will ultimately attach the mitten flap--picking up stitches has never been my strong point, so I think the purled stitches will help meet me halfway. Here are some pics of the work-in-progress:

Here's the cuff and beginning of the hand. I'm actually a bit further along than this now--I have the first two fingers done and made S. try them on. My fingers were a bit too long, so I had to (grudgingly) take out a few rows and re-do them. But that's a story for another post... P.S. glove fingers are a SNAP to do using the magic loop method. The method takes a bit of practicing and a leap of faith before you get the hang of it, but in my ever so humble opinion, it's well worth it. Not a single a curse word passed my lips whilst knitting the fingers, I do vouch unto you.
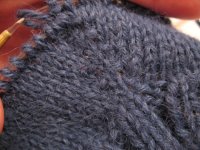
Look at that GORGEOUS thumb gusset (this is where you increase the stitches to make room for the thumb. These stitches will eventually get taken off and stitched separately). You'd think I'd know how to do a decent increase by this point in my knitting career, but I seem to have to learn anew every time. I think I'm finally getting the hang of it though, thanks very much.

I'm heading down to New York this weekend and am looking forward to several hours of knitting and catching up on podcasts on the bus down there. My (perhaps a bit lofty) goal is to have the gloves done by the time I'm back in Boston. Wheee!

Saturday, September 30, 2006

Crafts: Laptop Cozy...The Big Day

[Catch up on the drama of Parts I and II of this Laptop Cozy series HERE--Part I and HERE--Part II.]

It's been a long, hard road, my friends. The cozy is complete. Ends are all woven in. Garbanzo beans are all tucked into little pouches and lovingly wrapped in cut-up zip lock bags. It's been through the washer and the ringer to boot. Results are in...

But FIRST, for a bit of delayed gratification, a little lesson on felting! True, honest-to-goodness felting is a bit different than the kind of felting I'm talking about. Felting, like Fedora hat felting, is very similar to making hand-made paper. Basically, it is done by taking carded, unspun wool (also called roving), getting it wet, and placing it in layers into some sort of mold. As the wet wool is agitated, the little fibers will tangle with each other, creating a solid, tight mass. Let it dry and you have a solid piece of fabric that can be molded into something like a hat or used in kindergarden dioramas of cave-man dwellings.

When we talk about felting with knitting, it's essentially the same process, but using spun and knitted fiber. Instead of going at it free form, we knit a very big, loose item, get it wet, and agitate it to get the fibers to tangle together. The piece will 'shrink' and become a thicker, more solid piece of fabric--exactly what happens when you accidentally throw your favorite winter sweater in the wash. (Interestingly enough, it's the washing process, NOT the drying process that causes your favorite sweater to felt and shrink.) Yarns made of any kind of animal fibers (like wool) and that have not been pre-treated to be machine washable ("superwash") can be felted. Yarns made of plant fibers like cotton, flax, or bamboo don't felt very well, though I've heard of felting experiments combining a thread of plant fiber and a thread of animal fiber. If you're planning a felting project, it's really really key to knit and felt a sample swatch. Every yarn felts a little differently and swatching is crucial to determine the gauge for your original, pre-felted piece. In general, a piece of knitting will felt (shrink) more vertically (top to bottom) than horizontally (left to right).

To felt an item, first knit something rilly rilly big on relatively large needles. The looser you knit, the more the piece will felt because there will be more room to agitate those fibers. If the knitting is tight, there will be less agitation and less felting. Put the finished piece in a zippered bag (like a pillow case)--this will prevent your washing machine from getting clogged with little rats of loose fiber. Throw this in your washing machine along with a couple of pairs of old jeans (NOT TOWELS) and about a tablespoon of detergent (any kind). Put your washing machine on the lowest load setting and the hottest water setting. Let 'er rip! Check your piece every five minutes to see how the felting is coming along. You can keep repeating the first part of the wash cycle as many times as you need to. When it's the size you want, take it out of the washing machine, let the washing machine run until the cold water part of the cycle, and dunk your piece back in to get out the last traces of detergent. Many places advocate removing your piece before the spin cycle as sometimes spinning it can leave wrinkles in the fiber, but I've never had this problem. In general, I feel the risk is worth it to get out as much excess water as possible. All that's left to do is block your piece and let it dry. There's a good article about felting on Knitty.com: http://knitty.com/ISSUEwinter03/FEATfelthis.html
.

Ok, blah blah blah, give us the good stuff! My friends, wait no longer. (P.S. Click on any of the pictures to see them larger--some of the detail is amazing, but hard to see in the smaller size.)

This is the finished, pre-felted laptop cozy. My idea was to have a fewer number of large nubs at the bottom and gradually move to more, smaller nubs at the top. The large nubs have about ten garbanzo beans stuffed in them and the smallest nubs have three. I ended up using cut squares of old zip lock bags instead of simple plastic wrap because I was worried the plastic wrap might actually melt in the hot water and figured the zip lock bags would be more durable. I used cheapo rubber hair bands to secure the nubs. Pre-felted size was about 18.5x22 inches.

And it felted beautifully. The fabric is really seamless and tight with barely a trace of the original stitches. You can already see in the pictures above that the fabric in the nubs didn't felt at all. Boy was I nervous to take them off, though!

And, ta-DA! There are the nubs! Don't they look like little cheese balls you want to pick up and pop in your mouth? Below is the full piece being blocked, and then progressively closer details of the nubs. The final piece measures about 11x14 inches.
When dry, those little nubby baubles pop right up. Of course now that it's all done with, I'm already wishing I'd done more nubs and in a different arrangement, but then again, because the pattern overestimated the amount of yarn needed, I do have enough left over for another entire bag...

And here's another thing--maybe y'all can help me decide:
When I first took the plastic wrap off, I thought the nubs were cool, but wasn't sure I really liked the un-felted nub look for this particular piece. But now that I've been looking at it for a few days, I'm torn. I'm thinking about throwing the bag into the washer to felt again, this time withOUT any covering on the nubs. My idea is that I would felt it just enough so that the nubs softened and felted a bit, but were still obviously, well, nubs. I'm also kinda tempted to do it just as an experiment to see what it looks like (since we've already determined I'll soon be doing another bag, obviously). What do you think, oh ye sage crafters and opinion-holders?

Sunday, September 24, 2006

Crafts: Laptop Cozy Update

The hour is nigh upon us. The laptop cozy hovers on the brink of completedness. I debated waiting to post anything until it was actually 100% and truly finished, but where's the fun in that? Plus, I think I might need a bit of hand holding through the potential disaster I have created.

So, the laptop cozy is probably one of the simplest patterns in existence. It's so easy that I have absolutely no plagiarism hang-ups about sharing it with you (though the original pattern can be found in Alterknits by Leigh Radford): cast on 65 (80, 80) [for small (medium, large)] and work in stockinette stitch until the piece measures 44 (50.5, 57.5) inches from the beginning. Bind off and fold the piece in half. The folded edge becomes one side of the bag. Sew the bottom and the other side shut using your favorite fancy sewing method. Weave in loose ends. Felt. Use scissors to cut handles. Presto chango, laptop cozy!

I made the small size bag, which calls for two skeins each in three colors of Lamb's Pride Worsted if you want stripes, or six skeins in a single color.
First off, I didn't use anywhere NEAR this much yarn. In fact, I only used three skeins and still had some left over. I was a bit disgruntled about this because, as you may recall from my earlier post, I actually had three skeins already, but since the pattern called for six, I made a public display of myself by picking up the extra skeins from my local yarn store while out on a run. Anywho, at least the experience still makes for a good "yarn" (oh! oh! Ouch!).

I liked the striping pattern in the book, so decided to follow it instead of making up my own. The striped ranged in width from two rows to seven rows. Since the final piece was going to measure 44 inches, this translates into a lot of striping, my friends. It didn't occur to me until, oh, about 3/4 of the way through that this also translates into a lot of loose ends. That I would have to weave in. Later. Dear Lord. I smacked myself on the head and said, "This is what INTARSIA is for!" Intarsia is where you essentially have two balls of each color, one for each side of the piece. You end up not having any loose ends to weave in. (see more thorough explanations here and here.) Since intarsia is usually used when you're knitting some sort of complicated pattern like argyle or letters, it didn't occur to me to use it here (although now I'm wondering if this is why the pattern calls for six skeins when only three get used? Still seems a bit excessive, even so). Alas, my intarsia-revelation was too late to be of real use for me, but please learn from my experience. The idea of weaving those ends in was so effing annoying that this project was almost relegated to the "I can't deal with you until at least several months from now" pile.
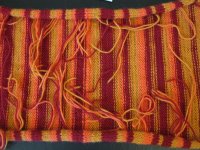
Look at all those ends! Bleck!

In the end, rather than actually weaving in all the ends, I decided to do a whip stitch along the bottom edge and a mattress stitch across the top (cu
z it's prettier and this is the part that will be seen), and gather in the ends as I go. I'm not sure how well this will felt, but it seemed preferable to weaving them all in. Fingers crossed.

Bottom ends woven in with a whip stitch
Top ends woven in--I think this is called a mattress stitch

Ok, at this point a sane person would be all hunky dory and ready for a good afternoon of old fashioned felting. But I kept looking at the finished, un-felted bag and thinking, "You know? I think I could do something more here." That's when I remembered a scarf that my mom once described seeing at an art fair she went to. It was a basic felted scarf, but there were all sorts of little...well...bubbles all over it. The way Mom described it, I pictured a clean piece of felted knit fabric, but with the kind of nubs you'd get if you were doing short-row shaping--like the heel of a sock. Mom said it was one of the most incredible (and expensive--$350 for a scarf!?!) things she'd ever seen, and she asked the artist how she'd done it. The artist said she took a piece of knitting that she was going to felt and tied bundles of garbanzo beans into the fabric, covered it with plastic wrap, and then proceeded with the felting. This way, the regular fabric felts, but everything covered by the plastic doesn't.

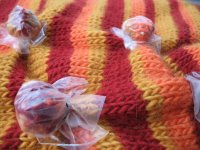
I've been eager to try this technique out for myself ever since Mom described it to me, but never had quite the right project. Until now! Yessiree, we're gonna get cre-AH-tive over here in Boston! Below is a picture of what the nubs look like so far. I gathered a bit of the fabric, popped in a few garbanzo beans, and secured a piece of plastic wrap over the whole nub with hair bands. I'm going to finish tying them up during the Patriots game tonight (cuz what's football for if not guaranteed, uninterrupted knitting time?), and then felt them tomorrow. Wheeee!