Crafts: Dying T-Shirts
A little background: Last year for Christmas, a friend gave me a copy of Alterknits by Leigh Radford. This book is full of knitting inspiration--unusual projects, gorgeous full-color photos (including shots of my former city of residence:
Setback Numero Uno: Alas, 26 adult large or extra large t-shirts were not to be had. That's a lot of shirts, my friends, even for a pack rat like me. No problem--I decided to put up flyers around my office asking people for t-shirt donations. Interest was expressed, eye brows were raised, my status of resident office crazy person was reaffirmed, and the donations trickled slowly in. Here follows One Girl’s T-Shirt Dying Story:
The dyes we used came from Dharma Trading Company. This is the company My Mom the Artist has always used, and my teenage tie-dye wardrobe can definitely attest that their colors truly are as brilliant and permanent as advertised. If you want to undertake any dying project, I recommend using their products: http://www.dharmatrading.com/ and http://www.dharmatrading.com/html/eng/3796-AA.shtml?lnav=dyes.html.
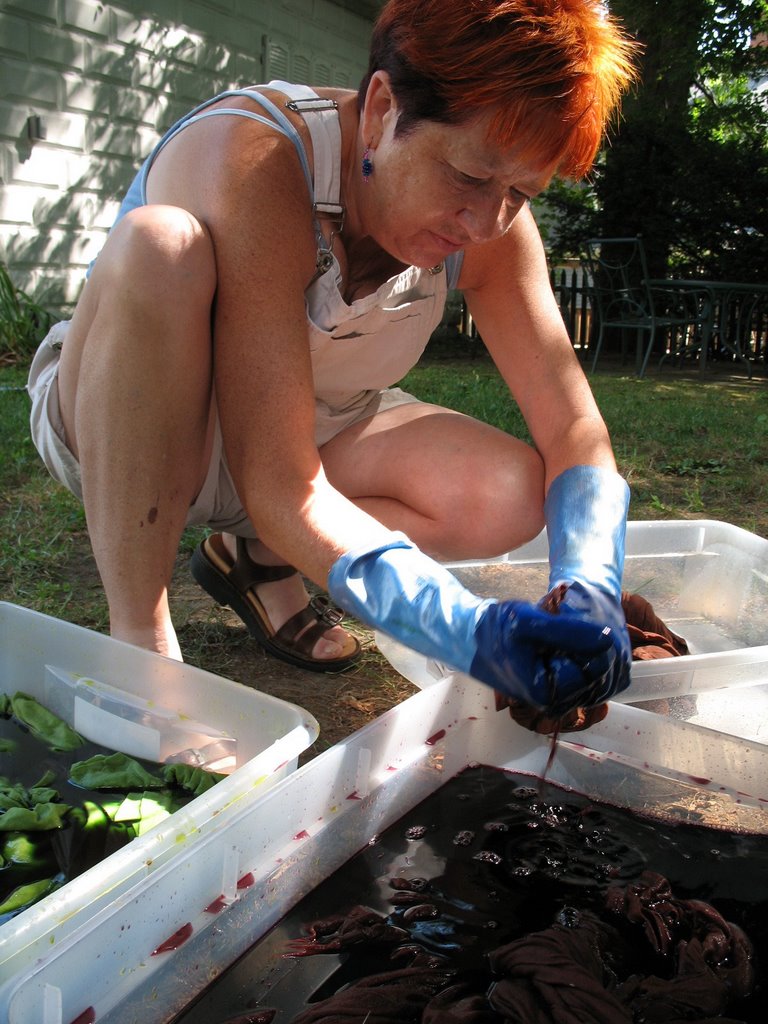
Meet the Dying Crew: My lovely mom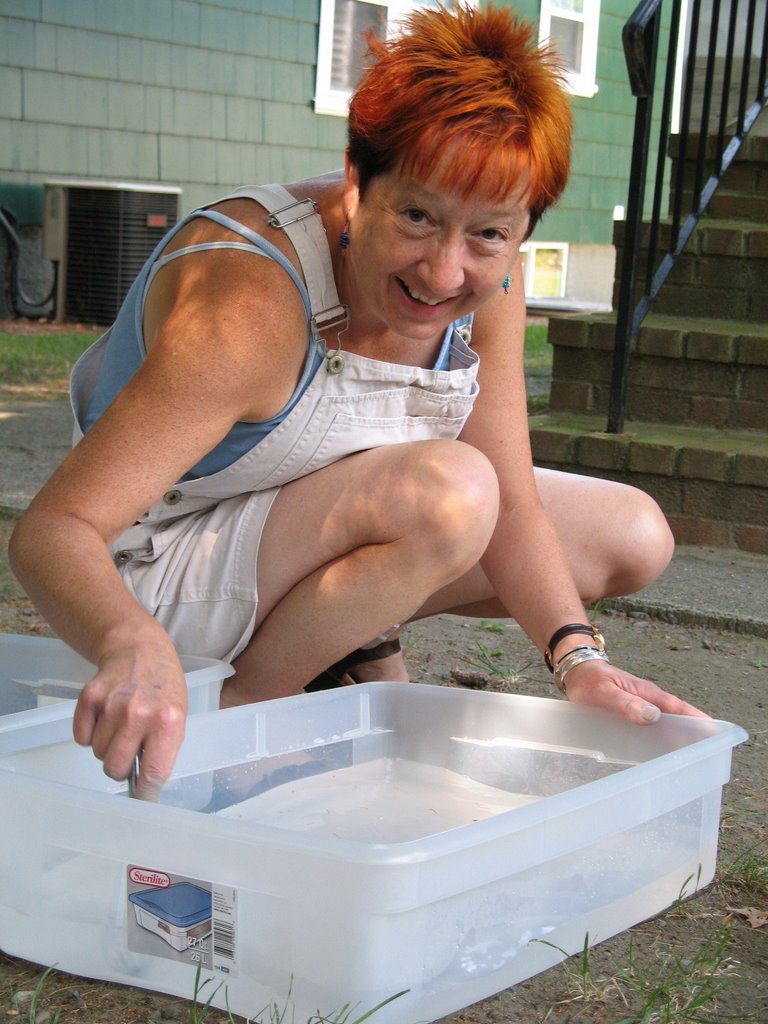 and lovely aunt
 . Their help and guidance was much appreciated. In fact, if it weren’t for my mom motivating me to do this and carting her left-over dye from
With our bounty of white t-shirts, we decided to mix up several vats of dye: lavender, turquoise, chartreuse, and chocolate brown. A vat of dye is essentially a proportion of powder dye, warm water, and LOTS of plain table salt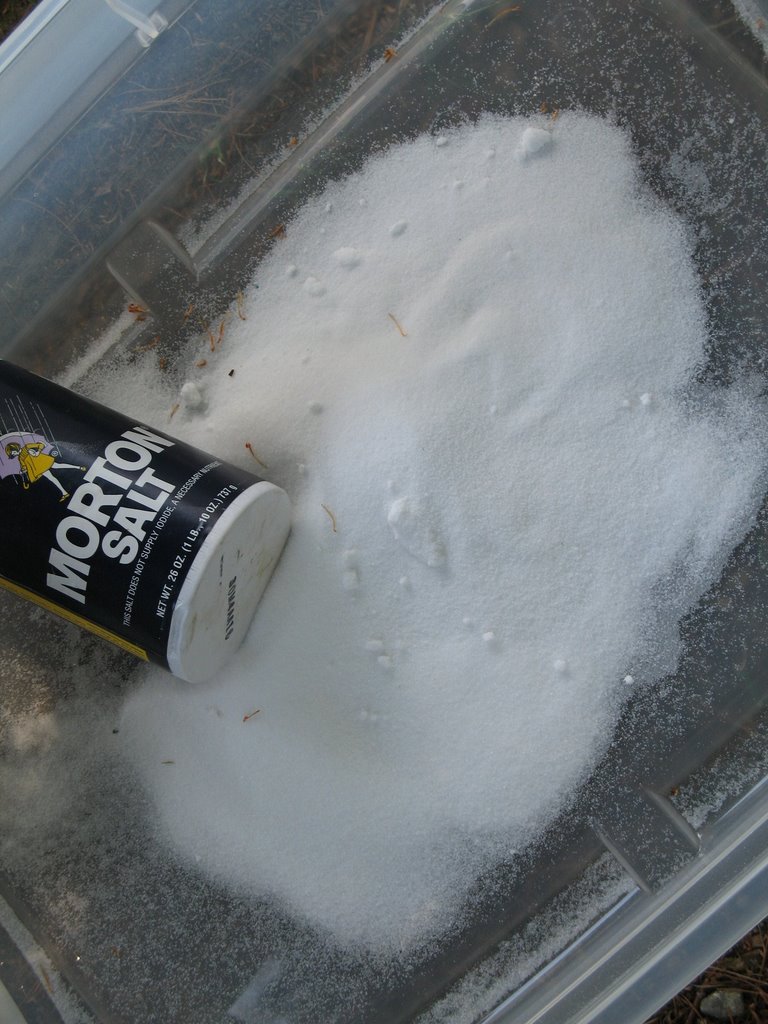 . Soda ash
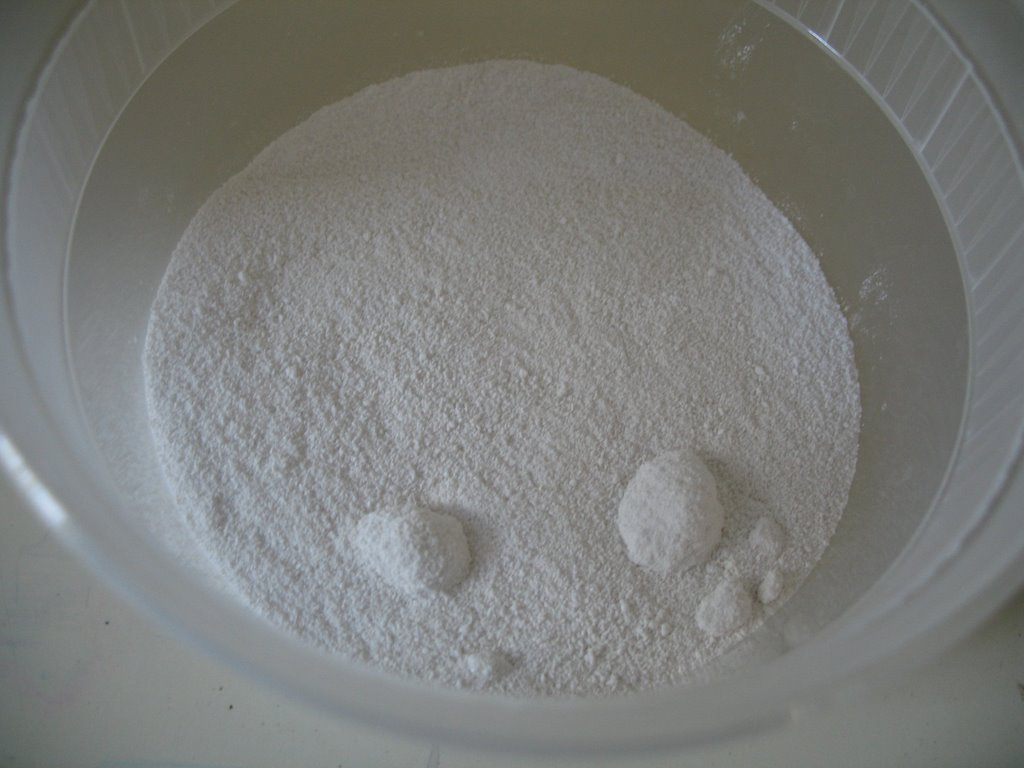 is then added later in the process. Soda ash fixes the dye into the fabric so it doesn’t wash out or fade. How much of each depends on how many pounds of dry fabric you want to dye (instructions and details for the exact amounts of ingredients will come with your dye order.)
 1. Dissolve the salt in warm water.
 2. Dissolve the powder dye in a small amount of warm water and then mix it into the larger vat of salt water.
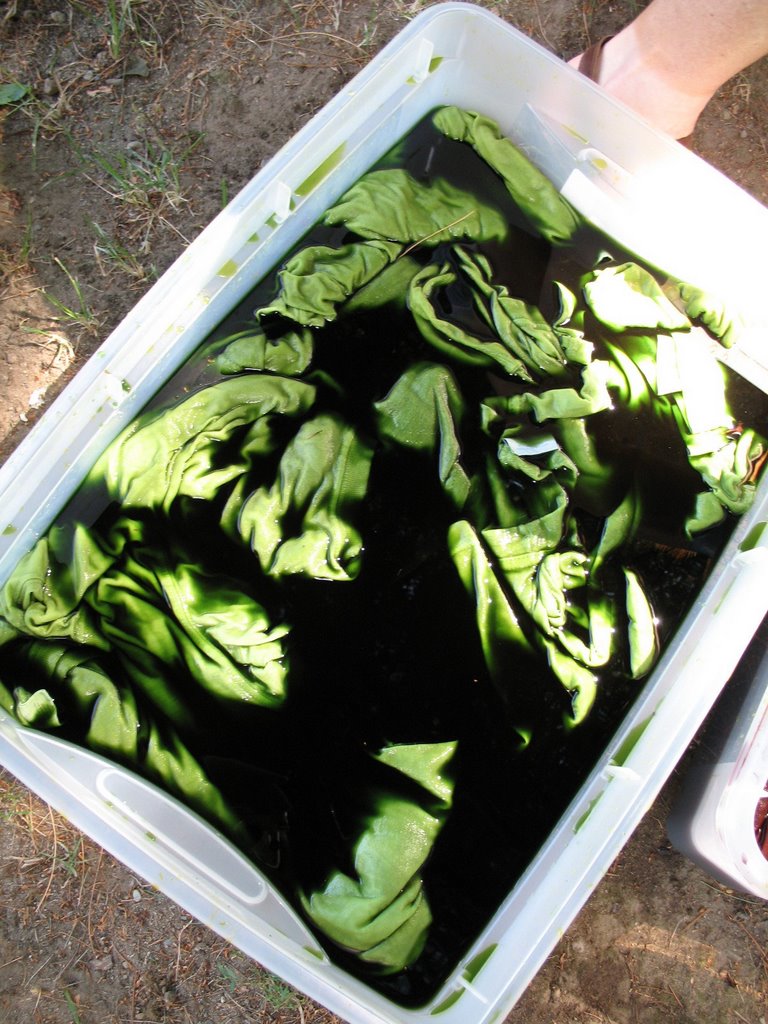 3. Add fabric to vat and allow to soak for about 20 minutes. During this time, the fiber is absorbing all the dye it can. It’s important for the fabric to be completely bone-dry so that it can absorb as much as it can.
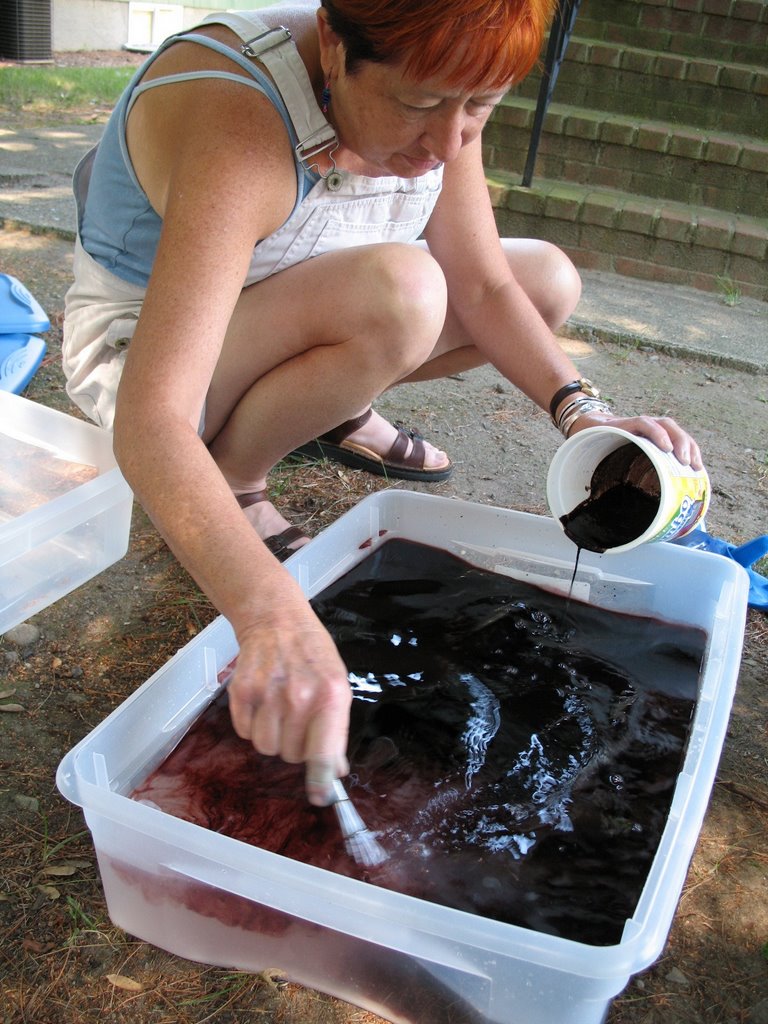
4. Dissolve soda ash in a small amount of very hot water and then add it slowly to the vat of fabric and dye.
 5. Stir frequently and allow to soak for 30 minutes to an hour.
 6. Squeeze excess water from fabric.
 7. Rinse with cold water to remove any excess dye. (Do this a few times—the water won’t run clear, but it should be lighter in color.)
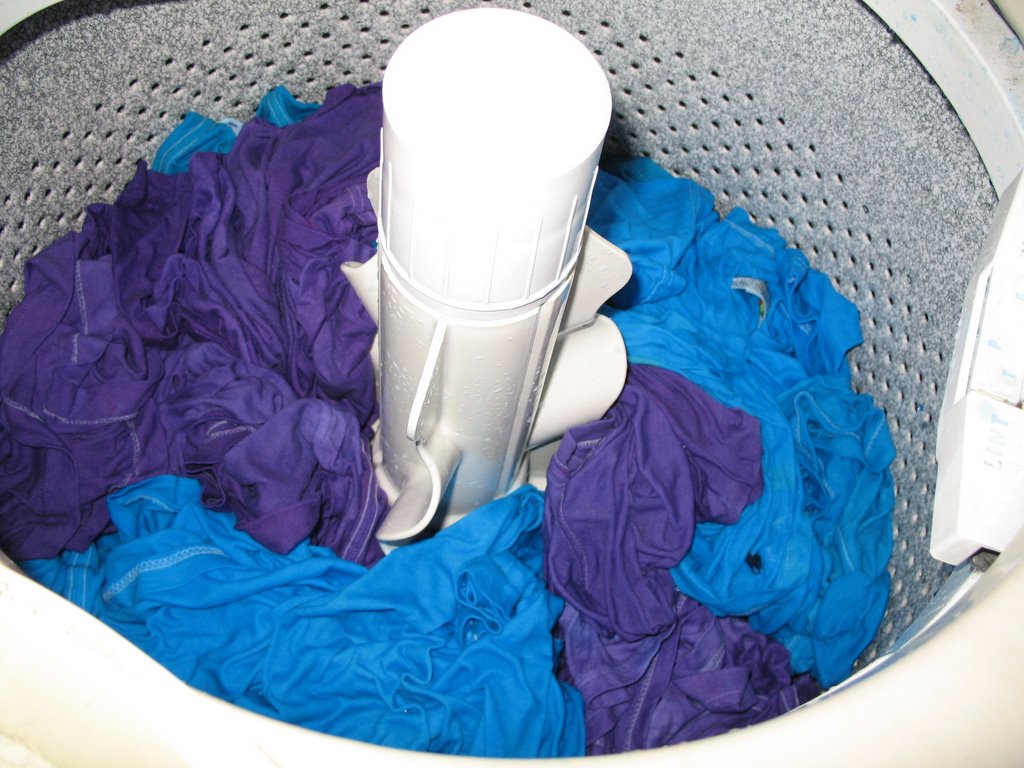 8. Wash fabric with detergent in hot water in a washing machine.
In the first batch, the lavender, turquoise, and chartreuse came out wonderfully. The brown faded to a rather unpleasant dirt color, so we decided to re-dye it. We also had a lot more white shirts left over, so we decided to mix some new powder dye into the vats already made to make some new colors. Into the turquoise, we mixed royal purple and made a nice deep violet. Into the lavender, we mixed hot pink and made a warm maroon. Into the chartreuse, we mixed emerald green and made a lime-green. The colors in this second round didn’t ‘take’ quite as well to the fabric and faded during washing. Mom and I realized that this was probably because the soda ash that was already in the dye from the first round prevented the new dye from being adequately absorbed and fixed into the fabric. Ah, well. Live and learn.
Next step is to cut all these t-shirts into ribbons. I think this calls for a Harry Potter movie marathon, fo shizzle. "I crave the result...I crave the result...I crave the result..."

3 comments:
Wow, what an amazing project. I can't wait to see where this goes and the end result. Would love to see all those T-shirts cut into ribbons, like a fabric compost pile!
Am happy to be your "blog friend", haven't made it to the sourdough yet, but will be canning apples soon in various forms and tasty treasures.
Missy Emma!!! Lovely to see the women in your life bonding over the craft! I'll be checking in to see how your project develops (and perhaps get inspiration to start my knitted log cabin rug).
I like the way you describe your project, it's really inspiring.
It will be really cool to see the next few steps in the process.
Thanks for sharing!
I'm from Taiwan and I was looking for some dyeing techniques and your blog helped me a lot.
Post a Comment