Showing posts with label Bread. Show all posts

Sunday, January 27, 2008

Mini-Calzones

I had some leftover brisket wallowing in my fridge on last week and got it in my head to make some mini-calzones over the weekend. I thought I'd add some caramelized onions and roasted red peppers, but got stumped on the cheese. I stood in front of the cheese fridge at Trader Joe's for at least fifteen minutes picking up one cheese and then another, squinting my eyes and tasting various imaginary flavor combinations in my mouth. Goat cheese? No.... Sharp cheddar? Possibly... Maybe with some BBQ sauce? Sigh.... And then my hand wavered over some smoked gouda. I can't remember the last time I had gouda. No reason, really, I just...haven't.

And standing there imaging how gouda would taste with my smoky brisket etc. etc., I remembered my dad coming home from work with a shopping bag, all excited and jittery as he pulled out a round of smoked gouda and some tart apples. I was probably fourteen or fifteen at the time, and I just remember how happy he was as he cut up the wedges of apples and arranged them around some slices of gouda. "Here," he said, pushing the plate toward me, "Try this!" And with a fair bit of curious trepidation (likely disguised as teenage sass), I mirrored him as he took a slice of apple and layered on a slice of gouda. I bit off a corner and oh my! Good stuff!

I think this was the first time that I realized that cheese could be something other than what was sprinkled over pasta. It could be something more. It could transform my quiet, reserved father into a euphoric, cheese-pushing gourmand. That's some powerful stuff, right there.

And that's how I ended up with smoked gouda in my calzones. Not precisely a 'traditional' filling for calzones, true, but then I've never exactly been one to stand on formalities. I think my calzones and I will be juuuust fine.

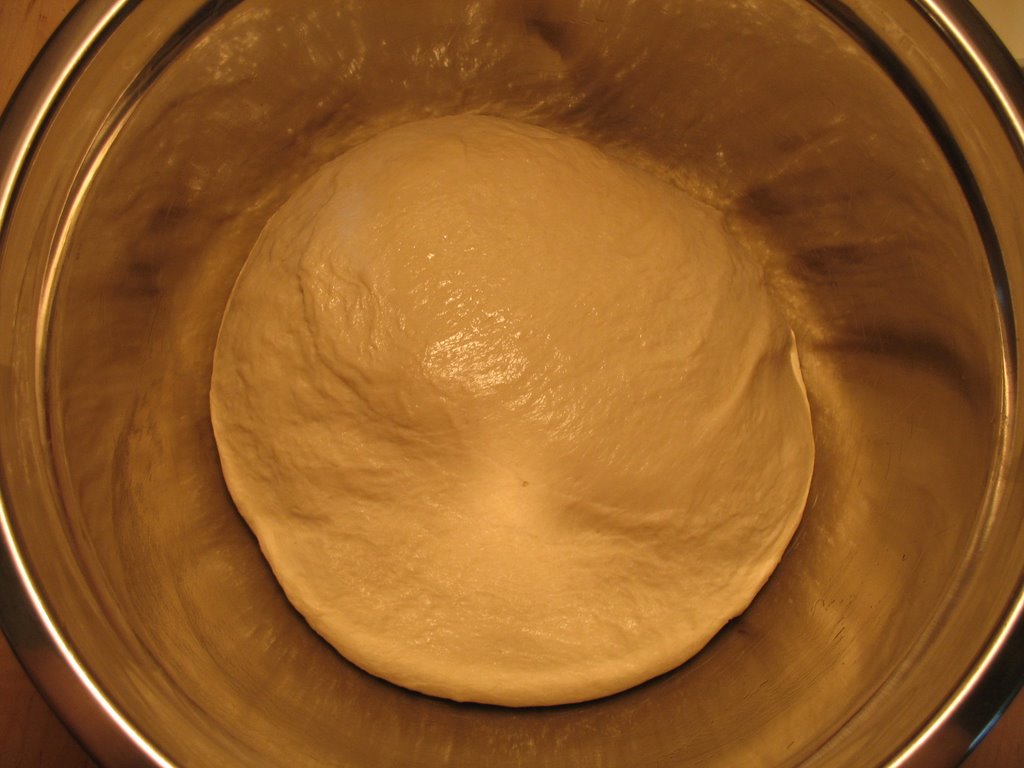
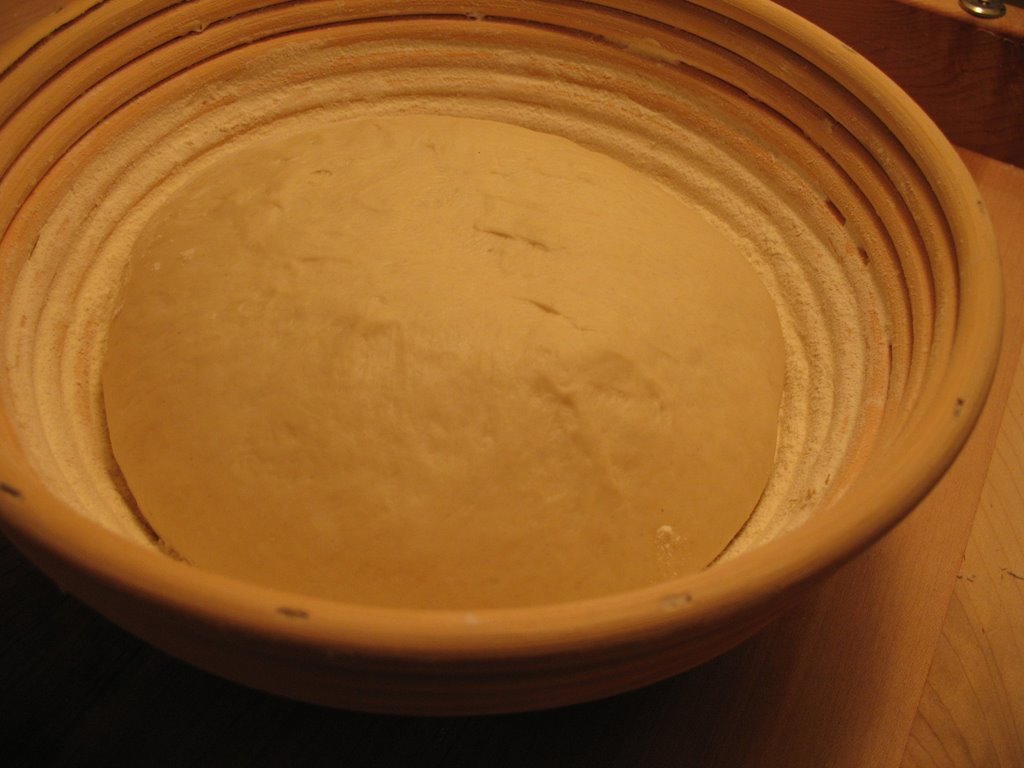
I started making these mini-calzones a while back as part of my open-ended quest to find healthy, better-tasting, freezable, and easily-transportable lunch alternatives instead of things like Hot Pockets, Cup-o-Noodles, Lean Cuisines, and their ilk. It took a while to find a crust that fit the 'healthy' profile, until it dawned on me
(like a skillet to the forehead) to use my thin-crust pizza recipe. Duh. That dough is perfect for this--thin, but chewy; easy to make and healthy to boot; just enough flavor to give you a nice bread-y background but not so much that it steals the show. Splitting the dough into eight portions seems to give just the right amount of dough for a six-inch calzone. Poi-fect.

The combinations for fillings are really endless. I usually do a medley of meat, cheese, and sauteed veggies--whatever I have on hand.
Keep in mind that they are mini-calzones, after all, so there's a limit to what you can stuff in them. I usually weigh out a half-ounce of meat, a half-ounce of cheese, and then layer on as many veggies as I think will fit. Some combos I've done in the past are spicy pulled pork/goat cheese/caramelized onions and red peppers, sausage/cheddar/veggies, eggplant/kalamata olives/feta. You can also throw in a sauce of your choice--BBQ sauce works really well and a dab of tomato sauce is never out of place. Obviously, these calzones can be entirely vegetarian--even vegan, since the crust doesn't have any dairy! Woot!

The only drawback is that these are pretty labor-intensive to make, so I usually set aside an afternoon, make a double-batch of dough and keep on trucking until my fillings run out. I have found that it helps to lay out little piles of fillings in a row so you can just scoop and fold, scoop and fold.

Once they're cool, I wrap them up in saran wrap and throw them in a zip-lock bag in the freezer. A few minutes in the microwave gets the cheese melty and all the insides piping hot.

~~~
Mini-Calzones
(makes 8 with one batch of dough)

1 batch of thin-crust pizza dough (Recipe HERE)
4 ounces of cooked meat, separated into 8 half-ounce piles
4 ounces of cheese, separated into 8 half-ounce piles
sauteed veggies of your choice (onions, green or red peppers, eggplant, zucchini, mushrooms, etc.)

Pre-heat oven to 475-degrees F.

If you haven't already done so, cook your meat and set it aside to cool. Then sautee your veggies in a little olive oil until they are mostly cooked through and set them aside to cool. It's important to cook these ahead of time because they won't cook all the way through in the oven. Also, if you add the veggies raw, they will likely release a lot of liquid in the oven and you'll get mushy calzones.

Find a bowl in your kitchen that is about 6 inches across (in diameter). Use this bowl as a guide to trace 8 circles onto parchment paper. Cut the parchment into 8 pieces with once circle on each piece of parchment. Flip the parchment upside down so the actual pencil/pen mark of the circle is against the counter and your food-surface is clean.

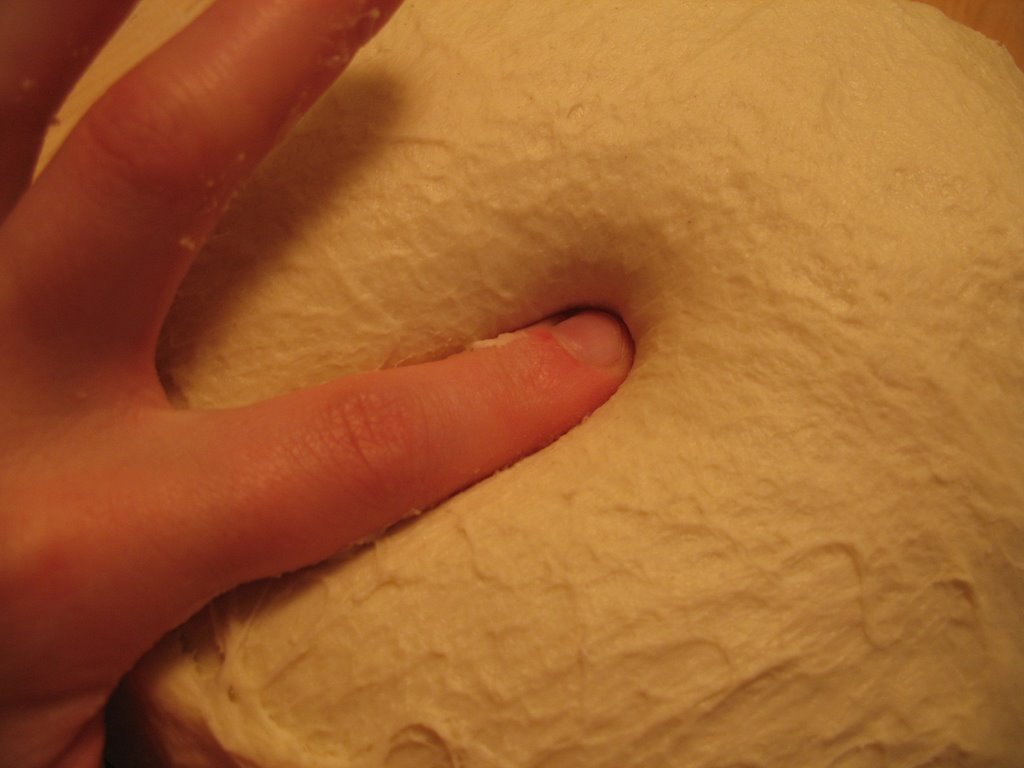
Cut the pizza dough into 8 equal pieces. Place one piece on a piece of parchment paper in the middle of the circle. Press down on the center of the dough and then use the heel of your hand to gently push outward on all sides until you've filled the circle. The dough will be about 1/8 i
nch thick. Repeat with the remaining pieces of dough and parchment.
Cover each rolled-out circle as you finished with saran wrap or an upside down bowl to keep it from drying out while you finish the rest of the circles.

Place the meat and cheese in the center of the dough and layer on as many veggies as you think will fit (you'll get a feel for it after making one or two). Leave about 3/4 - 1 inch of space around the edge.
Lift one side of the dough over onto itself and pinch the dough together in the middle. Pinch all the dough to one side closed and then go back and pinch the other side closed, forming a half-moon. I find it easiest to do this if I pick up the calzone and hold it upright in my left hand like a taco, and then I use the fingers of my right hand to pinch the rest of the dough closed. You can poke any errant bits of filling back inside. Repeat with remaining calzones. (Note--the parchment paper will continue sticking to the dough and that's fine! When the calzone bakes, the parchment will gradually un-stick itself.)
Arrange as many calzones as will fit on a sheet pan. Just before baking, use a paring knife to cut three steam vents in the top of the calzone--go right through the parchment paper. Bake the calzones for five minutes and then flip them over. Bake for another 5 minutes and flip them over again. Bake for another 3-5 minutes until the calzones are golden and browned in spots. This whole baking process takes about 15 minutes in my oven, but it may take shorter or longer in yours. Since the filling is already cooked, you're really just looking for the crust to be a nice browned color. If the edges start to char, that's a sign that they're likely done cooking.

Remove calzones to a cooling rack and bake off any remaining calzones. Once they're completely cool, wrap each calzone in plastic wrap and keep them in a ziplock bag in the freezer. They'll last in there for a few months (if you don't manage to eat them all first...)

I don't get too worried about the calzones splitting open, honestly. These are more functional than beautiful and I'm usually the only customer I have to please! Once they're cool, I tuck any tumbling bits of filling back into the shell and wrap it all up in saran wrap so it's a tidy package for grabbing in the morning and sticking in my lunch bag.

Re-heat for 1-3 minutes on High. I've also eaten them cold (like cold pizza) if they've been thawing in the office fridge for a few hours.

For interested parties and Weight-Watchers folks: The calzone shell alone is 2 points. A half-ounce (14 g) of meat is usually 1-2 points, and a half-ounce (14 g) of cheese is also usually 1-2 points. If I only use a dab of olive oil for the veggies, I usually count them as zero points. So! One calzone is usually 4-6 points or so. Not too shabby for a meal-on-the-go!


Tuesday, December 18, 2007

It's a Bread Eat Bread World

If you've ever wondered what happens if you forget to slash the top of your bread, this is it. Hard to tell if the loaf is eating itself or giving birth to a Brave New Loaf. Either way, it ain't pretty.

But golly GEE, it tastes good! This is the second loaf from the Simple Crispy Bread recipe I made last Thursday, baked after lazing about (I mean, fermenting) in the fridge for three days. The taste was much the same (yeasty and salty--in a good way), but the crumb and texture were very different. In the first loaf, the crumb was pretty tight with a lot of small, evenly distributed holes. In the second loaf, the crumb was looser with some bigger holes here and there, much more like a traditional hearth loaf. The texture was also very chewy and airy--a seeming contradiction in terms, but actually so delicious and adept at holding pockets of melted butter that we ate the entire loaf before I thought to take a picture to show you one of the slices. Oops!

Sunday, December 16, 2007

Simple Crispy (No-Knead!) Loaf

This past Thursday, I left my cube to get something at the printer and by the time I walked back (muttering to myself because I'd ALREADY found a typo I'd have to fix), the sky out the window was full of thick, fat flakes. Our offices closed about an hour after that. I was supposed to have class later, but honestly? I just wasn't feelin' it. What I WAS feelin' was going home, curling up on the couch with some knitting and watching the season premiere of "Crowned" taped the night before. And so I sat at my computer in my empty office pressing the refresh button on my internet browser until ("C'mon! C'mon!") the note went up on the school website that classes were canceled. YES!

Three full trains passed through the station before one came with enough space for me to smoosh myself, my two bags of shtuff, and my equipment roll into the crevice between the first step and the door. Two hours later, I finally got off the train and forged the last stretch of the journey on foot because I could walk faster than the traffic. It was cumbersome with the bags, but I actually think they made good ballast to keep me afloat in the snow. And though I managed to keep my footing the whole way, I like to think they would have cushioned my fall. Except for my equipment roll. That would have...yeah, not the equipment roll.

So after I thawed out with a glass of wine and some mother-daughter pageant action, what did I do with my evening off from baking class? Why, I BAKED of course! I mean DUH! What ELSE would I be doing with a night off from school?!

Ahem.

I first saw this recipe for "Simple Crusty Bread" in the New York Times a few weeks ago. It pledged to be an alternative to the No-Knead Bread of recent fame, but even simpler! quicker! and more flavorful! It was this last promise that really caught my eye since, for me, the lackluster flavor of the No-Knead Bread outweighed it's convenience. I was also intrigued by the fact that one recipe made four loaves and the dough would keep in the fridge for up to two weeks, allowing you to lob off a piece whenever the mood struck. In general a slow rise will give you a more complex flavor and better texture, and a 'retarded' or 'delayed fermentation' rise in the fridge will result in a slightly sweet bread, like the slackdough breads I was working on a few summers ago--HERE. I baked off one loaf right away and stored the other three in the fridge for taste-tests over the next few weeks.

Dough just after combining ingredients

My initial reaction to this bread is....(drumroll!)....pleasant surprise. The just-mixed dough was stiff and tacky, and I had very low expectations of being able to shape it into anything resembling loaf. But somewhere over the next two hours of rising, it really pulled itself together. With only a light dusting of flour, I was able to handle it relatively easily and shape it into a nice little ball. I decided to rest my dough on the countertop instead of on the peel as the recipe suggests since I've had a few too many experiences of resting the dough on the peel, going to shuffle it loving into the oven, and having it stick to the peel and turn out looking like THIS despite a generous dusting of cornmeal. I was able to pick the ball up off the counter and plop it onto my peel without too much fuss. It stuck a bit, but then willingly slid out onto the pizza stone. It didn't rise very much in the oven, but it did keep it's nice round shape without deflating at all--an amazing feat for any loaf, if I do say so myself.

The dough after the 2-hour rise

The crust browned very evenly and crackled when I cut into it--thumbs up for that. The crumb was tight and moist with a few larger holes here and there--a second thumbs up. And the taste? Decent! Not as much flavor as a traditionally kneaded bread, but also not too shabby. It's a little salty, but I'm a fan of salt so no complaints here. It even past the second-day-toast-test with flying colors. I also like that it's a smaller loaf, which means that I have a chance of eating it before it goes completely stale or moldy.

I'm really excited to try the other loaves as the dough ages over the next few weeks. Even if there's not much flavor development, I think this is still my new standby Lazy Girl's Loaf!


Shaped loaf

This is what the underside of the loaf looks like after you stretch the top

~~~~~~

Lazy Girl's Loaf (a.k.a. Simple Crusty Bread)
Recipe alone: http://www.nytimes.com/2007/11/21/dining/211brex.html
Full article: http://query.nytimes.com/gst/fullpage.html?res=9C0DEEDB153FF932A15752C1A9619C8B63

Adapted from "Artisan Bread in Five Minutes a Day," by Jeff Hertzberg
and Zoë François (Thomas Dunne Books, 2007)

Time: About 45 minutes plus about 3 hours' resting and rising

1 1/2 tablespoons yeast
1 1/2 tablespoons kosher salt (If you don't like salty, try cutting this down to 1 Tablespoon)
6 1/2 cups unbleached, all-purpose flour, more for dusting dough
Cornmeal.

1. In a large bowl or plastic container, mix yeast and salt into 3
cups lukewarm water (about 100 degrees). Stir in flour, mixing until
there are no dry patches. Dough will be quite loose. Cover, but not
with an airtight lid. Let dough rise at room temperature 2 hours (or
up to 5 hours).

2. Bake at this point or refrigerate, covered, for as long as two
weeks. When ready to bake, sprinkle a little flour on dough and cut
off a grapefruit-size piece with serrated knife. Turn dough in hands
to lightly stretch surface, creating a rounded top and a lumpy bottom.
Put dough on pizza peel sprinkled with cornmeal; let rest 40 minutes.
Repeat with remaining dough or refrigerate it.

3. Place broiler pan on bottom of oven. Place baking stone on middle
rack and turn oven to 450 degrees; heat stone at that temperature for
20 minutes.

4. Dust dough with flour, slash top with serrated or very sharp knife
three times. Slide onto stone. Pour one cup hot water into broiler pan
and shut oven quickly to trap steam. Bake until well browned, about 30
minutes. Cool completely.

Yield: 4 loaves.

Variation: If not using stone, stretch rounded dough into oval and
place in a greased, nonstick loaf pan. Let rest 40 minutes if fresh,
an extra hour if refrigerated. Heat oven to 450 degrees for 5 minutes.
Place pan on middle rack.

Monday, August 13, 2007

Cooking: Lazy Day Loaf

It's taken a year of research and experimentation, but I think I've finally discovered my solution to bread baking on hot, humid summer days. This recipe is a step up from the No-Knead Bread of recent fame, and I find that the flavor and crumb of this loaf is a vast improvement over that recipe.

And P.S. the man-hands in the pictures below belong to my dad. I'm thinking he has a possible future in the field of professional hand-modeling.

Baguette-Style Loaf
thanks to James McGuire, as published in The Art of Eating, No. 73 + 74

Ingredients:
500 gr all-purpose flour

10 gr (1 1/2 tsp) fine salt (preferably kosher)
2 gr (1/8 tsp, or about a pinch) yeast
400 ml (1 5/8 c) water

Blend flour and salt in a bowl and form a well in the center. Pour the water into the well and sprinkle the yeast on top. Allow the yeast to dissolve (about 5 minutes). Using your fingertips, gradually begin to mix the flour into the water until all the flour is incorporated. This should take about two minutes. Cover the bowl and let rest for 10 minutes. When the ten minutes is up, give the dough its first fold. Slip your fingers between the side of the bowl and the dough. Grasp the dough between your fingers and thumb, lift the flap upwards to about the rim of the bowl, and then lay the flap across the top of the dough. Give the bowl a turn and repeat the folding until you have gone a full revolution--about 8 to 10 folds. Cover and let rest for 1 hour. After an hour, give the dough a second set of folds. Cover and let rest 1 hour.After two hours, give the dough a third set of folds. Cover and let rest 1 hour.
After three hours, give the dough a fourth set of folds. Cover and let rest 1 hour.
A
fter four hours, give the dough a final set of folds. At this point, the dough should largely come away from the sides of the bowl when you're doing this and the dough should hold a roughly spherical shape. Sprinkle a little flour between the dough and the sides of the bowl and turn the dough out onto a floured work surface (so the folds are now underneath). Dust the dough lightly with flour and cover with the inverted bowl. Let rest 20 minutes.

While the dough is resting, prepare a rising bowl or basket. If you have an actual rising bowl or basket, pat a little bit of flour into the sides and use that. If you're improvising, find a circular bowl or basket about the diameter of the dough and line it with a clean, smooth kitchen towel (not terry cloth or anything with a nap).

After 20 minutes, pick the dough up and gently reshape it into a sphere by tucking the ends under. Invert it into the rising basket so the folds are on top. Cover with plastic wrap or a towl and let it rise at room temperature for 45 - 50 minutes. The loaf has sufficiently risen when a fingertip indention disappears completely in 2-3 seconds. If it springs back like a rubber ball, it's not ready; if the indention remains, it's risen for too long and your loaf will still be yummy, but won't rise as much in the oven. After the dough has been rising for a half an hour, place a baking stone in your oven and pre-heat the oven to 450-degrees.*

When the dough is ready, sprinkle a pizza peel with a light layer of cornmeal (or the back of a cookie sheet will do) and tip the dough onto it. Quickly cut a few scores into the surface of the dough--about a half-inch deep--with a razor blade. Slide the dough into the oven onto the baking stone. Using a spray bottle, spritz the inside of the oven (avoiding the light) and the surface of the dough and quickly close the door. Repeat this a few times in the first five minutes of baking.

When the loaf begins to color (after about 15 minutes), turn the oven down to 350-degrees. Also, rotate the loaf every 15 minutes so that it bakes evenly (most oven have 'hot spots' that can cause un-even baking). After 45 minutes, start checking for doneness. If you thump the bottom of the loaf with your thumb, it will sound hollow--like you're knocking on a door. The surface should be a caramelly-color with spots of darker toast color. The internal temperature should be about 210-degrees.

Allow to cool for 20 minutes. Serve with room-temperature butter sprinkled with sea salt and a few dollops of good honey.

*You can also bake this in a dutch oven, a la 'No-Knead Bread.' Just place your dutch oven inside the oven so both pre-heat at the same time. When it comes time to bake, tip the dough into the dutch oven and cover with lid. Let it bake for about 30 minutes with the lid on and finish with the lid off.

Tuesday, April 17, 2007

Food: Reunited with Old Friends and a Brief Parting

This is a short little post (though like so many of my posts, it will likely ramble on beyond what could technically be called "short") to let you know that I may be a bit sparse with my postings for the next few weeks. There are a lot of things swirling around in my life right now to which I need to give some attention. I just need wait and see what the view is like when the dust settles. In any case, never fear; I will return with tales of what I've been up to and recipes and musings in short order. This blog has become a home to me and you always come back home eventually.

Until then, please content yourself with the following Artifacts of Comfort and Joy. At least they bring comfort and joy to me if only because they wander into my life so rarely these days.

Nutcracker Sweet Tea is hands down one of my favorite teas ever, and believe me, I've tried a lot of teas in my day. I usually find the teas made by Celestial Seasonings to be a bit...'too much.' Too sweet, too pungent, too...zingy. Despite these experiences, I was lured in by the description of black tea with vanilla extract and cinnamon--so many of my favorite flavors.
And indeed, it is a basic traditional black tea smoothed with a subtle taste of vanilla, a pleasing nuttiness, and just a touch of cinnamon. It's also one of the rare times when a beverage tastes just as good as it smells--I could happily sit here typing away and inhaling the scent of this tea for hours, taking little sips when the mood struck. I drink it black, but it would probably be grand with milk. A word of caution, be sure to remove the tea bag after about 5 minutes or the tea gets too bitter.

Since Nutcracker Sweet is from their "Holiday Tea" line, it's only available during the holiday season. Once I fell in love with it, spotting the first boxes in the grocery store became my personal sign that the holiday season had officially begun. A few years back, I realized that if I stocked up right at the end of the season, I could just stretch my boxes through the spring and summer until the next holiday season rolled around. I did this with a bit of trepidation that the magic and delight of this tea would wear off if it became an everyday commodity, but there was nothing to fear. Love knows no holiday season.

Unfortunately, the past two years, these boxes of Nutcracker Sweet have been even m
ore scarce than usual. Last year, I didn't see any being sold in stores until after Christmas and I was barely able to stock enough boxes to last me through April. This year, I didn't see any at all. I'd been toying with the idea of actually going to the Celestial Seasonings website and ordering a case of the tea (Love, folks, this is love) when I spotted two dusty, lonely boxes sitting discarded on the very bottom of the discount shelf last week at my co-op. Last week! As in April. As in not at all close to the holidays. Where these boxes came from and how long they'd been in the stock room, I have no idea (and I don't really want to know). I'd been checking the shelves of this co-op regularly for months (a few other favorite bagged teas of mine have recently disappeared from shelves, but that's another post), and never saw Nutcracker Sweet in stock. You can be sure I grabbed these two right up, went straight home, and brewed myself a fresh cup. Ahh....Love.

And the other week, a second reunion was celebrated in my kitchen when a friend brought back two bricks of Smoked Cheddar Tillamook Cheese from her recent trip to Portland, Oregon. When the Engineer and I lived in Portland,
we put this stuff in EVERYTHING. In fact, I can't think of a single dish we regularly ate that a healthy handful of Smoked Cheddar Cheese wouldn't make better. Eggs? Check. Pizza? Check. Annie's Mac and Cheese? Check. Stale crackers? Double check. Tillamook Cheese is an Oregon icon. It's fun to wander around their website HERE and a stop to wander around their visitor center, licking fresh ice cream and nibbling on squeaky cheese (cheese curds that literally squeak between your teeth when you bite down) was a requisite part of any trip to the Oregon coast. If you're in the area, I highly recommend stopping by.

This smoked cheddar cheese has a sharply cheddar bite and is literally infused with the hardwood smoke for a truly unique cheese experience. Every bite is like sitting around a campfire. These two bricks are literally and figuratively gold! (That's my one Pun o' the Post. I'll quit while I'm ahead with that one.)

And if you manage to get your hands on some Tillamook Smoked Cheddar, one possible manifestation of your riches could be in the form of my For-Real Sandwich Loaf.
My thought behind this loaf was to take the sandwich prep out of...um...making a sandwich, and just put all the typical sandwich ingredients in the loaf. That way, if I'm crunched for time in the morning because I forgot it was Recycling Day or I fell asleep in the shower completely by accident, I can just cut off a slice and call it lunch.

Dang, I just realized that I never posted my recipe for basic, non-sourdough bread to this blog, which is what I used for this recipe. Oh, well, I'll do an abbreviated version of the recipe here and describe it in detail another time (see what I mean about this post no longer being technically 'short'?!). In any case, if you don't want to use my recipe, or if it's confusing, feel free to use any bread dough you like and just add the cheese, spinach, and sausage when I say to in my instructions. (PS if you don't eat meat, just leave out the sausage and this would make an excellent cheese loaf!)
Summer Sausage Cheese Loaf (a.k.a. For-Real Sandwich Loaf)

For the poolish (starter):

1/2 cup (4 oz) water
1/2 tsp dry yeast
3/4 cup (4 oz) flour

In a medium sized bowl, dissolve the yeast in the water, add the flour, and mix these all together really well--about 100 strokes. Cover with plastic wrap and let sit on your counter overnight or about 12 hours. It will rise and fall, but ultimately it will about double in size and the surface will look really bubbly.

For the bread dough:

2 1/2 cups (20 oz) water
1/2 tsp dry yeast
5-6 cups (26-31 oz) flour
1 Tablespoon sea salt
1-2 cup spinach
3 c cheese, shredded (alternatively, shred half and cut the other half into strips. Add the strips at the same time you add the sausage)
2 10-oz summer sausages (or chorizo, un-cut salami, or any other hard sausage)--cut into long strips

Dissolve the yeast in the water. Add the poolish and mix until slightly frothy. Add in enough flour until the dough begins to pull away from the sides of the bowl. Turn out onto a floured surface and knead for a few minutes just to bring the dough together. Cover with the upturned bowl and let rest for 10 minutes.

Create a well in the center of the dough and add 1/3 of the salt. Fold the dough on itself and add another 1/3 of the salt. Fold again and add the last of the salt. Knead dough for 10 minutes. Cover with the upturned bowl and let sit for 10 minutes.

Meanwhile, clean the spinach and cut it into small pieces about the size of your thumb. Steam it slightly (I microwaved it on High for about 30 seconds). You want it wilted, but not complete mush.

Knead the dough for about 5 minutes more. As with the salt, add the cheese and spinach in batches and knead until they are evenly spread throughout the dough. The dough will get a bit wet and you might have to add more flour than normal. It's ok if it feels a bit wet, but it shouldn't be sticky or gummy to your hands.

Place dough in a lightly oiled bowl, cover with plastic wrap, and allow to rise for about two hours or until doubled in size.

Turn the dough out onto a lightly floured surface without deflating it. Divide it into two pieces and set aside one piece. Pat the remaining piece into a long rectangle with the shorter end closest to you (in other words, lay the rectangle out like a portrait rather than a landscape image). Lay half of the sausage strips like rungs on a ladder across the width of the dough. Lightly press the strips into the dough. Roll the dough away from you, making sure that the strips stay positioned so that they roll up in a spiral rather than all clumped together. Place loaf in an oiled loaf pan. Repeat with second half of the dough.

Allow dough to rise until the surface of the dough just clears the rim of the loaf pan--about an hour. Preheat the oven to 450-degrees. When the loaves are ready, pat the surface with a bit of flour and cut three diagonal slashes about 1/2 inch deep. Spray the tops with water and put in oven. During the first five minutes of baking, quickly spray water a few times into the interior of the oven and on the surface of the loaves. Bake for 20 minutes and reduce heat to 400-degrees. Bake for another 20 minutes until the surface is a nice caramelized golden color and the loaves sound hollow when thumped on the bottom.

Let cool and enjoy! Slices are best when toasted.

Saturday, March 17, 2007

Cooking: Snow Days and Soda Bread

Since I didn't manage to extract myself from the cozy, multi-blanketed nest of my bed until well after the snow had passed from pristine prettiness into half-melty sludge, I give you this picture from Boston.com taken yesterday afternoon. Besides being yet another beautiful example of the fashion faux pas and arch-collapsing train wreck that is the Ugg boot (oh, why do I torture myself?), this photo so perfectly captures how unwilling we Bostonians were to deal with snow after a week of 55-degree weather--much less the blizzardy ice storm with sideways blowing snow pellets that we ended up getting. In my my three years in Boston, I can't help but notice that Bostonians have quite a time-honored "willing suspension of disbelief" going on here. To name a very few, we are willing to believe:

Fuggedaboudit.

A good pummeling of snow seems to bring out the best and the worst in people. This morning, it's bringing out the best. Determined to make Irish soda bread
for a St. Patty's Day party later today and lacking the proper ingredients, I cinched on my snow pants, laced up my snow boots, and prepared for the worst. But then...the worst never came! When I realized that my local CVC doesn't carry buttermilk* and realized that a bus trip to the nearest Stop&Shop would be in order, I was sure my good mood was doomed. But then, miracle of miracles, a bus appeared on the horizon mere moments after I arrived at the bust stop. In attempting to board the bus, I managed to drop my shopping list, wallet, and T-pass at the same time, thus delaying the boarding of fellow passengers and departing of the bus. I apologized profusely to the bus driver, but instead of rolling her eyes or gazing disdainfully past my left ear--a normal and accepted reaction to passenger ineptitude--she actually said (get THIS!), "No problem. Welcome aboard." No problem? Welcome aboard?! Did anyone else hear that? But no, my fellow passengers were gazing placidly out the windows, not even minding that I was (continuing) to delay the bus by standing in the doorway, immobile with disbelief.

At the grocery store a group of local firefighters all dolled up in their boots and suspenders were shopping for a St. Patrick's Day dinner toge
ther--a very meaty St. Patrick's day dinner, as became increasingly obvious as I followed them around the grocery store. (Side note: I wasn't actually "following" the firefighters in the stalking sense; our shopping routes just happened to coincide is all. Though they were pretty adorable.) There was one Papa Bear Firefighter with the cart and all the other firefighters kind of orbited around him, bringing him cuts of meat for approval, adding condiments to the cart, dropping off sodas. I was especially touched when one swarthy-looking fellow added two beautiful purple rutabagas to the mix. I loves me a veggie-eatin' firefighter! And the whole time, the group was joking with each other, teasing the Stop&Shop employees (who they seemed to know quite well), and chatting with fellow customers. They even posed for a few pictures. It was all very heartwarming.

I found all my purchases, trotted back to the bus stop, and again waited mere moments for another bus to show up. The doors slid open and who should I see but my new favorite bus driver! "Good morning," she said as I climbed up (managing not to drop anything this time). "Good morning!" I chirped in reply. When I got to my stop, I actually walked all the way to the front of the bus just so that I could say, "Thank you!" as I got off. "You're welcome," she said gravely as the doors wheezed shut behind me.

And in one last feat of snowy-day good cheer, I passed the mailman on the short walk from the bus stop to my house. I always feel bad for mail carriers on the particularly gross weather days--rain or shine, they're always out there, but they always seem quite w
illing and happy to be doing what they're doing. In any case, peering at me from beneath his fur-lined, US Postal Blue hat**, my mailman said, "Hello! How are you?" "Quite well, thank you! And you?" I replied. "Oh, I'm great!" he said, and slushed past me, whistling a little tune.
-----
*By the by, I'm not quite sure why I thought CVS would carry b
uttermilk, but I rilly wanted to believe it would--ahh...there's that suspension of disbelief! Hey, I'm a real Bostonian!

**
Every time I see a mail carrier now, I totally think of the Project Runway episode where they have to redesign the US Postal Service uniform. I saw a mail woman a few days ago wearing a particularly fashionable uniform (I thought) and I almost stopped and asked her about it. That was on a day when snow was making Bostonians grumpy, though, so I decided not to.
-----

Irish Soda Bread

I've shied away from soda bread for a long time. My memories of it are of dense, dry, crumbly bricks with little taste or satisfaction, which are left in the bread basket long after the hunks of airy baguette and elegant slices of sourdough have been claimed. In the build up to St. Patty's day, a number of recipes for soda bread--both sweet and savory--came my way and I decided to give it a whirl in my own kitchen.

I decided on a sweet bread with raisins and nutmeg and held my breath as the rocky, unappetizing balls of dough baked into golden loaves twinkling with granulated sugar. In both taste and consistency, this bread reminds me of scones. The crust is both crunchy and crumbly, with a satisfying chew. The interior was cakey and moist, rich with a light sweetness and chewy little nuggets of raisin. This cake was the perfect finish to the corned beef stew cooked by our St. Patrick's Day hostess, and was wonderful on its own, smeared with butter, or paired with the traditional sharp cheddar cheese.

In my research for this recipe, I found that soda bread is traditionally baked in a cast-iron skillet so that the top and bottom get crunchy and brown evenly while the middle stays cakey. I don't have a cast iron skillet (yet--I know, I know, it's sin that I don't have one yet), but I thought I could replicate the effect in my dutch oven. This recipe makes two loaves, so I baked one in the dutch oven and one on a regular baking sheet. (In the picture of the two loaves above, the one on the left was done in the dutch oven.)

Both loaves rose about the same amount, but the dutch oven loaf had a rounder shape and more even surface; where the loaf backed on the sheet was craggier and less uniform in shape. Additionally, the loaf baked in the dutch oven did indeed have a more even brown color and crunchier crust while the inside was noticeably more moist. The verdict? If you have a dutch oven or cast-iron skillet, I definitely recommend baking the loaf in it--just add about fifteen minutes to the baking time and remove the lid in the last five minutes. However, if you don't have a dutch oven, never fear--your bread will disappear just as fast.

Sweet Irish Soda Bread

Makes 2 loaves

4 cups flour
4 teaspoons baking powder
1 teaspoon baking soda
3/4 teaspoon salt
6 Tablespoons granulated sugar
1 teaspoon nutmeg (1 1/4 tsp if using freshly ground)
4 Tablespoons cold unsalted butter, cut into chunks
1 1/2 cups thick buttermilk
2 egg yolks
2 teaspoons vanilla
1 1/2 cups raisins (purple or golden)

Set oven to 375-degrees. If using a dutch oven or skillet, put it into the oven to warm as the oven heats.

In a large bowl, combine flour, baking powder, baking soda, salt, sugar, and nutmeg. Add the butter and use the tips of your fingers or a pastry cutter to work the butter into the flour until it reduces to pea-sized bits. Add the raisins and toss to coat with flour (this helps the raisins stay suspended in the batter).

In another bowl, whisk together the buttermilk, th egg yolks, and the vanilla. Create a well in the center of the flour mixture and pour in the liquids. Use a wooden spoon to stir the mixture until all the ingredients are combined and the dough easily comes together into a ball. It will be very moist and shaggy.

Divide the dough in half and form each half into a ball. Use a sharp paring knife to slash a cross into the top of each loaf about 1/2 inch deep, a traditional feature of soda bread that also allows the dough to expand while baking without cracking the surface. Sprinkle each loaf with a few pinches of granulated sugar.

If using a dutch oven or skillet, drop the dough (cross-side up) into the bowl and cover. If using a baking sheet, cover a baking sheet with parchment paper and set the dough in the middle. Bake loaves for 40 minutes or so until the surface is evenly golden, the center is set, and a cake tester (or toothpick) inserted into the center comes out clean. (Loaves baked in a dutch oven may need another 15 minutes to bake. Leave the oven uncovered for the last 5-10 minutes of baking.)

Allow the loaves to rest at least 1/2 hour before serving.

Weight Watcher's Points: Each loaf is about 34.5 points total. If you slice it into 12 wedges, each wedge is about 3 points a piece.

Wednesday, November 08, 2006

Cooking: NYTimes article on the "Secret of Great Bread"


I'm so shocked, I don't even know what to say. Bread? That you don't knead? And it's baked in a dutch oven? Wa-huuuh? My dad forwarded me this article from the New York Times earlier today and I'm still processing. And of course I have to try this immediately--anyone have a handy dutch oven I can borrow?!

"The Secret of Great Bread: Let Time Do the Work" by Mark Bittman:

http://www.nytimes.com/2006/11/08/dining/08mini.html?_r=1&oref=slogin

P.S. Let me know if that link doesn't work or if you're asked for a password.

Saturday, August 19, 2006

Baking: Our Sourdough, Ourselves--Part II

This is my favorite, tried and true sourdough recipe. It consistently has a sourdough flavor that is not too sharp but has just the right amount of kick. The crumb is moist and chewy--and stays that way for several days. When made in loaf pans, the crumb tends to be a bit more 'fine' and spongy. When made in a brotform, bread basket, or baguette-shape, the crumb is more airy with larger holes (though not as airy as traditional baguette). By the by, sourdough will stay fresh significantly longer than regular bread because the 'sourdough' bacteria resists mold. Bonus for those of us who don't necessarily consume an entire loaf all that quickly (though I'm sure I could if I really put my mind to it...). This bread also rocks the house as toast with butter, French toast, bread crumbs, stuffing, and other yeasted favorites.

This is a traditional hearth bread recipe with a levain made the night before and allowed to ferment overnight. Levain is a term for one of several different varieties of 'pre-ferments.' Pre-ferments contribute to the leavening of the dough and enhance the flavor and texture of the bread. They are usually a combination of flour, water, and yeast, and the different kinds of pre-ferments vary in the proportion of flour to water. Some common pre-ferments are levain, chef, sponge, starter, and poolish.

Note: If I plan it right, I like to make the levain in the morning before I go to work and then prepare the final dough in the evening up to the step where you shape the loaves. At this point, I go ahead and shape the loaves, but instead of doing the final rise, I put them in the fridge overnight. In the morning, I let them come to room temperature and continue rising (the final rise)--about one hour or so--before baking them as the recipe directs. The idea for this was inspired by the delayed-fermentation method used for some slack-dough breads. I find the overnight rise in the fridge improves just about every aspect of the bread: the crust is more firm and chewy; the crumb has gorgeous, well-developed holes; and the taste is a bit sweeter and nuttier, though still distinctively sourdough.

Traditional Pain au Levain
This recipe is gra
tefully borrowed from Bread Alone by Daniel Leader.

Levain

1 ¼ c. (6 oz) flour (either white or a blend of wheat and white)
1 ½ c. (12 oz) sourdough starter

Mix this the night before and let it sit out on the counter overnight in a container with a tight lid. The levain will double or more in size, so use a container with lots of extra space. Mix all ingredients together at once. This will form a very stiff dough. (Photos on left are from after it's fermented overnight: Photo # 1) Side view of the levain through the plastic tupperware--see all the bubbles? Photo #2) Top view of the levain--kinda gross-looking, huh? That's ok. It's how it's supposed to look.)

Final Dough

2 c. (18oz) le
vain (entire batch)
2 ¼ c. (18 oz) water
4 ½ - 5 ½ c. (24 -– 29 oz) flour
(either all white or a blend of whole wheat and white)
1 tbsp ( ¾ oz) fine sea salt (if you use regular table salt, add about ¼ to ½ teaspoon extra)

Mix and knead the final dough (20-45 min): Combine the levain and the water in a 6-quart bowl. Break up the levain well with a wooden spoon or squeeze it through your fingers until broken up. Continue stirring until the levain is partly dissolved and the mixture is slightly frothy. Add 1 cup (5 oz) of the flour and stir until well combined. Add just enough of the remaining flour to make a thick mass that is difficult to stir. Turn out onto a lightly floured surface and knead:

This is what the dough looks like before you knead it.

Kneading Alternative 1: (This is the traditional kneading technique you'll find in most standard cookbooks) Add salt just before you begin kneading. Begin kneading, adding remaining flour when needed, until dough is firm and smooth--—about 15 -– 17 minutes total. The dough is ready when a little dough pulled from the mass springs back quickly, or if you poke it, the impression of your finger springs back.

Kneading Alternative 2: (This is my perferred kneading techique. I find I get less tired, the dough is less sticky and uncooperative, and the final dough has better developed gluton) Knead for about five minutes. Dump some of the extra flour on the board and roll the dough in it so its nice and floury. Let it rest for 10 minutes while you gaze at it lovingly. Before the second round of kneading add the salt (I always forget this--usually I put the salt shaker in front of the dough before I let it rest so I don't forget). Fold in the salt and knead for 10 minutes. Dump a little of the extra flour on the board and roll the dough in it so its nice and floury. Let it rest for 10 minutes while you make a cuppa tea. The dough should be a little tacky during this final round, but if it starts sticking to your kneading surface or seriously gumming up your hands, add about a tablespoon of flour. The dough shouldn't require any more kneading after this, but you can tell it's ready when a little dough pulled from the mass springs back quickly, or if you poke it, the impression of your finger springs back.

After you're done kneading, the dough should be smooth and pillowy, and it should spring back if you poke it with your finger.

Ferment the dough (2 hours): Shape the dough into a ball and let it rest on a lightly floured surface while you scrape, clean, and lightly oil your large bowl. Place the dough in the bowl and turn once to coat with oil. Cover with a clean damp towel or plastic wrap and place in a moderately warm, draft-free place until increased in volume about one-quarter. (I usually put it in my oven--—it'’s a gas oven and usually a pretty cozy temperature. In the winter if your kitchen is cold, you can pre-heat your oven a few minutes. You should be able to comfortably rest your hand on the oven wrack. If it'’s too hot for you to touch, the oven is too hot for the rising dough and it will bake instead of rise!
This is the dough right before the first rise.
And right after the first rise.

Divide the dough and rest (35 minutes):
Deflate the dough by pushing down in the center and pulling up on the sides. Transfer the dough to a lightly floured work surface and knead briefly. Cut into 2 equal pieces, and shape each into a tight round ball and place on a lightly floured board. Let rest for about 15 minutes to relax the gluten.

Shape the final loaves and ferment (2-2.5 hours): Shape each ball of dough into desired final shape--a ball for round loaves, a 'roll' for loaves, etc. If you have a brotform, bread basket, or loaf pans, you can place the dough into these forms now. Alternatively, you can let the loaf rise 'free-form' on top of a piece of parchment paper on your counter top.
Shaped loaf in a 'brotform' or bread basket
Shaped loaf in a loaf pan

Cover with a clean damp towel or plastic wrap and let rise for about 2 hours or until the loaves have reached the desired size. Keep in mind that they will have a final burst of rising right after you put them in the hot oven! (I'’ve had many a loaf ‘spill over’ because I let them rise too long plus you risk the dough collapsing on itself and then you get a dense, brick-like final loaf. Bleck.) Forty-five minutes to an hour before baking, pre-heat the oven to 450 degrees. Be sure the oven rack is placed in the middle of the oven: —if it'’s too high, the top will burn, and if it'’s too low, the bottoms will burn. If you have a baking stone, place this on the middle rack and allow it to heat up with the oven.

After final rise
After final rise--both loaves are ready to bake

Bake the loaves (about 30 minutes): Using a sharp blade, score each loaf on the top by making several quick shallow cuts about ¼ to ½ inch deep along the surface.
Round loaf with score marks. See the ridges from the brotform? Cool, huh?!

This allows room for the crust to expand outward as the dough has its final burst of rising. Without score-marks to guide the expansion, your crust will crack on its own (see the horizontal crack marks on the side of the loaf to the left? I didn't score it properly and the crust didn't have enough expansion room. Still pretty and most definitely edible--I'm still getting the hang of this whole thang.) Slide the loaves into the oven and allow to back until the loaves are a rich caramel color (the baker's rule is that if you can see three distinct shades of brown, the loaves are done). My recipe says this takes about 25 -– 30 minutes, but I find that it'’s closer to 30 -– 35 minutes. To test the loaves for doneness, remove them from the pan and turn them upside down. Hit the bottom with your thumb. If you hear a sharp hollow sound, like knocking on a door, the bread is done. If not, bake about 5 minutes longer. Allow to cool completely on a wire rack. Don'’t be tempted to eat them right out of the oven because the loaves actually finish baking while they're cooling and the crust needs to firm up. If you cut them too soon, the loaves can get soggy and sink in on itself.

This bread keeps pretty well for about a week. Many traditional bakers abhor any kind of storage unit and say you should keep your loaves out in the air with the cut-side facing down on the counter. The crust gets really crust, but the inside (theoretically) stays moist. Loaves keep this way for a day or two, and then I personally think they're too hard to chew. I keep my loaves in big ziplock bags. The crust will take in moisture and be more chewy instead of crispy, but I usually like to toast my bread anyway. You can also freeze bread very well. I usually just put it in a big ziplock bag, squish out as much air as possible, and tuck it away. I recommend writing the date and the kind of bread on the bag with a sharpie or dry-erase marker--I started doing this was after the Christmas eve where I had about five loaves on the counter, scrutinizing them and sniffing mournfully at the frozen loaves, trying to find the sourdough loaf I KNEW was in there and really wanted to bring to Christmas dinner. *sigh* Learn from my mistakes, ladies and gentlemen.

If not quite easy-peasy, this is still relatively painless. Takes a bit of practice and perseverance, but you'll get the hang of it, I guarantee. Go forth, bake bread, god speed.